Rekordbox stems are here, and we have an easy way to get them onto your DJ controller!

What are Rekordbox Stems?
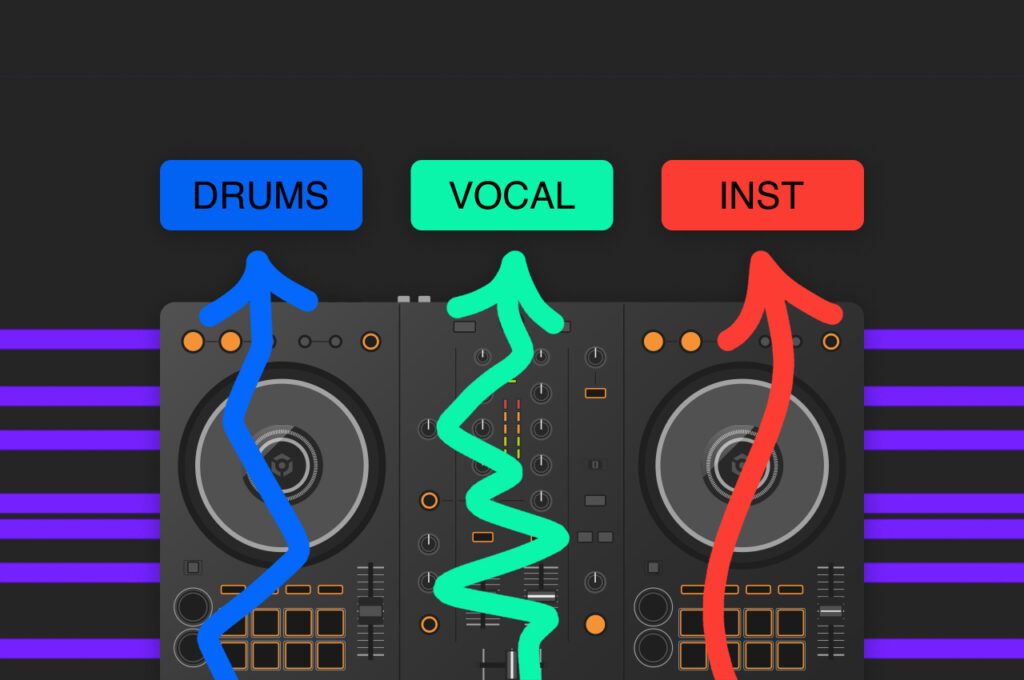
Track separation technology allows you to split the song into different parts: the vocals, the drums and the rest of the instruments. You can then remove any of those ‘stems’ from the song whilst it’s playing. This technology works in real-time, using locally stored files or streaming tracks. With Rekordbox Stems, you can even apply effects directly to any of these three song parts.
Method 1 – Easy Option (Midi Mappings)

- Pioneer DJ DDJ-400
- Pioneer DJ DDJ-800 (There is also an even easier way explained here.)
- Pioneer DJ DDJ-1000 (There is also an even easier way explained here.)
- Pioneer DJ DDJ-FLX4
- Pioneer DJ DDJ-FLX6
- Pioneer DJ DDJ-FLX6GT
- Pioneer DDJ-XP1 (There is also an even easier way explained here.)
- Pioneer DDJ-XP2 (There is also an even easier way explained here.)
How To Get The Midi Mapping On Your Controller
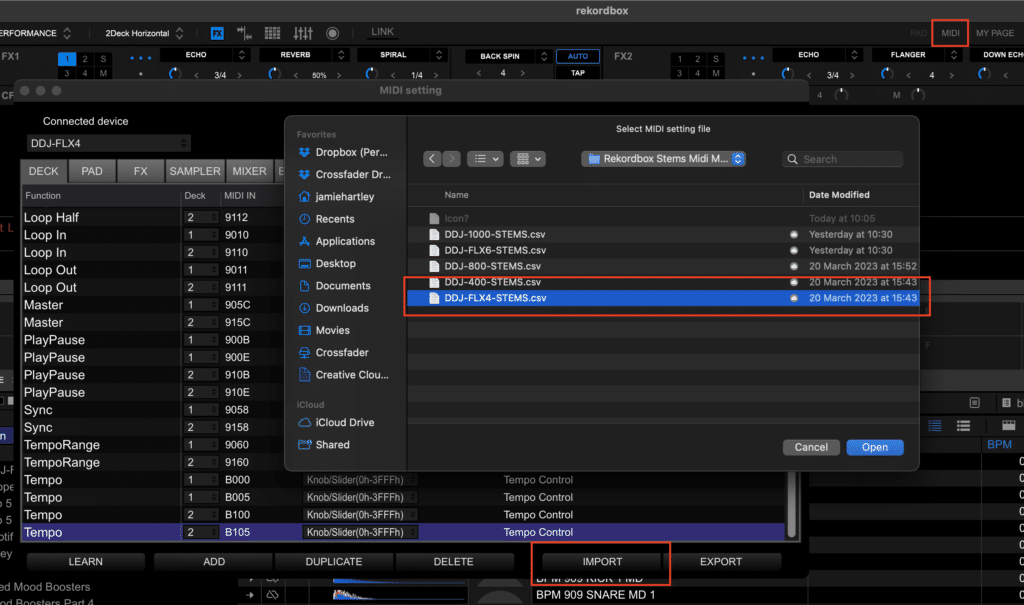
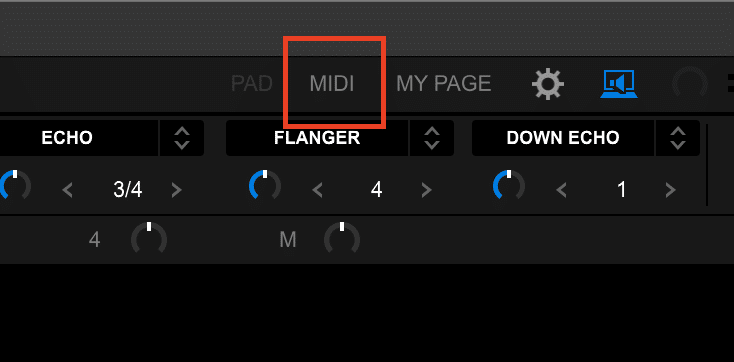
To get it working with your controller, click ‘midi‘ at the top of Rekordbox, click ‘Import‘ and load the downloaded file.
How It’s Mapped Out
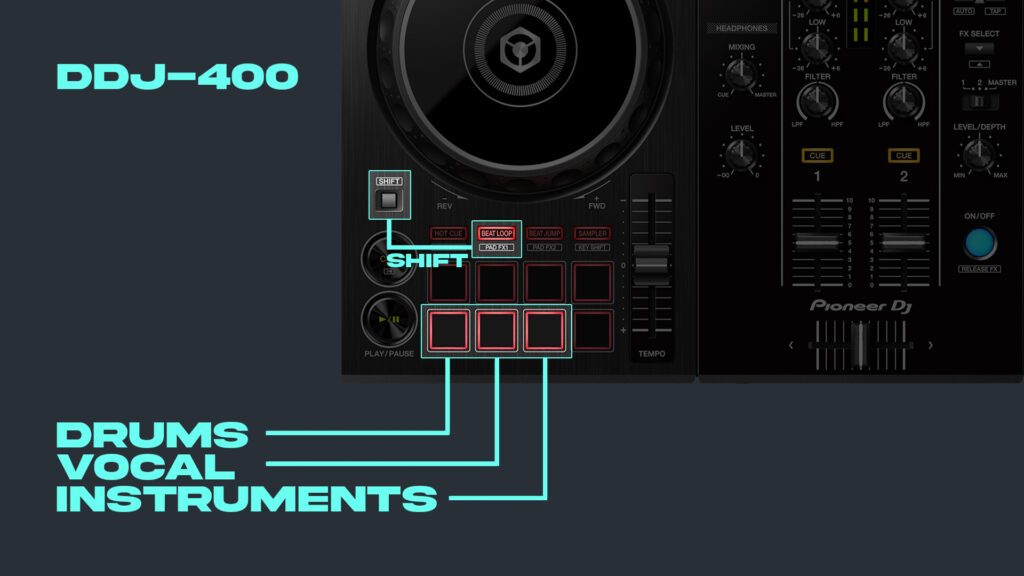
Stems Toggle On/Off Buttons
- Pad FX1 – Pad 5 – Drums
- Pad FX1 – Pad 6 – Vocals
- Pad FX1 – Pad 7 – Instruments
Please Note* Pad FX1 is a shift function on the DDJ-400. You access it by holding shift and pressing the beat loop pad mode. On all other controllers, press Pad FX1 mode.
Example:
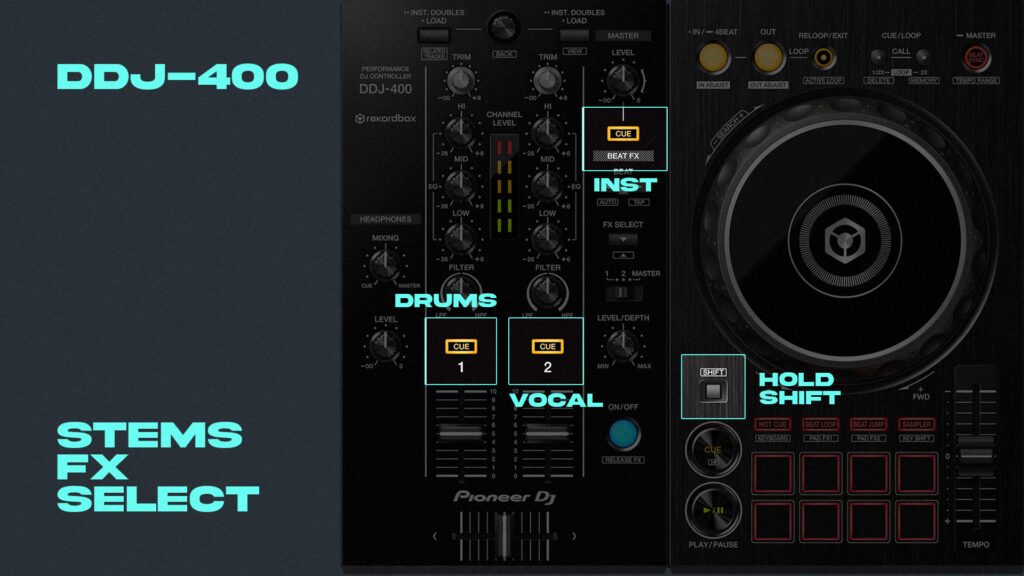
Stems FX
- Hold Shift + Channel Cue 1 – Drums FX
- Hold Shift + Channel Cue 2 – Vocal FX
- Hold Shift + Master Cue – Inst FX (DDJ-400, DDJ-800, DDJ-FLX4)
- Hold Shift + Channel Cue 4 – Inst FX (DDJ-FLX6, DDJ-FLX6GT, DDJ-1000)
Example:
DDJ-1000 & DDJ-800 Stems With Pad Editor
If you own a Pioneer DDJ-1000 or DDJ-800 then there is an easier way to get the Stems activation on your pads. Follow the steps below:
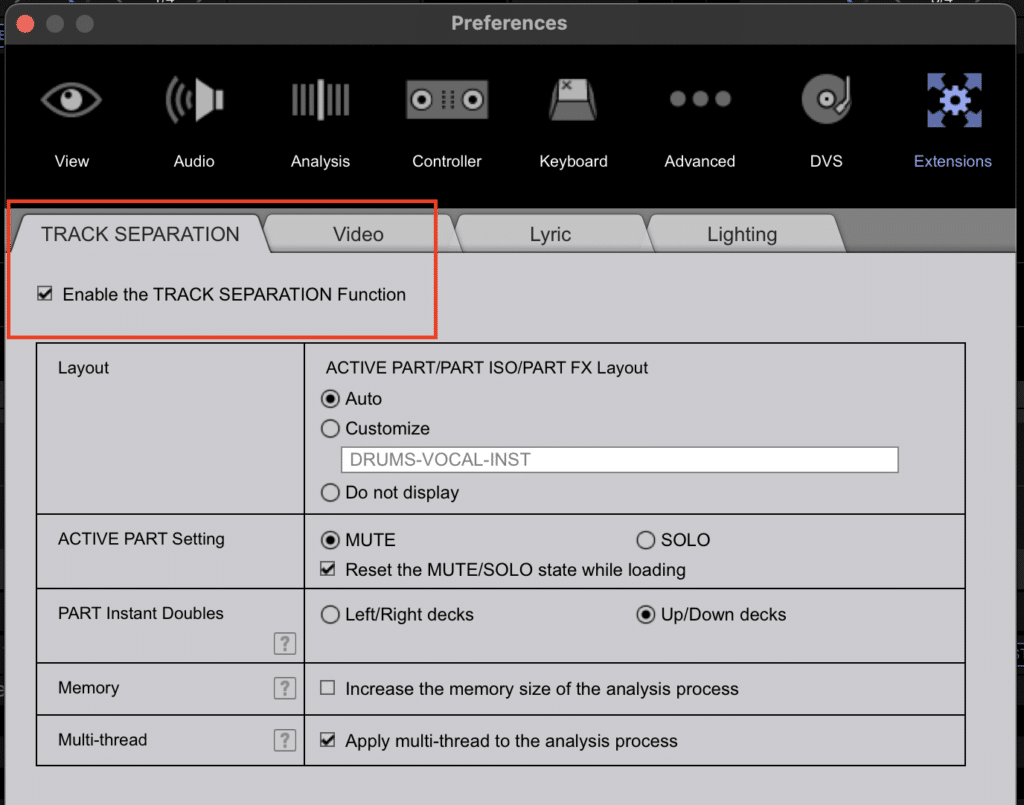
- Activate Rekordbox Track Separation in the extensions tab in settings.
- Click the PAD button along the top of the screen (near gear icon and midi button)
- Change a pad mode to User1
- Choose the pads you want to change and locate the track separation elements within the transport section of this drop down.
DONE!
Please note, this only applies the stems for each deck. You will still need to map out the stems FX features using the midi mappings provided or by the method below.
Method 2 – How To Midi Map Rekordbox Stems
If you don’t like the mapping we have created, or you own a different bit of equipment to those we have already created mappings, then time to put 10 minutes aside and map the functions yourself. Don’t worry; it’s easy enough to do; follow the simple step-by-step guide below and use the embedded video for extra support if needed.
Before you start!
Remember, when midi mapping features to your equipment, you’ll need to remove some features to make room for this. Think about which features you use the least on your gear and replace them. Shift functions also work, so some of those hidden secondary layers could be a great place to add your mappings.
Make sure to enable the track separation engine before following the steps.
Step 1: Open Midi
Just click midi at the top of Rekordbox. Just make sure you have your DJ controller or equipment already plugged in.
Step 2: Add Functions
Add the functions you want to map out. Make sure to add them for each deck you wish to apply them to. For example, if you have a four-channel controller, you must add each function in the deck tab four times.
Deck Tab
Here is the function to toggle the stems on/off. Select which deck the function is assigned to from the dropdown.
- ActivePart Drums
- ActivePart Vocals
- ActivePart Inst

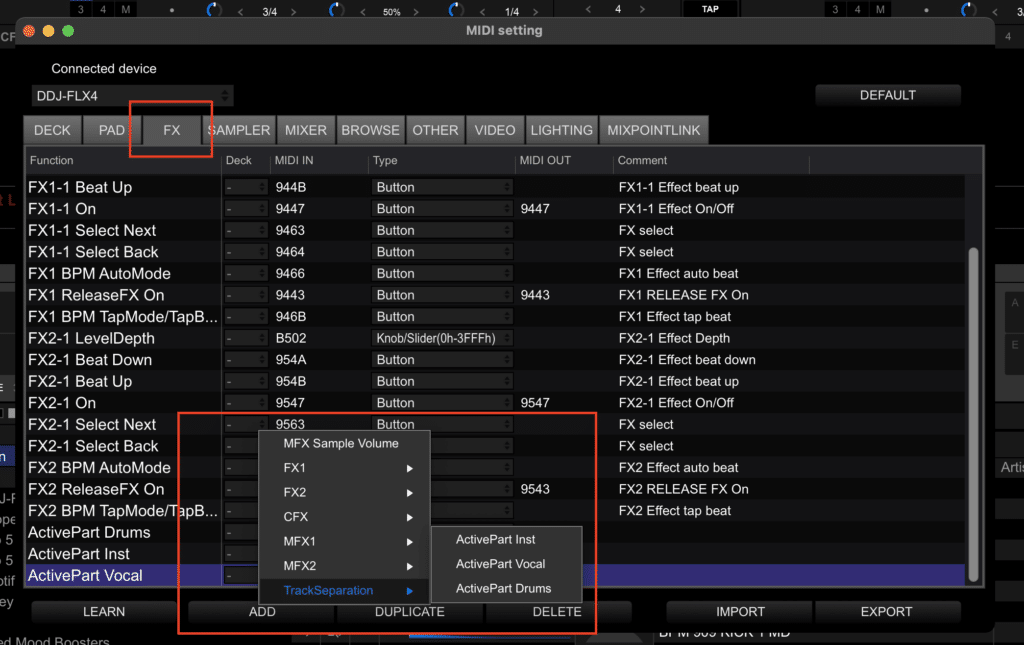
FX Tab
Function to add effects to specific stems.
- ActivePart Drums
- ActivePart Vocals
- ActivePart Inst
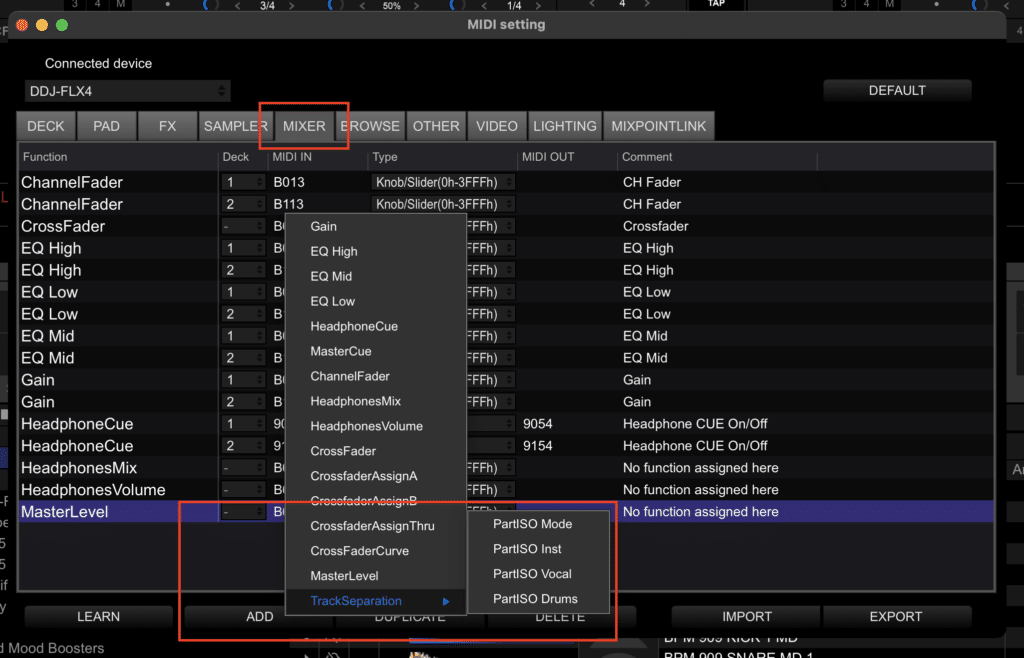
Mixer Tab
If you want to add part isolation to use the EQs as volume fader for the stems, this can be found in the Mixer tab.
- PartISO Mode
- PartISO Drums
- PartISO Vocals
- PartISO Inst
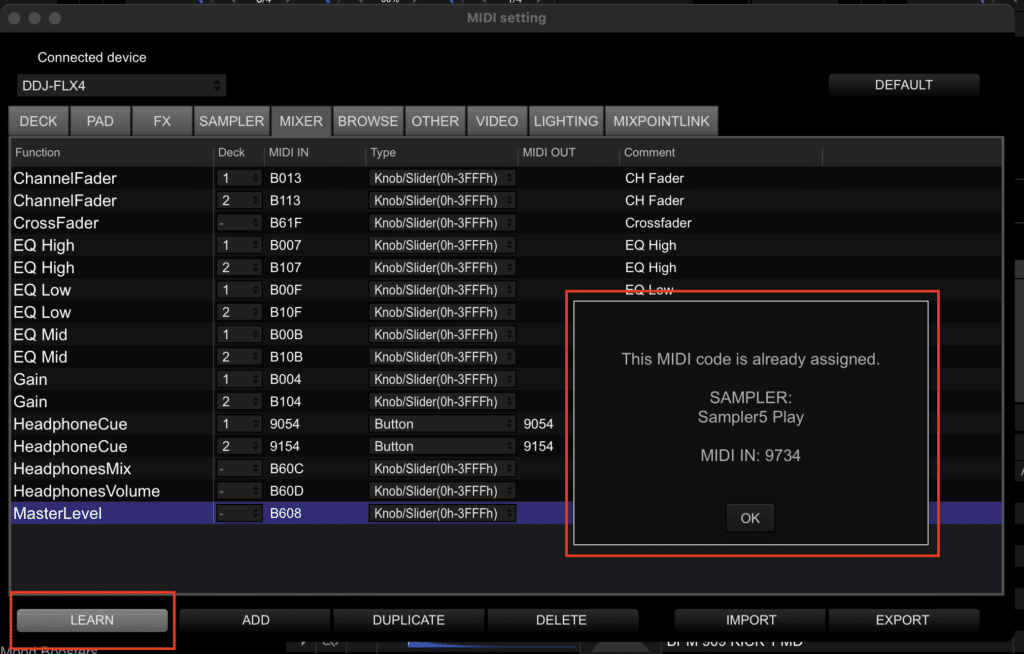
Step 3: Find Functions
Press ‘learn’, then hit the pad or button you want to assign it to. An error saying it’s already in use will appear. Just note which TAB this midi message is under and the Midi In or Midi Out code. This can help you find the relevant functions to delete.
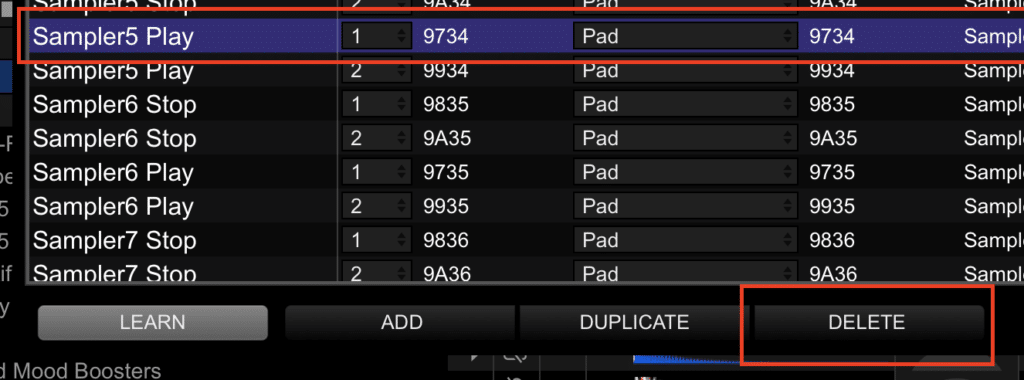
Step 4: Delete
You can search through the relevant tabs and find the functions to delete. Don’t worry; you can always hit the default button at the top to reset your controller mapping if you make a mistake.
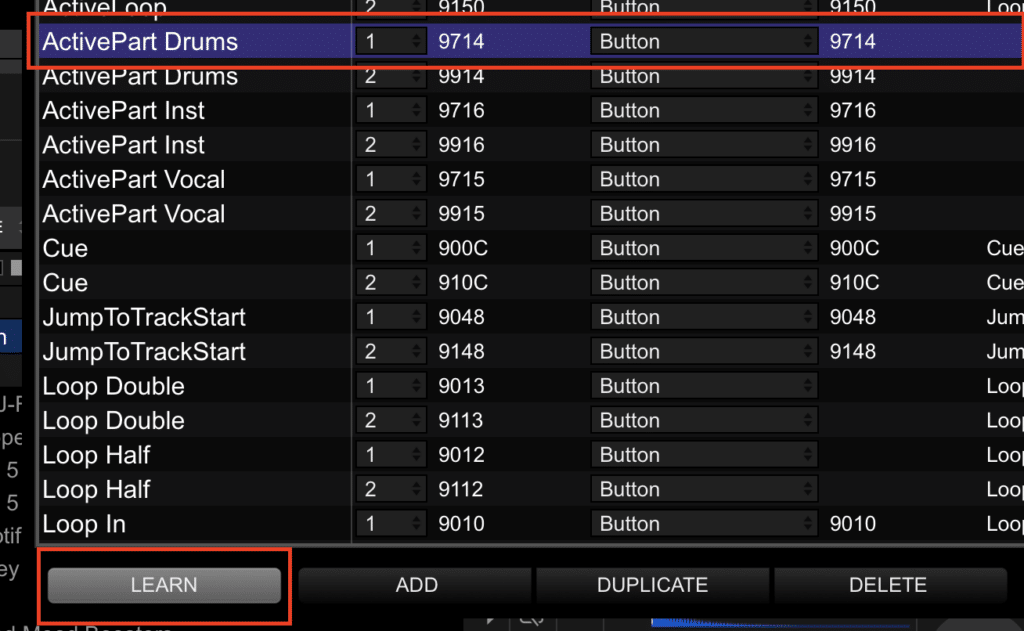
Step 5: Learn
Ensure you’re in the proper pad mode or have the suitable pads available before pressing the learn button, so you don’t accidentally map it to the wrong pad.
Step 6: Assign
Tap each pad you want to assign each feature as you scroll through them.
Step 7: Export
Make sure to export this midi mapping to save it in case you want to revert between the original mapping of your controller and this new stems version.
Step 8: Have Fun & Share
We hope you enjoy Rekordbox Stems and share this article with anyone who uses Rekordbox! (Reddit/Facebook groups/DJ mates)
If you want inspiration for using Stems when mixing, check out this DJ mix… or this one!
If you’re ready to learn new skills with Rekordbox Stems, our Intermediate Course for Rekordbox has some tutorials dedicated to this feature. Check it out below!
7.5 hours 49 lessons Intermediate
Rekordbox DJ Course
Or, for guaranteed success as DJ, with fast results, check out our Complete DJ Package! We’re so confident that we can help you level up your skills, we’re offering a full money-back guarantee if you don’t!
835 hours 1300+ lessons Creative
Complete DJ Package
Is it possible to use the stems function with the free or the core + cloud version?
Unfortunately, stems currently only work with creative or professional plans or if you hardware unlock them with a compatible device.
will this work on rb v6.8.5 ? I’m not upgrading to 7 heard its gotten worse, but I think it’s time to get on using stems in 2025
You do need to upgrade to rekordbox 7 unfortunately, especially with 7.0.4 bringing big improvements to the sound quality of stems. The talk around rekordbox 7 being worse than the previous versions is a little overblown but if you’re that worried, you can actually still download the older versions here if you want to go back to 6.8.5
Hi, DDJ-FLX2 is fairly new, Rekordbox Stems also available with this controller? thx
Hi, the FLX2 should still be able to work ok but you’ll have to follow the steps to manually remap some of the pad functions to use for stems controls.
If using Method 1 from your instructions, would that delete or override any existing functions of the pads?
Yes it will override whatever it’s set as currently so pick one of the functions you don’t use. I set it to the samples on mine as I never use those pads but it’s up to you.
Est ce que ce mappage « Tracks Separation combinant Part Fx & Part ISO mode » fonctionnerait sur le XDJ-RX¹?
You can use Track Seperation with Rekordbox if you’re using the RX as a controller but it won’t work in standalone mode.
I want to buy an all in one xdj-xz.
Is this unit mappable pads?
I want to buy it to get used to the screen and browse and utility buttons shared with pro gear. Cdj 2000nxs2 and 30000s. But I want a unit that has both stem separation and DVS functionality. The rx3 has the screen and brows functions and mappable pads but no DVS.
The FLX 10 I just sold had stems buttons and DVS but no screen and browse buttons. So I arrived at the XZ. So long as I can map the buttons to stems them I’ll go buy one immediately as just sold my FLX10.
Please let me know if this mapping of stems is possible for the XZ.
The XDJ-XZ should be able to be mapped like any other controller in rekordbox. It will just show up in the MIDI devices and you can remap the functions with the steps shown. I don’t believe there’s a way to use Stems in standalone with this though, only when using it as a rekordbox controller.
Thanks for the great guide – the midi file for the DDJ-400 don’t work, they’re for a different controller. But I managed to use the second part of your guide to create my own file and that works like a dream!
Well done.You always rock.