Library management is an essential skill that can help elevate a DJ’s performance to the next level. Having a neat, well-organised library will help you find songs quickly and can even inspire song choice you may not have considered before.
Every DJ organises their libraries differently, and it’s a very personal and unique process. Fortunately, modern-day DJ software offers us methods to customise our libraries to suit our individual needs.
Today we take a look at Serato DJ and five top tips to help you organise your digital record collection.
Column Headers
Serato DJ offers DJ’s many different fields and categories to organise your music by, most of these come from your music ID3 metadata.
You can add or remove the columns that matter to you by right-clicking on any of the column headers. The drop-down menu will then show all the available fields with the already selected fields showing a tick next to them. You can change the information inside these fields by double-clicking on them should the information be wrong.
The available fields are:
- Date Added
- Album
- Artist
- Bit rate
- BPM
- Comment
- Composer
- Filename
- Genre
- Grouping
- Key
- Label
- Length
- Location
- Plays
- Remixer
- Sampling Rate
- Size
- Track
- Year
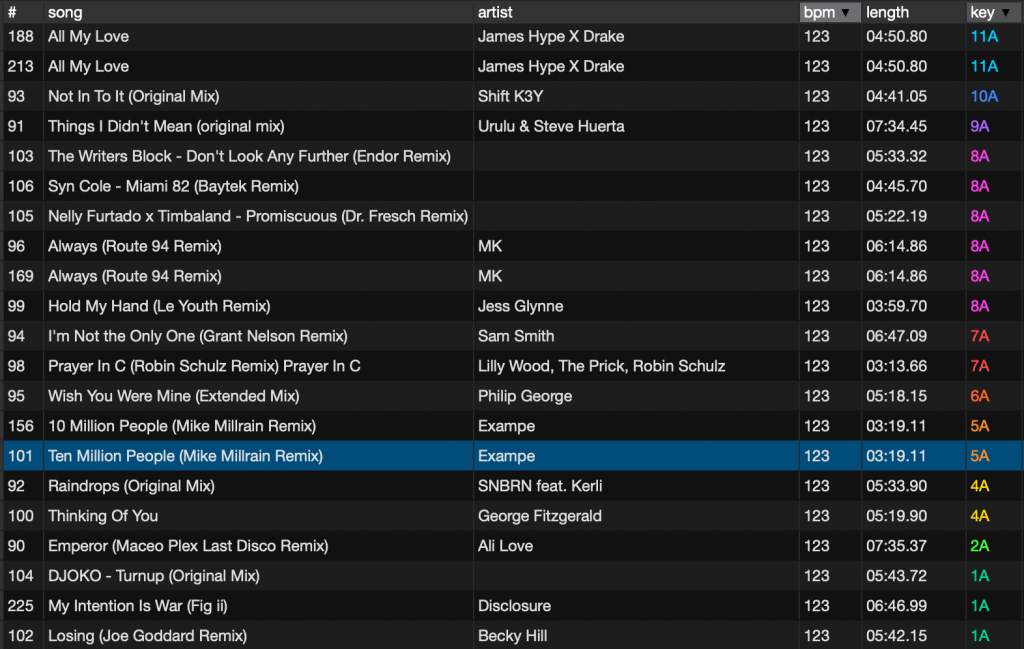
To organise a crate by a field, click on a column header. Clicking on it again will change if it is ascending or descending. Crates based around history you can organise by the order the tracks were played in by sorting via the # column. This number sorting is also how you would order a crate via album track numbers.
Smart Crates
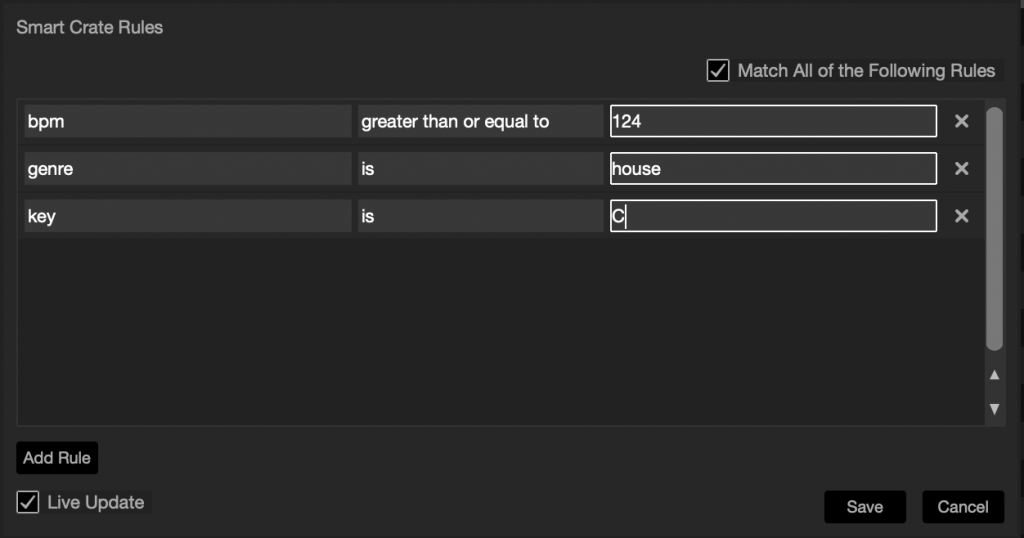
Serato offers Smart Crates to automate your library. These are like regular crates in Serato, but they automatically update to include songs that meet specific rules that you set.
The smart crates will automatically update when you launch the software, or you can force them to refresh to include any changes you may have just made.

To create a smart crate, first press the new Smart Crate icon found to the right of the usual new crate icon. The smart crate rules box will appear, press the new rule button in the lower-left corner. From here you can choose from various parameters including: Added to library date, Album, Artist, BPM, Comment, Filename, Genre, Key, Label and Remixer.
You can then choose the following inclusion/exclusion criteria: Contains, Is, Does not contain, Is not.

Match all of the following rules will ensure the tracks added match all of the set criteria. Failure to tick this box will allow the software to add tracks that match one of the requirements, rather than all of them.
If you want to change any smart crates you have made, click the Edit button (next to the add Smart Crate button) to edit the rules.
Locking Tracks
It’s effortless to change metadata of your tracks within Serato, as we’ve explained already you can update the data manually by double-clicking in any of the fields inside the Serato library.
However, vital information such as the tracks beat grid can be analysed wrong by the software. This information then requires manually editing.
Analysing the whole library runs the risk of manually edited information being overwritten. To avoid this, tracks must be locked.
To lock a track hold control + click in the empty Status column (the first column in the main Library view). A Blue Lock icon will now be visible next to the track. Press control + click again on this icon to unlock.
To save time, you can lock and unlock multiple tracks at once by highlighting them.
Locked Tracks
If a track already displays a gold lock instead of a blue, then the no metadata can be edited at all. The file may be locked because you are using the wrong formatted hard drive such as an NTFS drive from on a Windows PC and trying to use on a Mac which can only read this information. Or it could be the file itself is locked to read-only by your computer.
To find out if a track is locked, highlight the track in Serato DJ, and press control + R to ‘reveal’ the file location on your hard drive. Then press either command + I (‘Get Info’ for Mac) or alt + enter (‘Properties’ for Windows). Then see if the track is Read-Only, or that you have the permissions to write to the file.
Custom Crate Columns
A hidden trick of Serato’s library management is custom crate columns. This handy tool allows you to set an organisation rule for each of your crates.
Serato will then remember how you want each crate organised, allowing you to dynamically manage your library and set rules that best suit the crates needs. There are various scenarios where a crate would suit a specific sorting. For example, a crate built from history would be best organised by order played.
Click here to read our guide on custom crate columns.
Secondary sorting on columns
Serato also allows DJ’s to secondary sort. This tool is helpful as it enables DJ’s to group songs together by one field and then sort them by another. Great uses of this include organising by key and secondary sorting by BPM.
This allows the user to see all tracks that not only harmonically mix but that are similar speed, making better sounding mixes easier and quicker to plan. To do this hold CMD (Mac) or CNTRL (Windows) and click on a secondary column.
You can delete this secondary sorting by holding SHIFT + CMD (Mac) or SHIFT + CNTRL (windows) and clicking on the secondary column header again.

Video Guide
Want to learn to DJ better with Serato?
Here are our best selling Serato courses!

Pioneer DDJ SB3 DJ Course
3.75 hours
28 lessons
Beginner

Serato DJ Course
3.5 hours
23 lessons
Beginner

Serato DJ Course
8.5 hours
47 lessons
Intermediate

Pioneer DJ DDJ-FLX4 Course
7 hours
41 lessons
Beginner

Complete DJ Package
835 hours
1300+ lessons
Creative

Pioneer DJ DDJ-FLX4 Pro Course
9.5 hours
49 lessons
Intermediate

DDJ FLX4 Beginner To Pro Bundle
16.5 hours
90 lessons
Beginner


0 Comments