A guide for DJ’s setting up OBS with multi cams, direct audio and image overlays!
With streaming still being at the forefront of most DJ’s lives, it’s important to know how to set your stream up like a pro! Being able to include your DJ branding, switching between numerous camera’s and going live on two platforms at once is all key to making your sets stand out above the others. Today DJ Holland runs though how to set up your DJ stream using OBS which is a free download available here for Windows, Mac and Linux.
>
Adding Inputs to OBS
Direct Audio – Connecting your decks to OBS
The most important aspect of any DJ’s stream is the quality of the audio. Getting direct capture is essential to ensure the audience here’s the set perfectly and not possible background noise or interference. The easiest way to set up an audio input is to use a external sound card. The sound card must use LINE LEVEL inputs so avoid PHONO units.
The Behringer UCA202 models are a great choice as they are cheap and feature an Audio Output, meaning speakers can be plugged into it. Ideal for users for controllers that only have one audio outputs.
To add a sound card to OBS, click + icon in the sources pane at the bottom of the screen. Select Audio Input Capture. Select Create New and give the device a name such as “Decks”, ensure Make Source Visible is checked. Click OK. 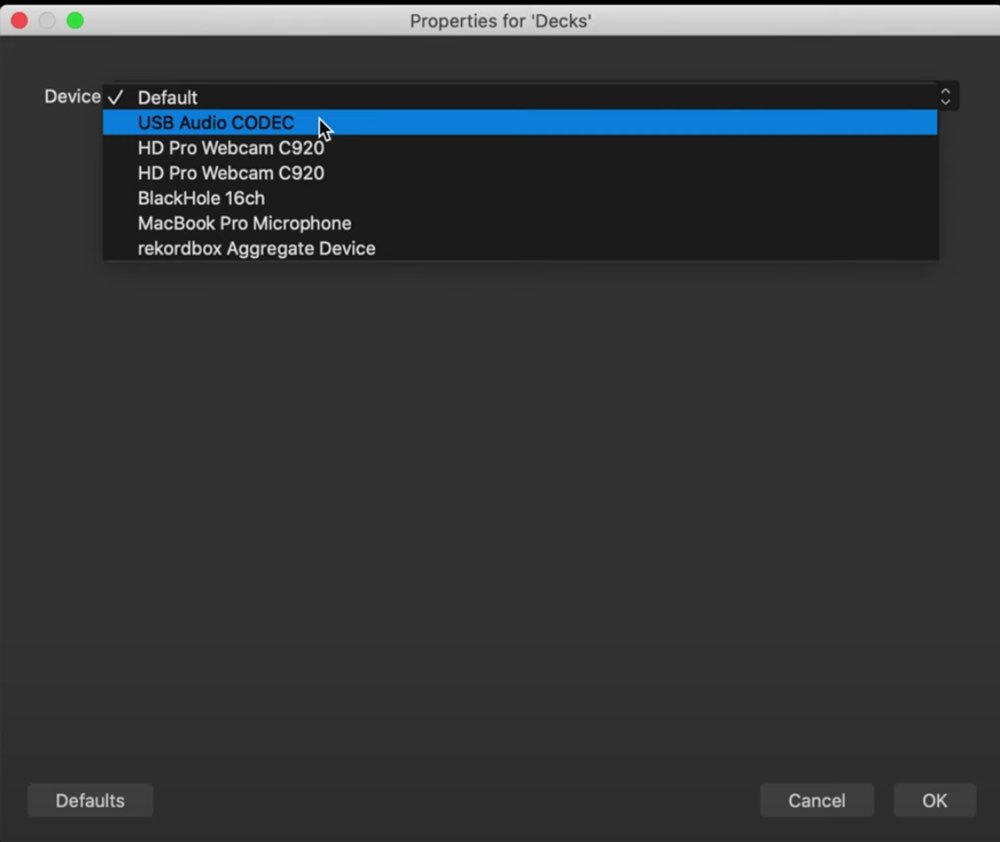 Select your sound card that you have plugged your decks into. In this example we are using the Behringer UCA 202 which is called USB AUDIO CODEC. Once selected, the input will show in the Audio Mixer on the main interface.
Direct Audio from Serato DJ
Serato DJ version 2.4 and above feature direct audio output which doesn’t require an external sound card or second laptop. The system uses a VAD (Virtual Audio Device) to internally route the audio from Serato to an Input inside OBS.
To set this up, head to the Serato Preferences and click “Make Audio Available To Other Applications”. This will then ask to download a third party piece of software and open a Serato help page, which can be found here. Follow the instructions on the webpage or in our video guide below to instal the VAD.
Once installed, the virtual audio device will create an audio input we can set up in OBS. To add the VAD to OBS, click + icon in the sources pane at the bottom of the screen. Select Audio Input Capture. Select Create New and give the device a name such as “Serato Feed”, ensure Make Source Visible is checked. Click OK. Select your virtual audio device. Once selected, the input will show in the Audio Mixer on the main interface.
Adding a webcam to OBS
In the same inputs pane, click the + button and select Video Capture Device. Give this camera a name, for example “Top Cam” for a camera pointing down at the decks. Ensure Make Source Visible is checked if you want to use this camera in this scene. Click OK. 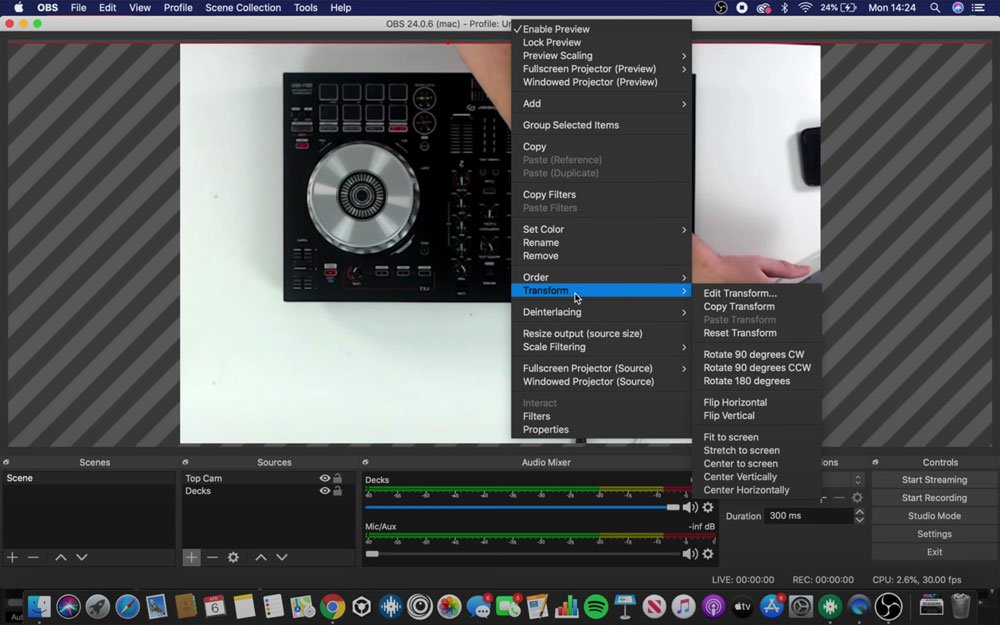 Next in the drop down menu, select the webcam you wish to set up. Leave Use Preset checked and the resolution as its default. Click OK and your webcam will now be visible in the scene. When highlighted red inside the canvas you can move the camera around and use the edges to resize the image. To rotate or crop the image, right click when highlighted red on the canvas and select Edit Transform.
Using a iPad or iPhone as a webcam in OBS
Thanks to a fantastic application, we can use a iOS device as a webcam in OBS. The application is called OBS Camera and is available in the App store.
You will also need to download the computer drivers available from their website here. Ensure you have downloaded the drivers and installed them before launching OBS project on your computer. 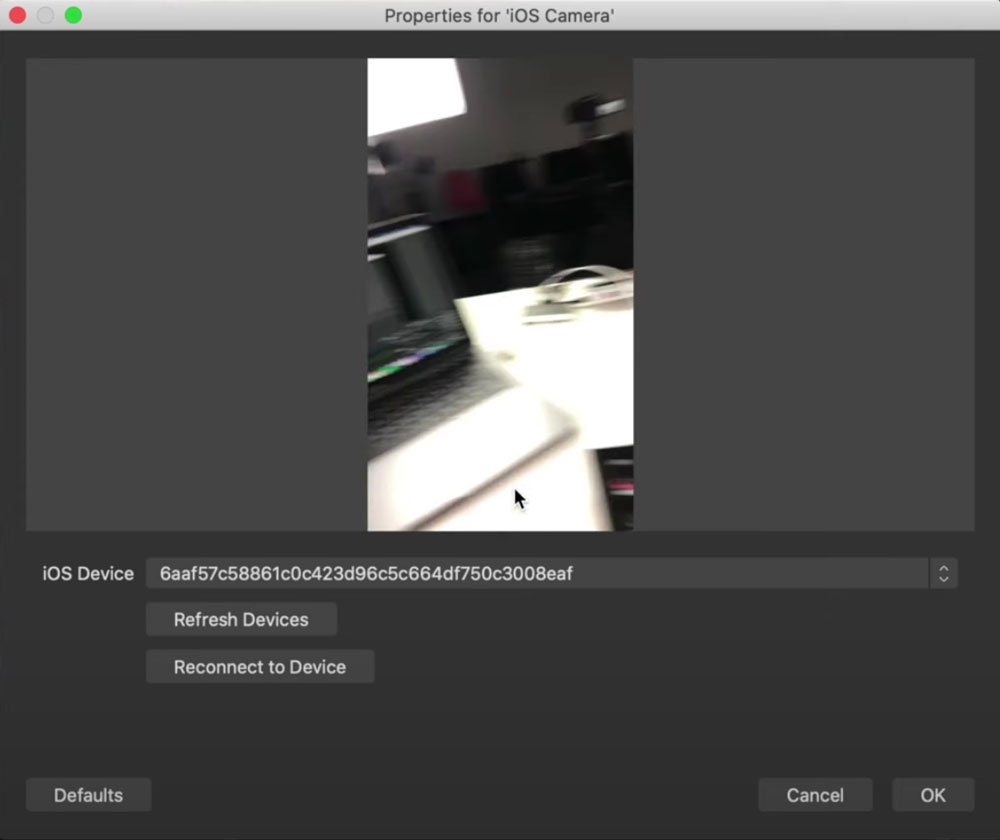 The application can be used wirelessly using NDI technology, however this creates lag. For the best results plug your iPad/iPhone into the computer with a USB cable and launch the app. In OBS click + in the inputs pane and select iOS Camera. Name the source, “iOS Cam” for example.
If you want to use this image in this scene, ensure Make Source Visible is checked and click OK. Next, click the dropdown menu and select your phone. Add it to the scene, turning the phone 90° will change the camera input from portrait to landscape without manually having to transform it.
Adding Images To OBS (DJ Logo or Frame)
When adding images to OBS its vital to use .PNG image files. This is due to the fact they can carry transparent backgrounds, allowing them to be placed above our video content without covering it with a white or black background.
Once .PNG images have been created/sourced, click + in the inputs pane and select Image. Name the source, “Logo” for example. If you want to use this image in this scene, ensure Make Source Visible is checked and click OK.
Next, browse for the logo and add it to the scene. 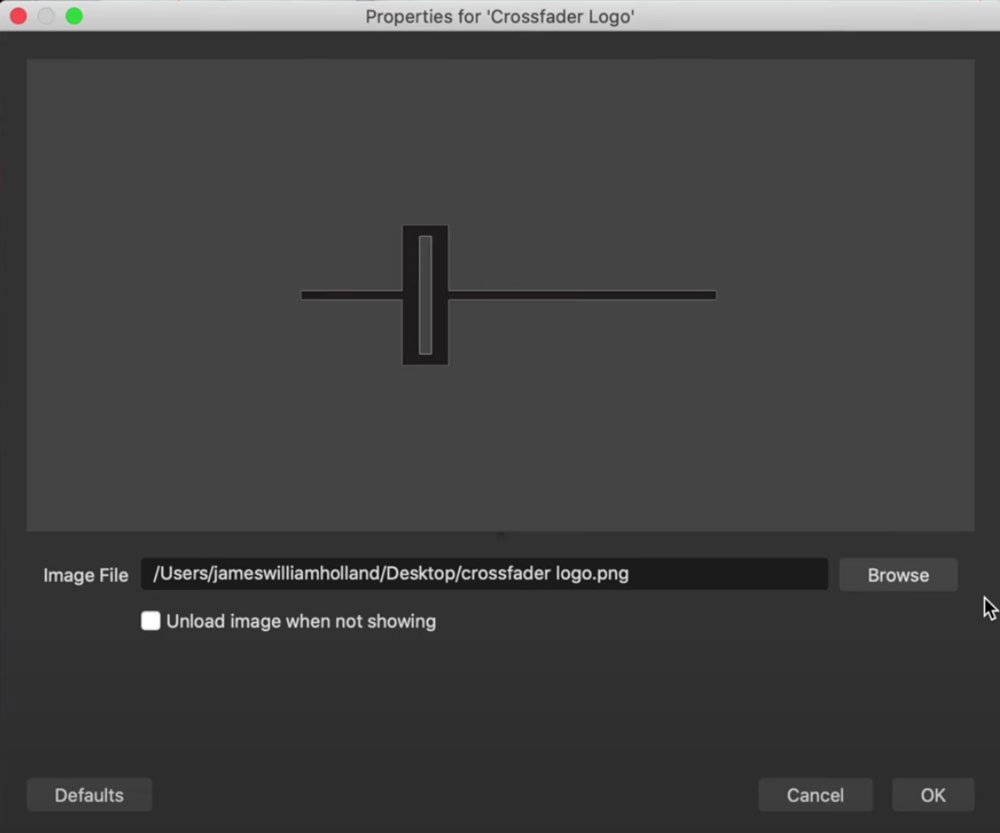 Click the source to highlight the image in a red box. When highlighted you can resize and reposition the image. If the logo is below the camera or in the wrong order you can either right click and use the ORDER tools or drag and drop the sources in the Inputs Pane to the order you wish them to be visible.
Creating Different Scenes in OBS (Multi Cam)
Creating a new scene in OBS allows the user to switch between multiple cameras and layouts. The inbuilt transition effects make these scene changes professional, elevating the viewers experience whilst watching the stream.
To create a new scene, head to the scenes pane which is to the left of Sources and click +. Give the new scene a name, we recommend naming it after the camera angle you will use such as “Side Cam”. Once the new scene has been created and selected, the canvas and sources will return to being blank. We must now add the sources required in this new scene.
Adding existing sources to the new scene.
Fortunately OBS remembers Sources that were set up earlier, allowing you to reuse these items without having to set them up again. Start with the audio input as this is the most important. Click + in sources and select Audio Input Capture. 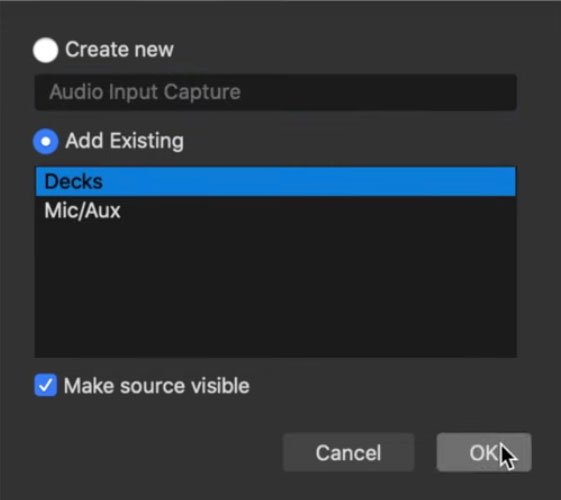 Click add existing and select the input you created in the first scene, “Decks”. You can repeat this process for every existing element such as webcams, images and audio devices. If you haven’t set the device up yet, follow the steps above to add a new device.
Switching Scenes When Live
Once all the scenes have been set up, click Studio Mode in OBS. This will open the preview window and output window in place of the canvas. On the left is the preview window, when you select a scene it will appear here. To the right is the program window (Output), this is what is currently being broadcast to the world when the stream is live. 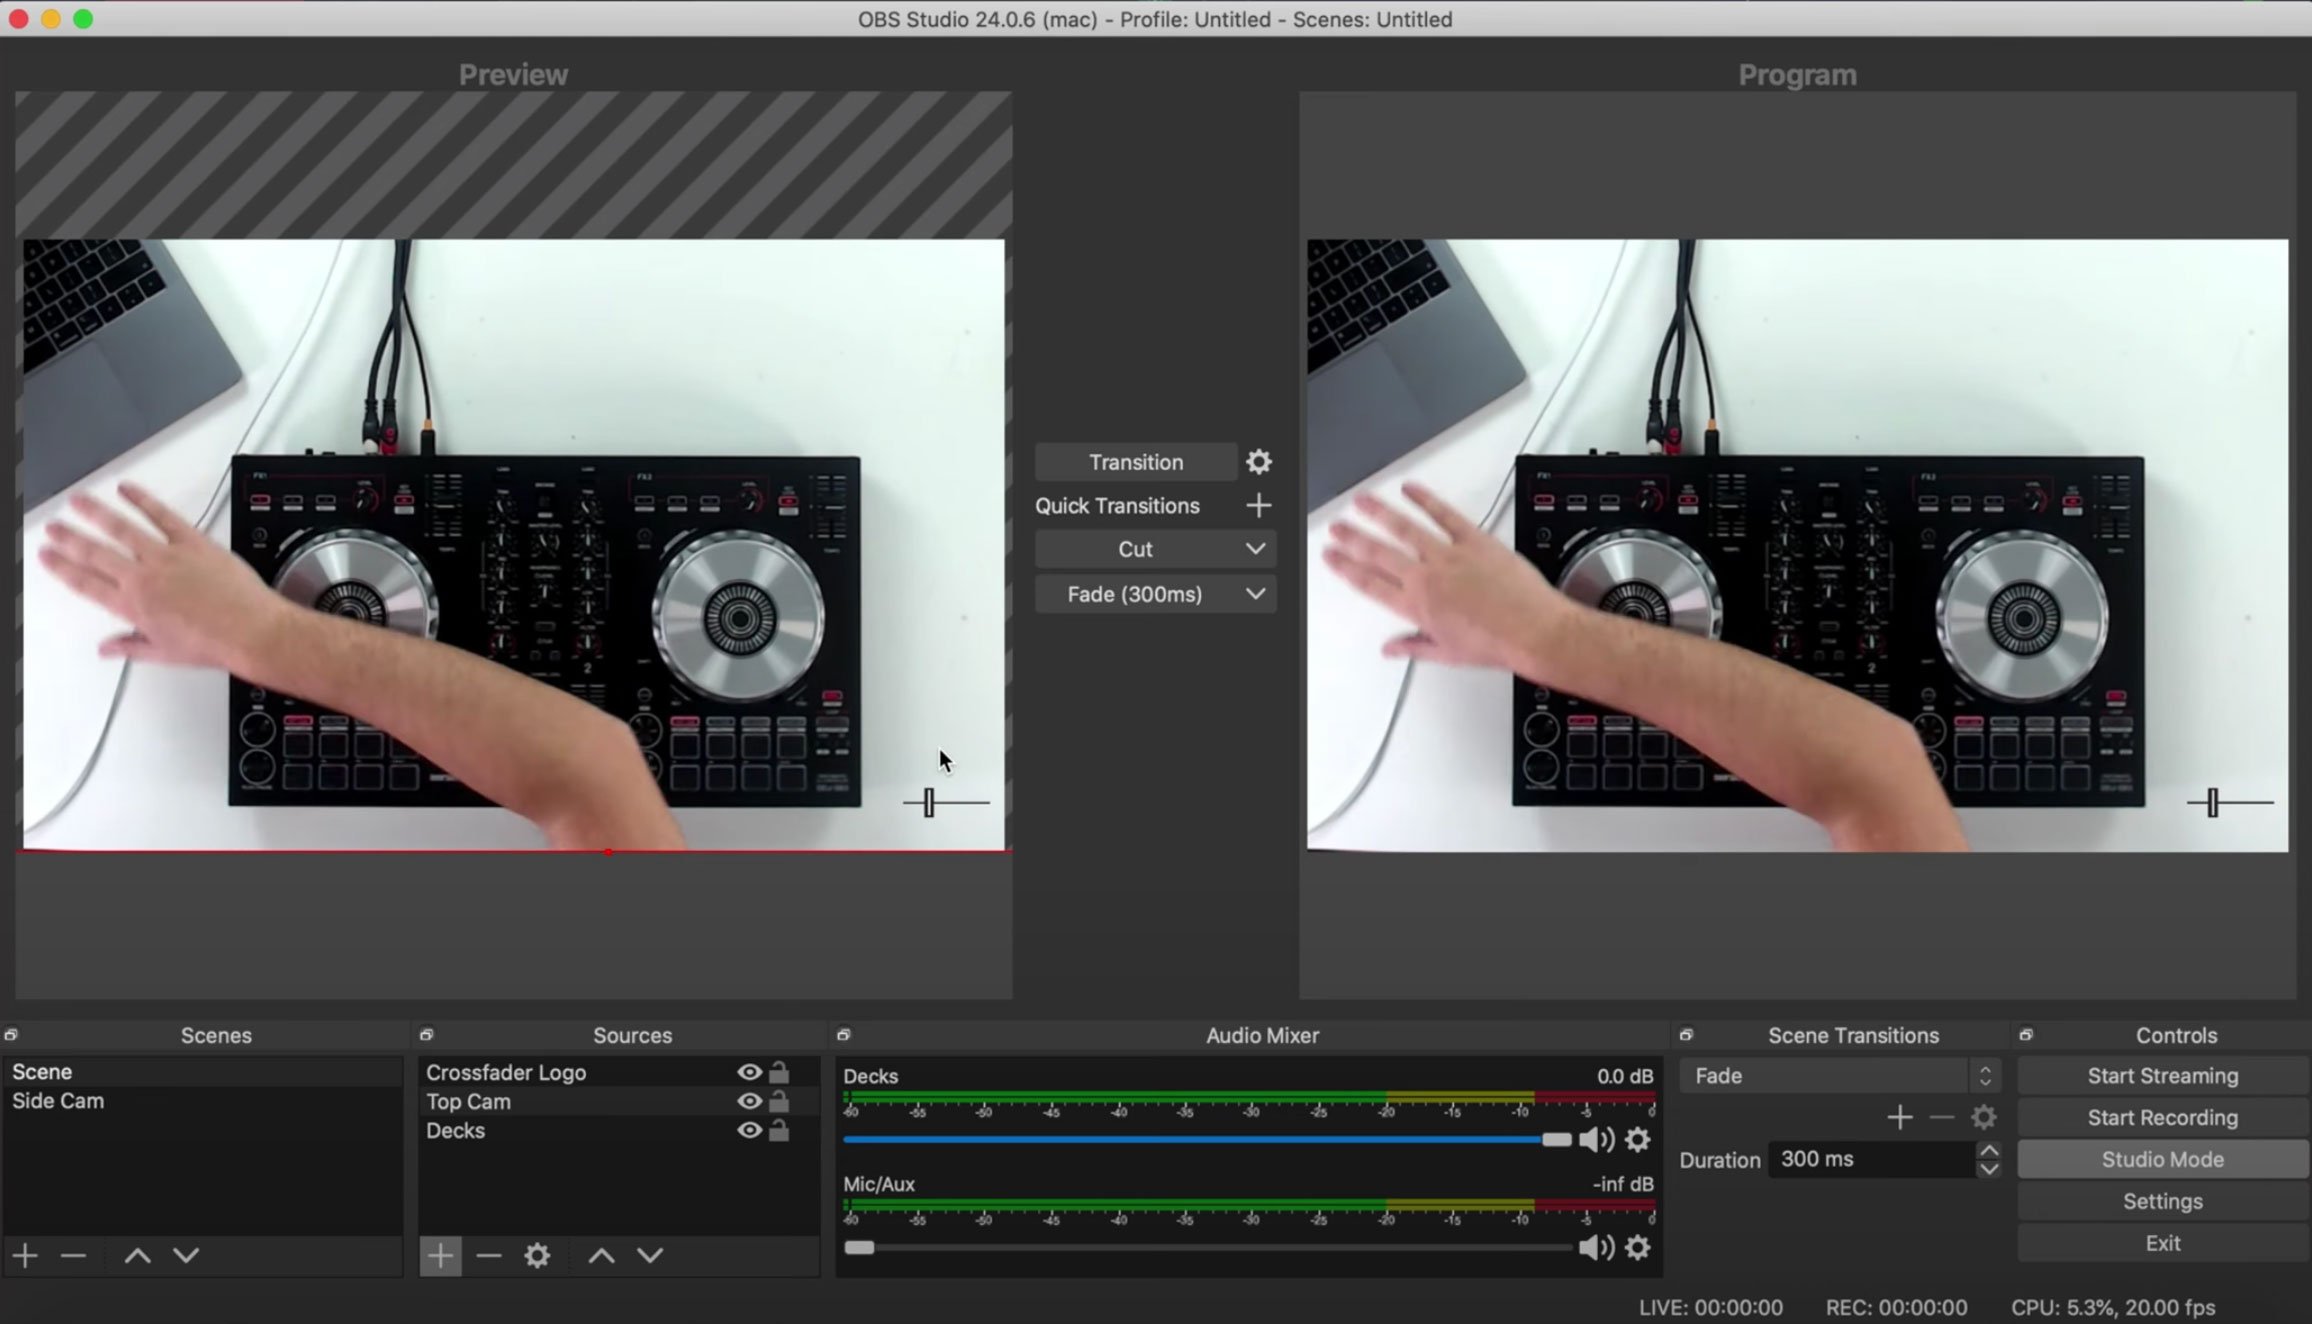 To transition between the scenes, you can use the shortcut Quick Transitions buttons between the two windows or press the settings cog to customise your transitions. We recommend using the Fade (300ms) option for smooth, professional transitions between scenes.
Changing Scene’s With Hotkeys
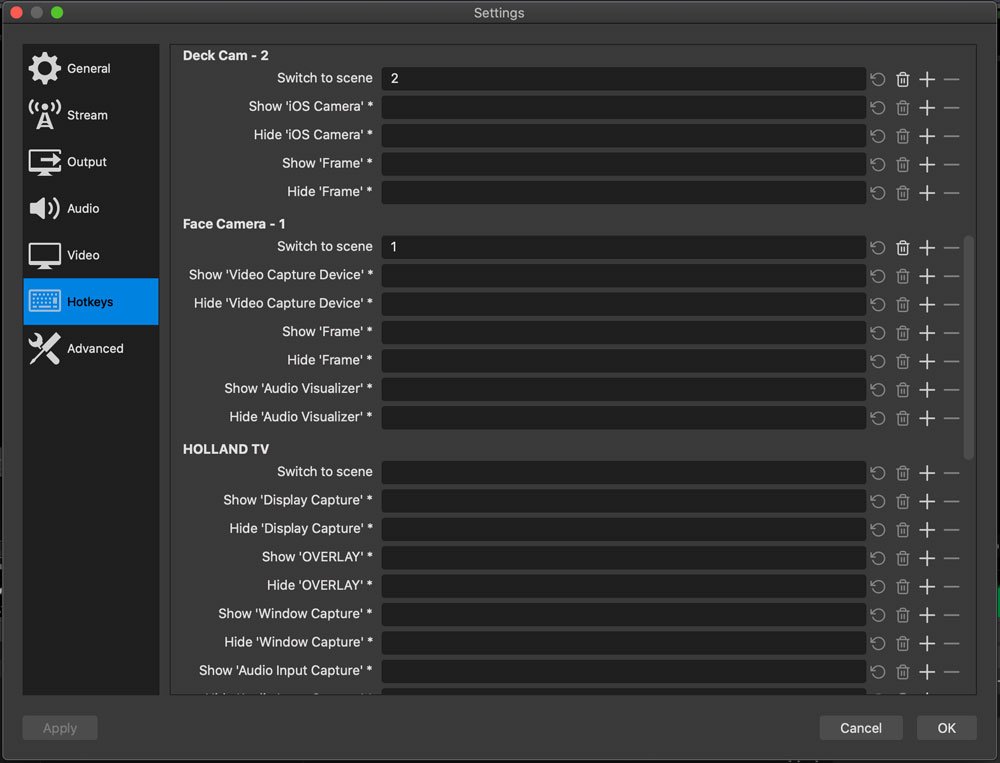
Scene’s can be changed with a keyboard shortcut. To set this short cut up, press settings and then hot keys. In hot keys scroll to the scene you have set up. Press the “switch to scene” box and when it is highlighted blue type in the keyboard shortcut you would like to use.
Renaming your scene to include the shortcut button can be helpful if you have a lot of scenes. Once applied, press okay and ensure nothing on screen is highlighted. You can now use the hot key you set up to change scenes.
Changing Scenes Automatically with Time
To change the scenes automatically with time, you must first download OBS Advanced Scene Switcher Plugin. Once installed, open the advanced scene switcher in the Tools menu. Inside the advanced scene switcher, click on the “Scene Sequence” tab. Set the rule for the first camera change. For example: When “Scene One” is active, change to “Scene Two” after “5” seconds using “fade” transition.
Make sure you set the rules so they loop. This means if you have two scenes, you need transition one to change to two and then two back to one. This will force scene one to change to two and keep the loop active whilst you are DJ’ing.
Once the rules have been established, head to the general tab and click Start. This will keep changing scene’s automatically until you go back into the plugin and click it to stop.
Setting up your Stream Settings
Once you have your stream ready to go live with image overlays, transitions and multiple scenes. It’s time to set up the stream key to let OBS know where to send the broadcast. Click settings and head to stream, here you can select preset services such as Facebook, Twitch, Youtube and many more.
If you are just going live on one of these platforms, click the platform and then head to their website. When you click go live on social media (Facebook, Twitch, YouTube) you will be given a stream key. Enter that key into OBS settings and click Okay.
You can now start the stream and go live! 
Go Live On More Than One Platform
To go live on more than one platform, we recommend the use of Restream.io. This web based application allows users to send their OBS stream to Restream, which will then share the stream amongst numerous services all at once.
To set up Restream, head to their website and create a profile. Once logged in, sign into all the services you wish to go live with. Click the Titles Tab to change the stream’s name and caption on each platform, please do note that this feature is in beta and doesn’t always work. If the Title fails to change, head to the social media platform and change it manually on there. You can do this whilst live.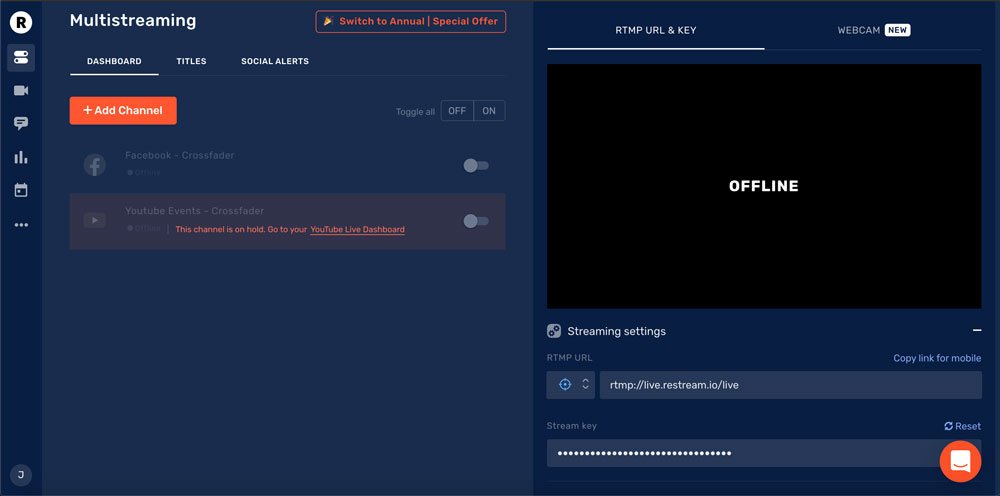 Once you have all the relevant channels linked to Restream, you can find the stream key on the right hand side of the webpage. Enter this stream key into the OBS settings and ensure Restream is set as your service.
Start streaming in OBS and the preview window in Restream will change to show your live feed. You can now toggle the platforms you wish to go live, sending your stream around the world on different platforms in perfect sync!
Learn More DJ Skills!
Level up your DJ performances with these dedicated courses…
Pioneer DDJ SB3 DJ Course
3.75 hours
28 lessons
Beginner
Serato DJ Course
3.5 hours
23 lessons
Beginner
Serato DJ Course
8.5 hours
47 lessons
Intermediate
Pioneer DJ DDJ-FLX4 Course
7 hours
41 lessons
Beginner
Complete DJ Package
835 hours
1300+ lessons
Creative
Pioneer DJ DDJ-FLX4 Pro Course
9.5 hours
49 lessons
Intermediate
DDJ FLX4 Beginner To Pro Bundle
16.5 hours
90 lessons
Beginner
Numark Beginner Course
4.2 hours
35 lessons
Beginner
Pioneer DJ-200 DJ Course
4.75 hours
28 lessons
Beginner
Rekordbox DJ Course
5.5 hours
37 lessons
Beginner
Rekordbox DJ Course
7.5 hours
49 lessons
Intermediate
Pioneer DDJ-400 DJ Course
7 hours
30 lessons
Beginner
Pioneer DJ DDJ-FLX4 Course
7 hours
41 lessons
Beginner
Complete DJ Package
835 hours
1300+ lessons
Creative
Pioneer DJ DDJ-FLX4 Pro Course
9.5 hours
49 lessons
Intermediate
DDJ FLX4 Beginner To Pro Bundle
16.5 hours
90 lessons
Beginner
Hi Holland
What do you use for your microphone?
Is this threw the decks or a separate input?
Vic
Great Video BTW
Thanks Vic! It depends on the equipment I’m streaming with! Cheaper controllers such as the DDJ-400, SB3 ect don’t route the microphone into the computer. So I have to use the UCA202 Behringer set up with these units. If I’m using a more expensive controller that does route the audio into the computer, I can either set up with internal routing or use a Behringer UCA 202 regardless. I try to avoid USB microphones in the computer as you’d have to use your mouse to mess fade it in and out. Lot easier to use a mic plugged into the decks! Hope this helps 🙂
Excellent and helpful video, thank you very much. I would like to ask one thing. I’m trying to do screen sharing but it doesn’t work. I want one of myscene to be my lap top screen so that people watching me live be able to see the track tha plays. I think I have to make some chenges, I tried few thing but nothing worked for a screen sharing scene.
Thank You advance.
Found the way just a minute afte the comment. I can do it with window capture. I choose the rekordbox and the window shos what is going on rekordbox. So simple. Thank You anyway.
Remember to set your computers permissions to allow OBS to access your screen 🙂
Nice video. I did learn a lot with it. Thanks.
That’s great to hear thanks!