
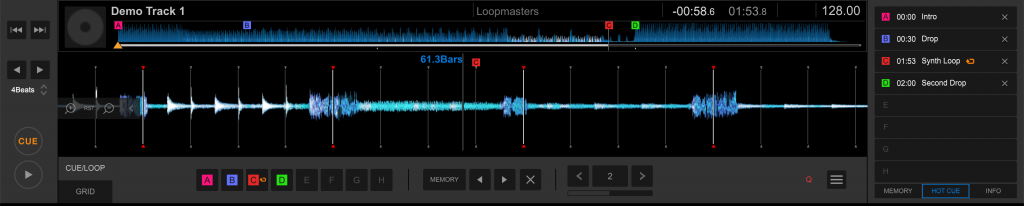
A hot cue is a marker you can lay down at any given time within a track. When you press the hot cue the software will jump straight to this marker and play from that point. It’s like having up to 8 additional cue buttons for each track that you can name and customise with colour. You can save loops to hot cue pads, skip to the desired beat and activate the loop when you press the hot cue.
How to use a Hot Cue
Adding hot cues couldn’t be simpler and works pretty much the same in every DJ software. Simply find the place in a song you’d like to place the hot cue, then press a blank hot cue either on the screen or on a pad if you are using a controller. If you are unhappy with a certain hot cue you can delete it by either holding shift and press the pad or by clicking the little X icon in the corner of the hot cue on screen.

Hot Cues vs Memory Cues
What is a Memory Cue?
Memory cues are points in a song that are useful to work from. Stored in chronological order, you can skip through the track with ease to points of interest and then set a normal cue point and play as usual. You also have the ability to store loops on memory cues and chose to turn them active, meaning they will automatically activate when the track reaches that point.
How To Use a Memory Cue
To add a memory cue, scroll to the part of the track you would like to add a memory cue, and press cue. Then press shift and the right arrow. This will then store the memory cue into the bank, these automatically organise in chronological order. To add a loop first create a loop and then press shift and right again to add it into the bank. To make the loop automatically trigger (active), press shift and exit loop button.

When to use a Memory Cue over a Hot Cue
Memory cues can only be used when the track is paused, meaning they are a useful tool to skip large chunks of tracks out. Creating shorter versions of tracks by skipping sections out is easier with memory cues, as is creating helpful loops that automatically activate.
When to use a Hot Cue over a Memory Cue
Hot Cues can be used much like memory cues, however with the ability to activate them at any point. For this reason hot cues act more of a performance feature than helpful tool. Stabbing melodic notes of a track or triggering vocal loops is only achievable with hot cues. By using memory cues properly we can leave more hot cues free to use in performance situations.
How to Set Up Hot Cues Like a Pro
There’s no single “correct” way to set up your hot cues — some DJs like to wing it track by track, others have detailed systems they stick to religiously. What matters most is consistency and whatever helps you mix faster and more creatively.
That said, if you’re not sure where to start, this method from Jamie Hartley is a brilliant baseline. It’s the system we teach in our courses, and it works across every genre, DJ platform, and level of experience. Try it out, steal it completely, or tweak it to suit your own workflow.
Jamie Hartley from Crossfader recommends splitting your hot cues into two layers: the top row for phrasing and the bottom row for performance. This structure works across most DJ software and controllers with 8 performance pads and helps you stay consistent, creative, and fast when mixing.
Top Row: Track Structure (Phrasing)
These hot cues are set in chronological order, mapping out key sections of the track:
- Hot Cue 1 – Start / Intro: Where the music begins (sometimes an isolated riff or vocal).
- Hot Cue 2 – Build-up: The section that builds energy into the drop, often 8 to 16 bars before.
- Hot Cue 3 – Drop: The main energy point of the track.
- Hot Cue 4 – Breakdown / Second break: A calmer section after the drop, often used to mix out.
This layout gives you fast access to the key structural points of any track — making it easier to jump between sections, shorten intros or breakdowns, or keep momentum high during fast transitions.
Bottom Row: Performance Cues
These hot cues aren’t always in order — they’re set based on interesting or isolated elements that can be used for hot cue play, cue drumming, or mashups:
- Vocal chops: Isolated phrases or words you can trigger rhythmically.
- Instrument hits: Stabs, chords or offbeat sounds.
- Loop points: A 4-beat section that loops well or sounds good layered over another track.
These are cues you’ll jam with during transitions, not just jump to. Jamie demonstrates using them to echo in new tracks, build energy with loops, or create entirely new cue-based routines. You can even use performance cues to introduce a new song creatively — playing chopped piano notes, for instance, over the outgoing track.
You don’t need to fill all eight pads on every track. Some may only need two or three hot cues. What matters is setting them intentionally — so you can mix faster and more creatively every time you load that tune.
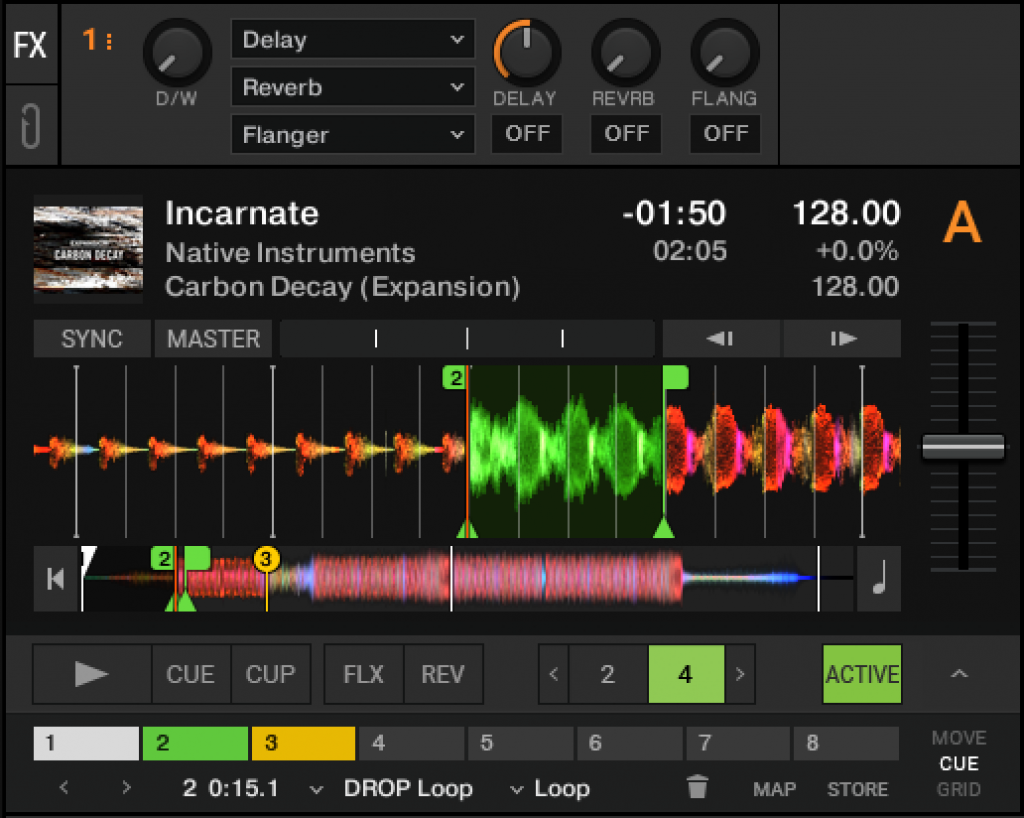
Colour Coding Your Hot Cues
The colour of your hot cues are usually pre determined by the software, but what if you want to change that? Creating your own system of colours can help your performances because you just have to simply glance at your decks and know exactly which hot cue is which. For example, you could set Pink to be the intro, Blue to the drop and Green to be the outro.
Changing Hot Cue Colour on Rekordbox
Rekordbox DJ offers users a selection of preset colours to chose from, including CDJ style, two cold styles and finally colourful. As default, this is set to CDJ, which means new hot cues will always be Green and Cold 1 will set your first hot cue as light blue, the second as teal and the third pink. Cold 2 is a lot more subtle, and the first three hot cues are all shades of blue. It’s worth noting that even though you can change the colour of saved loops, they will always be orange in all colour modes by default.

To change the colour of a Hot Cue in Rekordbox DJ, simply right-click on the coloured square with the hot cue number inside it. From here, you can pick one of sixteen colours or reset the colour to Rekordbox’s default setting. You can also name the hot cue by clicking the space to the right of the time value to activate the text box.
It’s worth noting that these colours will only be shown on compatible hardware, so if your controller features RGB pads, the colours will show. Users with hardware with singular-coloured pads, such as the original DDJ-SX, DDJ-400 or CDJs older than the 2000 Nexus, will continue to show the custom colours on screen only.
Changing Hot Cue Colours on Serato
You can also change the colour and names of your hot cues in Serato, so just like Rekordbox, you can customise your cues to match your own system. Unlike Rekordbox, there is no “theme” you can set for the default colours. In fact, Serato appears to randomly assign the colour of your hot cues, with the exception being that the first is always red. To change the colour, the process is the same as Rekordbox. Simply right-click on the hot cue and choose from one of 18 colours. To change the name of the hot cue, double-tap on the time value and replace the time with a name. Saved loops can’t be added to the Hot Cues like in Rekordbox, so there is no colour to change; however, you can still rename your loops. Simply double-click the saved loop’s time and change its name there.

Changing Hot Cue Colours on Traktor
Sadly, Traktor users cannot change the colour of hot cues. Traktor does have its own system for colouring with saved loops being green, hot cues being blue, grid markers being white, load in points being yellow, and fade in/out being orange. You can give your various markers names, however, by clicking where it says “n.n.” and entering a name. This can help you remember the different points you have laid out if you ever need to adjust them.
Gate Playback: What It Is & When to Use It
Gate Playback changes the way hot cues behave when a track is paused. With it switched on, pressing a hot cue while the track isn’t playing will only trigger sound while the button is held. Let go, and the track stays paused. It’s a useful feature for cue drumming or finger tapping with isolated vocals, especially when you want to keep things tidier when layering sounds over another track.
By default, Rekordbox Performance mode mimics the behaviour of a Pioneer CDJ. When the track is paused, pressing a hot cue jumps to that point and immediately starts playing. For DJs used to Serato, this can feel odd. In Serato, hot cues don’t play through unless the button is held. That method is called Gate Playback.
While CDJ and XDJ units are locked into the traditional Pioneer behaviour, Rekordbox users can choose between the two. To enable Gate Playback in Rekordbox, go to Preferences, click the Controller tab, scroll to the HOT CUE section, and check the ‘Gate when paused’ option. This also works when using CDJs and XDJs in HID mode with Rekordbox Performance mode.
Creative Hot Cue Performance Techniques
Hot cue play isn’t just about jumping between song sections. It’s a way to using these hot cue buttons to create completely new, different rhythms and patterns. This lets you turn them from simple navigation points into proper performance tools. Let’s break down what you need to know.
Start With Timing
To use hot cues rhythmically, you’ve got to start by understanding a couple of things about beat timing. There’s straight timing, which is where you’re hitting cues in time with the beat, like counting 1, 2, 3, 4. Then there’s offbeat timing, where you place hits in between the main beats, like 1-and, 2-and, 3-and, and so on. Combining these two timings opens up a wide range of rhythmic possibilities.
Vocal Cue Play Basics
Once you’ve got a feel for the timing, pick an isolated vocal and set hot cues on key syllables. Then, trigger them in rhythm over a looped instrumental. You might tap the cue on every beat to begin with, then start switching it up as you get a feel for it. Maybe try tapping once per beat, then mix it up by alternating between cue hits and letting the full phrase play out. Letting part of the vocal play occasionally stops it from sounding too robotic. You can also mix in silences and variations to make it sound a bit more interesting.
Introducing Silence with the Crossfader
Cue play can quickly become repetitive if every hit is followed by another. Leaving space in your phrasing is what gives it groove. Cut the sound with the crossfader or upfader between hits to control phrasing. Assign each deck to a side, then open the fader to let a cue play, and close it to mute. Practice combining hot cue hits with quick crossfader moves. Start by playing every 1 or 2 beats, then gradually work in longer rests. The goal is to create a rhythm using both sound and silence.
Use Effects to Fill the Gaps
To add more texture, combine cue play with effects like echo or reverb. Trigger a cue, then cut the fader and let the echo fill the silence. Adjust the FX timing (¼, ½, ¾ beat) depending on the tempo. Use FX only at the end of a phrase to avoid clutter. This works best when timed cleanly at the end of a bar or phrase.
Melody-Based Cue Jams
You can also set hot cues on melodic notes or instrument stabs — like keys, strings or vocal tones — and “play” them rhythmically. Use short, isolated notes. Keep them in key with the playing track (use key sync if needed). Tap in rhythms that match or complement the beat. Try finger-drumming them like a mini keyboard. Combine them with crossfader cuts and FX to build layered fills or melodic intros.
Hot Cue Performance Video Tutorial
Take Your Next Step with Crossfader
If you’ve made it this far, you’re clearly serious about improving your DJ skills. Mastering hot cues is a huge step, but it’s only the beginning. When you join Crossfader for free, we’ll help you build on what you’ve learned with a personalised path that fits your gear, your style and your goals.
Once inside, you’ll get access to:
- Custom learning paths based on your equipment, music tastes and experience
- A huge library of beginner to advanced DJ courses
- Exclusive videos, tips and community support
A hot cue is a saved marker in a track that you can instantly jump to by pressing a button. DJs use them to start mixes, trigger samples, or jump between song sections.
Rekordbox allows up to 8 hot cues per track when using compatible hardware and Performance mode.
Yes, if you’re using rekordbox to export your music, hot cues can be saved to your USB and accessed directly on CDJ and XDJ units.
Absolutely. Hot cues can be fired at any time, whether the track is paused or playing.
This depends on the software and streaming platform. Some services limit cue saving. In Rekordbox, for example, cues on streaming tracks aren’t always stored unless cached.