In today’s social media-driven landscape, it’s no longer enough to just have great DJ skills and expect to make a name for yourself on the back of that alone.
Getting content and videos of yourself out there on social media is the number one way you’ll start to grow your career and translate that online hype into real-life bookings. But in a near-endless sea of content, it can be really hard to stand out from the crowd.
As daunting as it can sometimes seem, filming great-quality DJ content doesn’t have to be difficult. You don’t need a fancy studio or high-tech gear to make great stuff, and in fact, you might just be able to get started right now with what you’ve already got.
This guide is here to break down those essentials to get you started. You’ll learn how to create content with high-quality visuals and audio that’s ready to post anywhere.
What You Need to Film DJ Content
Like with actual DJing itself, when it comes to making content, it’s easy to get carried away with gear, but in truth, you don’t need a load of equipment to get started. Here’s what’s actually essential:
A phone or camera
Your phone is usually the best place to start. The cameras on smartphones nowadays are more than good enough for social media clips.
If you want to go down the route of getting a fancy dedicated camera that will add a bit of professional sheen (if that’s what you’re after), but you can quickly end up spending silly money for rapidly diminishing returns. What matters more than the camera itself is what you do with it in terms of lighting, framing, and editing, which we’ll get to later.
A tripod or stable mount
Shaky video instantly makes your content feel amateur. A small phone tripod is ideal here because you can set your angle once and forget about it. But if you’ve not got one, anything that keeps your phone stable at the right height will work. The main thing is that your viewer can clearly see the decks and your hands without the camera wobbling every time you move.
A simple light source
Lighting makes one of the biggest differences when it comes to video quality. But that said, you don’t need a fancy full-on lighting rig. Just a cheap ring light, an LED panel or even a desk lamp bounced off a wall will brighten your shot and remove harsh shadows. We’ll get into more detail about lighting later on.
A way to record clean audio
Good audio quality is super important to making your content seem more legit, but it doesn’t have to be complicated. Basically, as long as you’re not just recording audio off your phone or camera mic and you’ve got a separate audio source, that’s a huge upgrade.
Depending on your setup, this might mean recording directly in your DJ software, using your controller’s built-in recording feature or sending your audio through a small interface like an iRig. We’ll get into more detail later in this article.
A basic editing app
You only need something simple to put everything together. CapCut is generally the easiest option because it handles video, clean audio, punch-ins and captions without much effort. There are also loads of guides and videos online to walk you through the basics of how to edit videos on there.
How to Make Your DJ Videos Look Good
To get a serious upgrade to your video quality, you probably don’t even need to invest in loads of new gear or completely rework your setup. Instead, a few small tweaks and a bit more deliberate consideration can go a long way.
Setting up your shot
The main thing to keep in mind when framing your shot is how clearly visible everything is. The two things you need a clear view of are the decks (and your hands interacting with them) and yourself (as faceless impersonal content is absolutely getting skipped over).
Before you hit record, do a quick sense check on the shot:
- Can you clearly see what your hands are doing on the decks?
- Is your face visible enough to feel present on camera?
- If you watched this with no sound, would it still make sense?
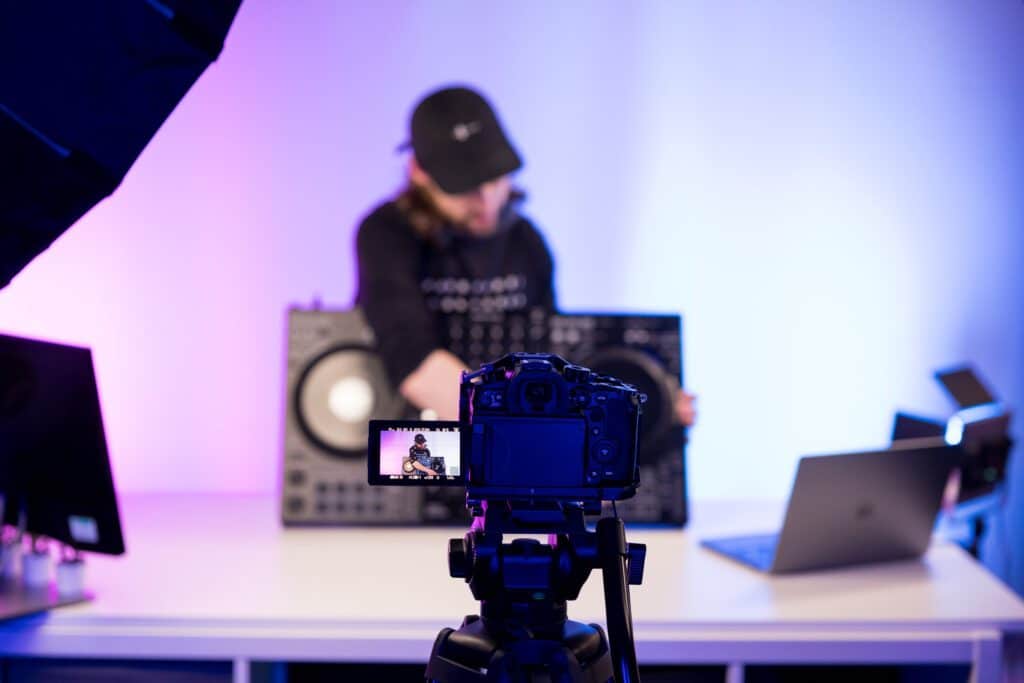
A front-facing angle is usually the safest option. Place the camera directly in front of your setup, slightly above deck height, and tilt it down a little. This gives a clear view of your hands and all the action of the decks.
Some people will use two cameras: one for the decks and one for them. This is the setup we tend to use for our videos at Crossfader, as it’s great to really focus in on what’s happening on the decks, so it lends itself to the educational content we make.
Also, think about the orientation of your shot (whether it’s landscape or portrait). Social media like Instagram and TikTok call for portrait videos, and trying to crop this down after the fact can result in awkward framing and low quality.
Your background and environment
People pay more attention to the background of your videos than you might realise, and it can have a huge influence on the overall ‘vibe’ of your channel’s output.
Generally, you don’t want things to be too distracting from the core content, but it’s nice to put some thought into the space to add some character without overwhelming things.
A useful way to think about your background is what it communicates:
- A messy background is distracting or unprofessional
- A blank background can be too sterile and boring
- A few deliberate details help create identity and recognition
If you want to know all about how to build the ideal space for your videos, check out our full guide on building the perfect DJ studio.
Lighting basics
Lighting is one of the easiest things to quickly improve the quality of your content. You don’t need loads of fancy lighting, though; just having one small light can be a huge upgrade. Here are a few tips we’ve picked up
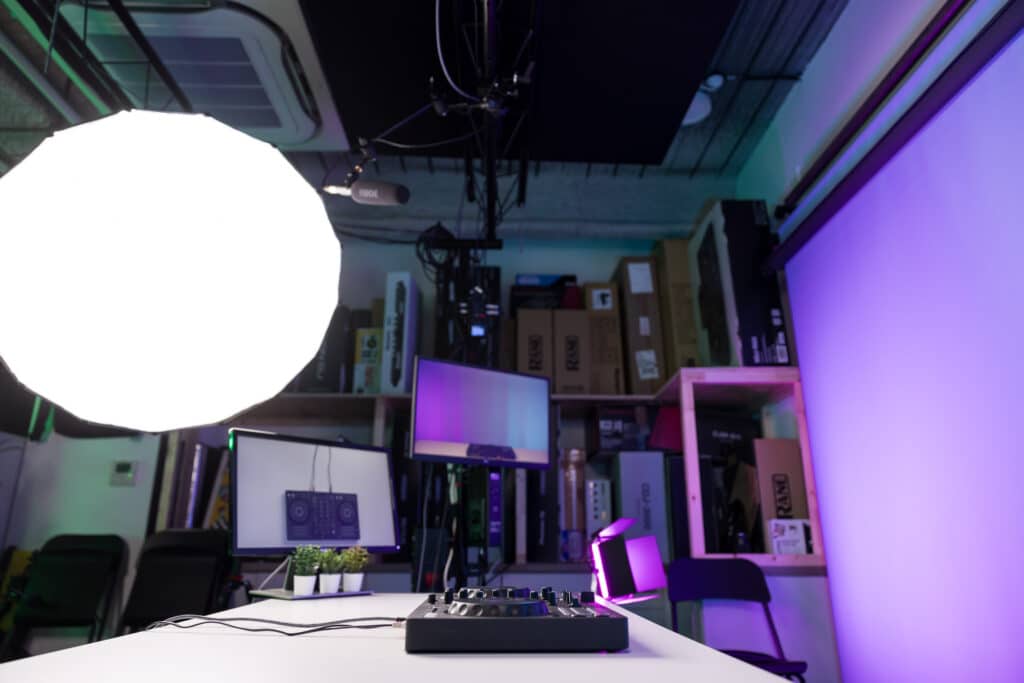
Use one main light source
Generally, you don’t need multiple lights, as this makes things more complicated and harder to control. One soft light aimed at you and the decks is enough. Ring lights and small LED panels work well, but a lamp bounced off a wall can do the job too.
Light your hands and the mixer first
Your hands and the mixer are where the action happens, so they need to be easy to see. A common mistake is lighting the face well while the decks fall into shadow. If that happens, lower the light slightly or move it closer to the setup so everything stays visible.
Avoid harsh shadows
If you notice strong shadows across your hands or the decks, the light is usually too low or too close. Try raising it slightly or moving it back until everything looks more even and comfortable to watch.
Watch out for reflections
Decks, screens and other glossy surfaces can catch light and become distracting on camera. If that happens, a small change in the light angle or height is often enough to fix it.
Do a quick test before filming
Record a few seconds and check it on your phone. Have a look if there are any dodgy shadows or poorly lit areas, and tweak the lights before recording properly.
How to Capture Clean DJ Audio
Audio is, of course, just as important as video when it comes to making great content, but it’s something that’s all too often overlooked. No matter how good your mixes are, they’re getting skipped over if the audio’s bad.
Avoid using the camera microphone for music
The most important rule is not to use your camera’s mic to record the music from your speakers. This sounds super amateur, doesn’t properly pick up all the frequencies and can add loads of echo from the room.
If you’re making content where you’re speaking to camera, however, the phone’s mic is likely good enough for that, just make sure to get a separate recording for the music.
Record directly from your DJ setup
The best option is to record your mix straight from your DJ setup. In most DJ apps, like rekordbox or Serato, you can record inside the software and get a clean audio file that matches exactly what you played. A lot of higher-end gear, like XDJs and CDJs, also supports recording directly onto a USB drive.
Recording straight into your phone
If you are filming on your phone and want a simple workflow, a small audio interface can help. Devices like the iRig Stream or Evermix box send your mixer output straight into your phone while you record video.
Keep your levels under control
Despite the popular DJ meme of ‘if you aren’t redlining, you aren’t headlining’, clipping your audio signals is actually a big no-no. This is, in fact, especially important for making content, as social platforms compress sound heavily, so clipped or distorted audio only gets worse after upload. Keep an eye on your master level and make sure it’s always staying out of the red.
How to Edit Your DJ Videos
Editing is one of those things that at first can seem really complex and daunting, but it really doesn’t need to be.
Free tools are more than enough
You do not need paid software to edit DJ videos. Free tools like CapCut are widely used and work on both phones and computers. They’ll be more than enough for what you need for DJ content, and let you cut up clips, add graphics and export the right way for each platform.
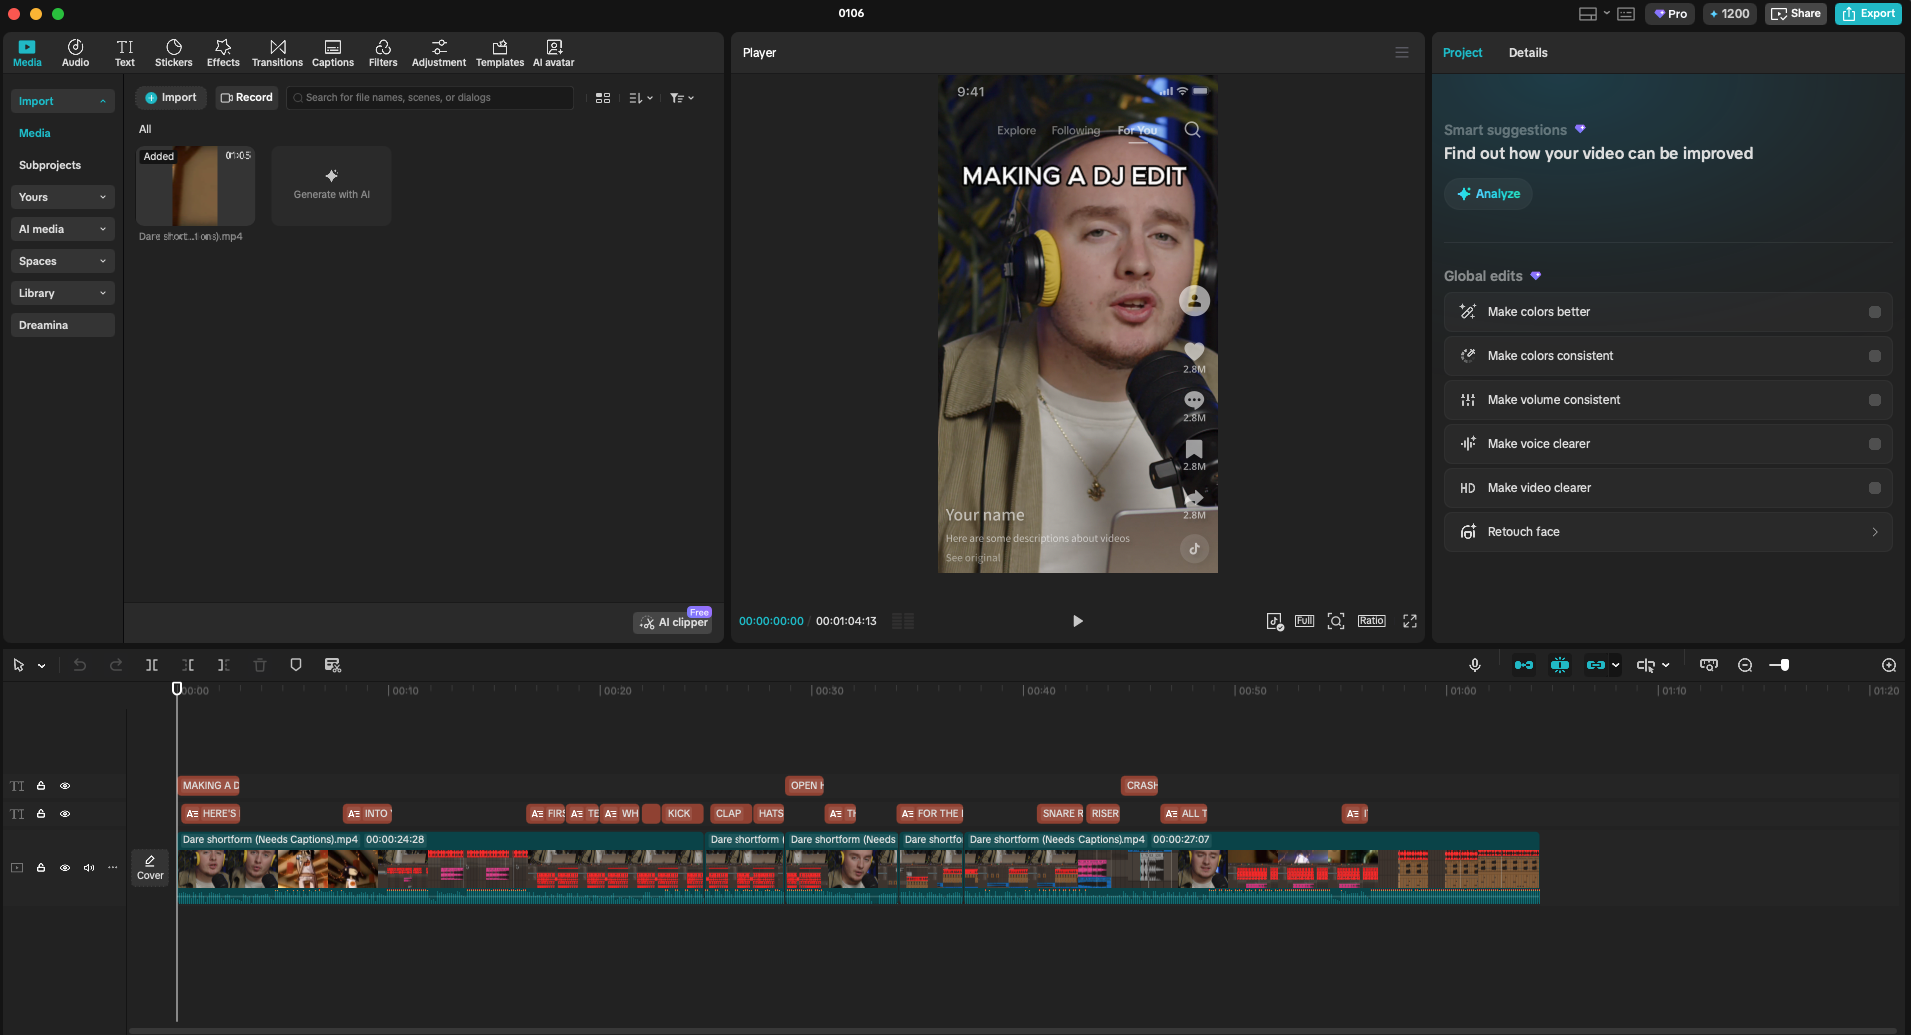
Syncing the video
Start by bringing your main camera clip into the editor. If you recorded clean audio separately, add that as well. Line the two up, so they play in time, usually by matching a clear kick in the waveform. Once everything is synced, mute the camera audio so you are only using the clean recording from your DJ setup.
Using graphics
Doing a screen record off your computer of the DJ software can be great to add in the actual waveforms so people can clearly see what’s going on in your mix. This adds a little more visual interest and is especially great if you’re doing something like explaining a technique. You might also want to add in other graphics like text overlays to show what track you’re playing, for example.
The key thing with adding graphics and overlays is making sure they actually add real value to the vid and aren’t distracting from the core DJing content.
Keep it simple
Once everything is in place, trim the clip so it gets straight to the action. You’ve got to remember that people’s attention span on social media is vanishingly short, so you can’t waste time.
It’s easy to over-edit, especially when you’re starting out, but simple often works best. If the audio is clean and the visuals are clear, you don’t need loads more for the sake of it.
When editing DJ content, most decisions come down to:
- What moment is actually worth showing
- What helps the viewer follow the mix
- What can be removed without losing impact
Want Your DJ Content to Look Better? Start with Better DJ Skills
You can have the slickest-looking content out there, but if the skills aren’t there to back it up, no one’s going to watch it.
People want to watch content that showcases your skills and offers up something new, entertaining and attention-grabbing to ‘stop the scroll’ on social media.
If you want to level up your mixing skills and really supercharge your content, join Crossfader today. You’ll get a free personalised learning plan to meet your goals, along with access to three free courses and a taste of our full structured curriculum.