The essential tips all Prime series owners need to know!
The Denon DJ Prime series of players are packed full of cutting edge technology. It’s easy to miss some of the helpful and interesting little details hidden inside these impressive units. From the amazing all in one units such as the Prime 2, Prime 4 and Prime GO to the stand-alone SC5000 and SC6000 players, these tips will help you make the most of your equipment.
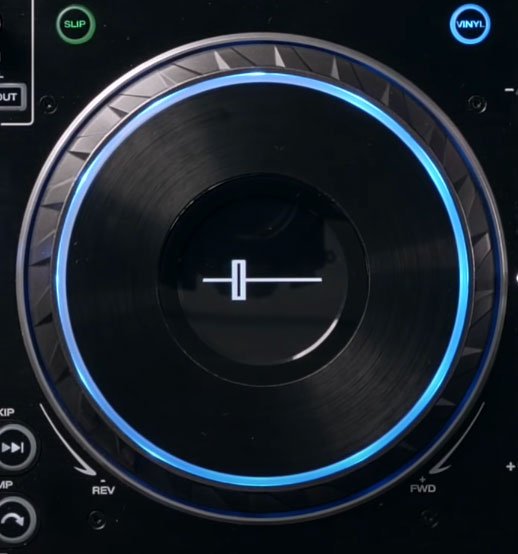
Custom Logo’s Inside The Jog Wheel Displays
Except for the Prime GO, every Denon DJ Prime player features high-resolution displays inside the jog wheels. This display shows key playback information such as the active loop status, needle position and album artwork. However, you can replace the album artwork with your custom image. The image has to be a .PNG file, .JPG and .BMP files aren’t supported. Use an online conversion tool to create a .PNG if your logo is currently in a different format.
- Open your preferred photo-editing application.
- Create a new image that is 600 x 600 pixels.
- Design your image.
- Save your image with the name “logo”.
- Save the image as a .PNG.
- Insert your USB/SD media device.
- Copy the file “logo.png” to the Engine Library folder.
- Eject the media device from your computer.
- Insert the media device into your Prime player and load the profile.
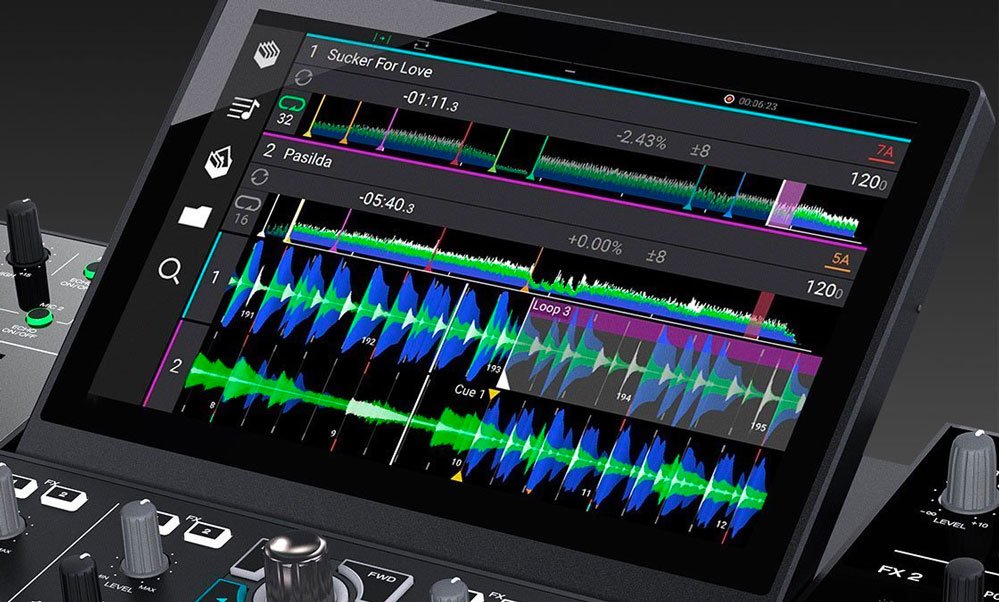
Change Waveform View From Horizontal To Vertical
On the Denon DJ Prime 2, Prime 4 and Prime GO you can change the view of the waveforms. From default, the waveforms will display horizontally. Vertical waveforms are also available, the vertical waveforms also enable the user to view the crate or playlist used to source the playing track.
To change waveform layout, press shift and view.
Swipe Down Menu
A fantastic time-saving technique, the swipe down menu allows quick access to essential settings. The menu can is available on Prime 2, Prime 4 and Prime GO all in one units. Swiping down from the top of the screen reveals the menu. Inside many settings can quickly be changed these include:
- Quantize: Tap this to enable or disable quantization. When enabled, time-based features like triggering cues and loops will snap to the beat-grid according to the Cue/Loop Quantization setting in the Preferences. •
- Continue: Tap this to enable or disable continuous playback, which will keep playing the next track when the active track has ended.
- Record: Tap this to jump to the Record page quickly.
- Stop Time: Use this slider to adjust the stop time, or how long the track takes to stop playing after the pause button is pressed.
- Contour: Use this slider to adjust the slope of the crossfader curve. Slide towards the left for a smooth fade (mixing) or slide to the right for a sharp cut (scratching).
- Preview Volume: Use this slider to set the volume level of the track preview.
- FX Enabled: Tap this to enable or disable FX 1 and FX 2. When enabled, the FX selection and parameters will be shown under the track overview in Vertical Waveform View or at the bottom of the touchscreen in Horizontal Waveform View

Default Loop Settings
Loops on the Denon Prime players act differently to those found in rival players. These loop behaviours are customizable and changed to suit a DJ’s needs. The loop settings are found within preferences.
Default Loop Size
When loading a new track, the decks will default to a standard auto-loop length. Regardless if the DJ had shortened a loop to 1/2 beat in the last track, the unit reverts to a standard length set by this setting. Meaning a DJ can access their standard loop length immediately after loading a new track.
Smart Loops
Quantize moves the DJ’s button presses to the closest beat division, allowing them to stay perfectly in time. The feature is widely used and affects the performance pads, loops and loop rolls. There are cases when DJ’s will want Quantize off, usually when finger drumming.
Smart loops when enabled quantize the loops to the closest whole beat regardless of Quantize being active. This allows DJ’s who prefer to DJ with Quantize off still have accurate loops.
EQ Type Settings
The Denon Prime series players that include an inbuilt mixer such as the Prime 2, Prime 4 and Prime GO give the users the ability to change the mode of the EQ. The EQ has two settings to chose from, Isolator and EQ and these can be changed in the system preferences.
In EQ mode, when the EQ knobs are turned down the selected frequency band will be reduced in volume by up to 26db. This allows some sound to leak through still when fully turned down.
Isolator, in comparison, kills the sound of the selected frequency band when turned fully down. This means if all three bands (Low, Mid, High) are turned fully down, in Isolator mode no sound will be audible.
Certainly styles of music suit the different sounds produced by these modes with EDM and bass-heavy tracks suiting the Isolator. The frequencies killed to allow for easy swapping of kick drums and bass lines.