If you are using a Windows computer to DJ with, there are various settings we can tweak to maximise the computers performance. In this article we are going to show you five handy tips that you might not have been aware about, to streamline your machine for DJ applications!
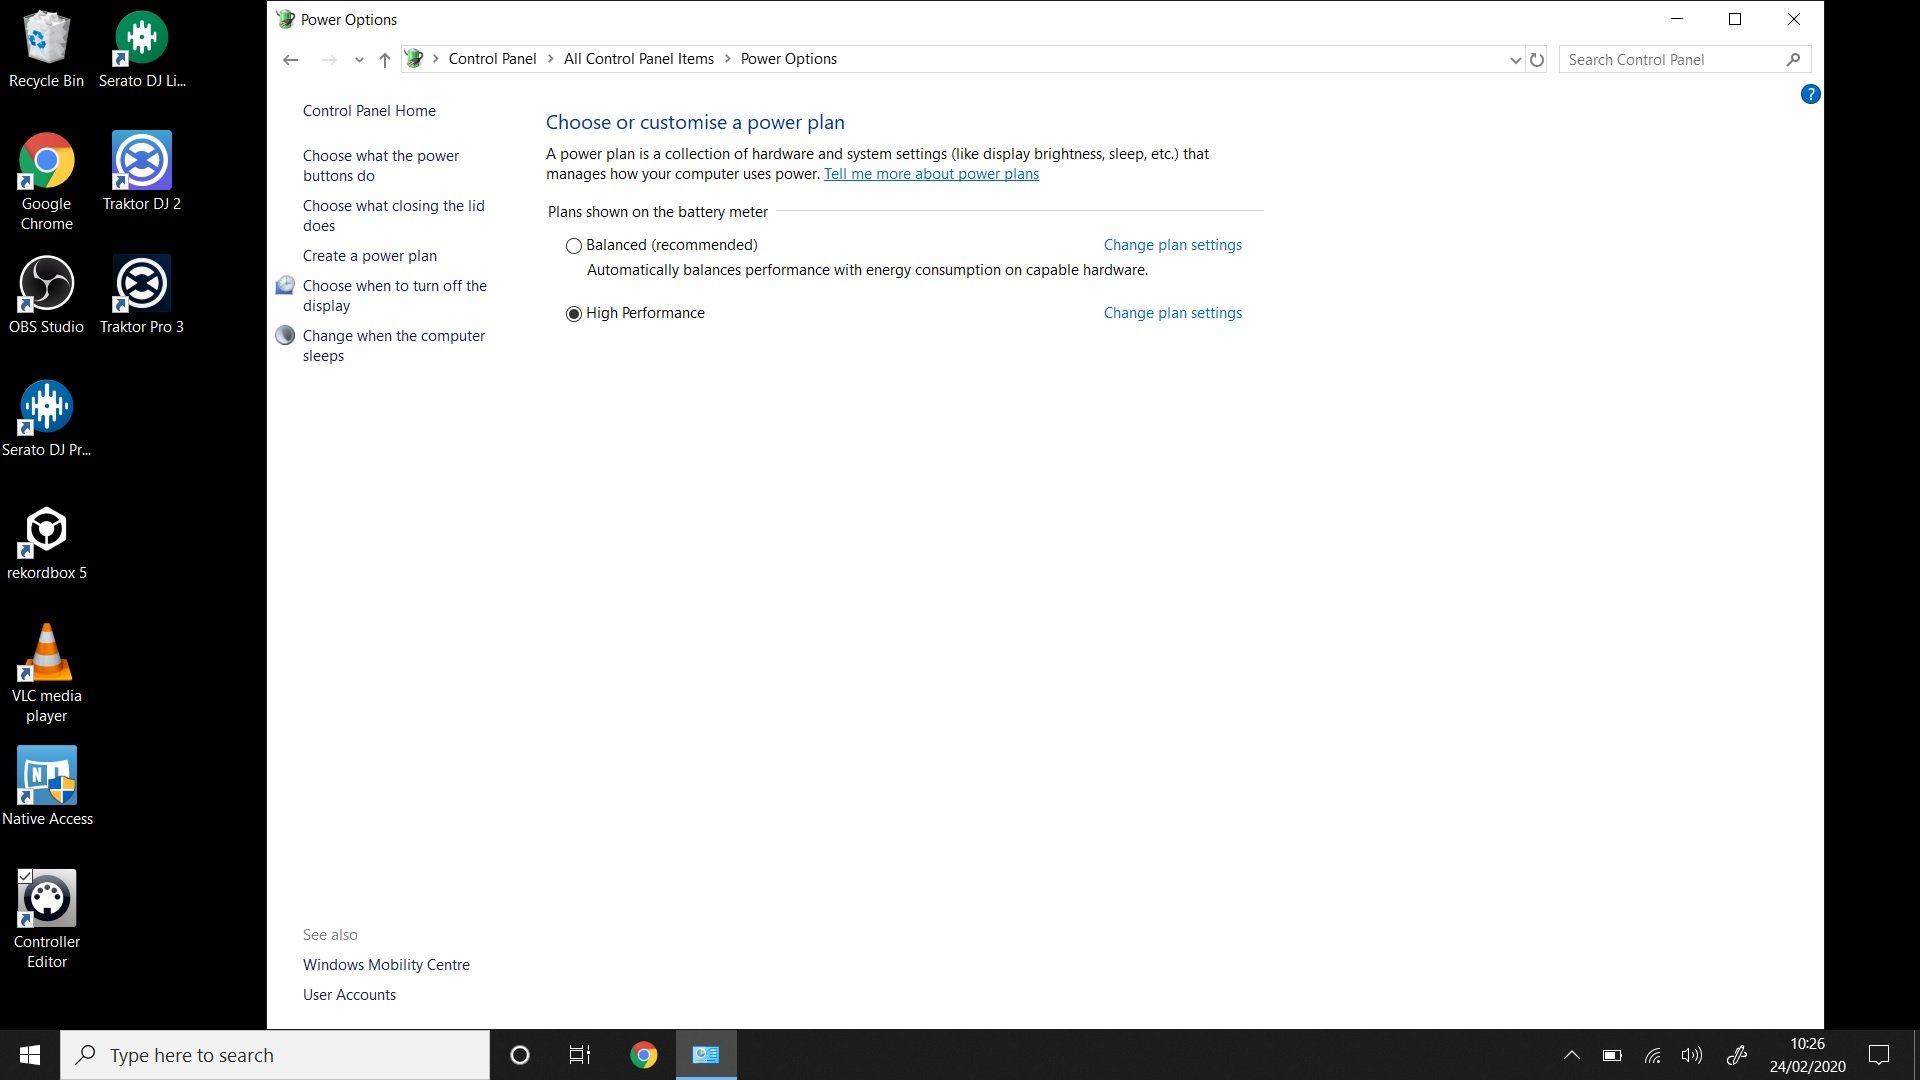
Optimise Power Settings
Most windows computers as standard will try to manage the performance to give the laptop the longest possible battery life. This often means the computer isn’t always running at it’s best performance, which isn’t ideal for our performances. It’s for this reason that we can change the settings of the power delivery to favour performance over battery life.
- Open Control Panel
- Select Large Icons in the top right hand corner
- Click on Power Options
- Select high performance (if you do not see high performance, see the guide below before continuing)
- Click on change plan setting
- Set the display’s sleep time as well as the computer’s sleep time to Never.
- Click on change advanced power settings
- Click the + next to Hard Disk, then click the + next to Turn Off Hard Disk After
- In the text field, type Never
- Click on the + next to Processor power management, then click the + next to Minimum processor state
- Type 100% in the text field
- Click Apply, then OK
- Click Save Changes
If you don’t have the option to select high performance you may need to enable it, to do this we have to change settings inside the registry editor. These are advanced settings so be careful not to accidentally change other values. You can make a back up of the Registry if you wish.
- Right-click on the Start menu button and choose ‘Run’.
- When the ‘Run’ prompt appears, type “regedit” (without quotes) and then press enter on your keyboard, or hit the ‘Ok’ button.
- In the left hand pane of the Registry Editor, navigate to HKEY_LOCAL_MACHINE\SYSTEM\CurrentControlSet\Control\Power
- Locate the item entitled CsEnabled, and double-click on it.
- In the next window that appears, change the Value data field from 1 –> 0.
- Click ‘OK’ to confirm your choice, then restart your computer.
- Open Control Panel.
- Select Large Icons in the top right hand corner.
- Click on Power Options.
- Click create a power plan.
- Continue from step 5 onwards.
Disabling Screen Saver
If you are DJ’ing for a long period of time and don’t touch your laptop you run the risk of the screen saver starting. The screen saver can cause DJ applications to drop out and lag so it’s always best practice to disable the screen saver.
- Right-click on your Desktop and click Personalise
- Click on Lock screen in the left pane, then click the Screen saver settings link in the right pane.
- Select None, then click OK
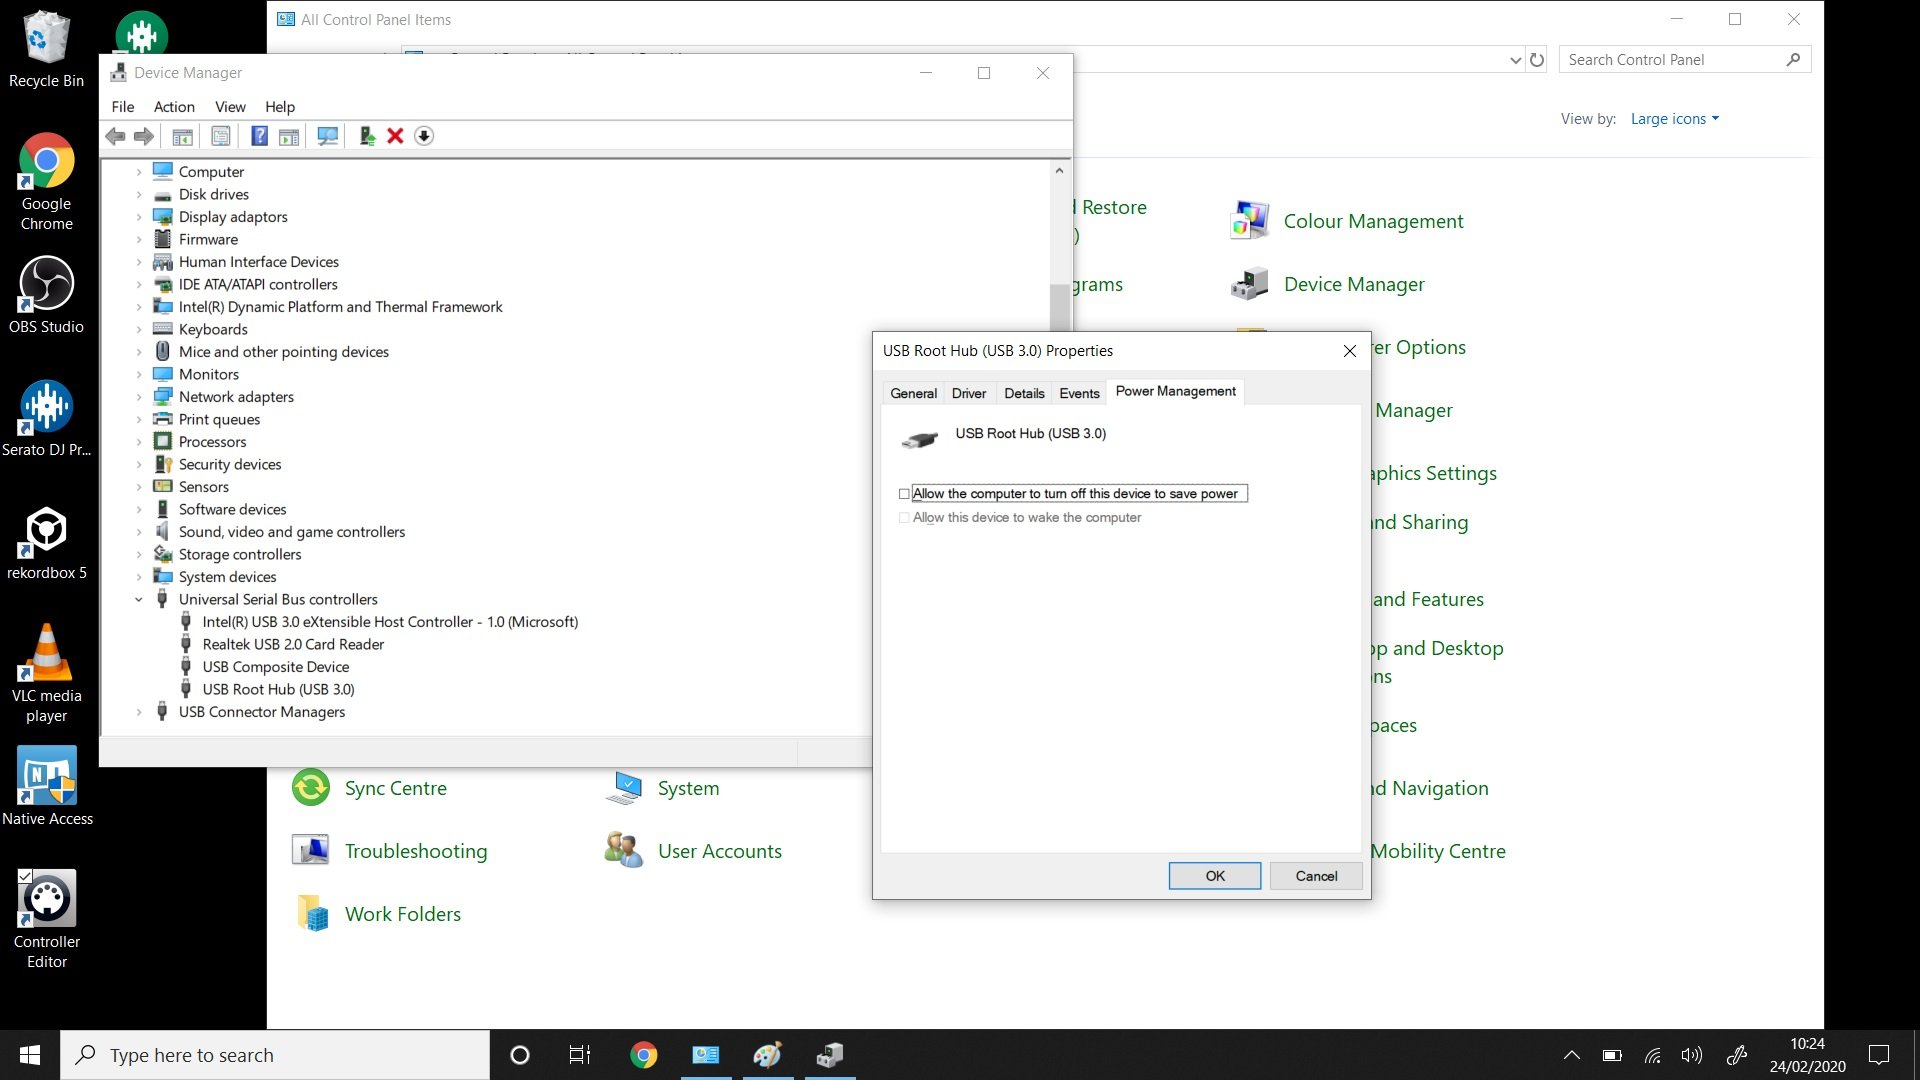
USB Power Management
Windows as default will monitor and control the power sent over any USB connection. This monitoring takes up bandwidth over the connection from your computer to the decks. By disabling the USB power management, we free up that bandwidth to allow it to be used for more important data transfers, such as faster audio latency.
- Open Control Panel
- Click on Device Manager
- Double-click on Universal Serial Bus Controllers
- Double-click on the first USB Root Hub item
- Click on the Power Management Tab
- Uncheck the box that says “Allow the computer to turn off this device to save power” and click OK
- Do this for all USB Root Hub and Generic USB Hub items
Optimise the Hard Drives
Windows will often try and compress data on your hard discs. This saves storage space but makes your drives slower for reading and writing audio files. For this reason we want to ensure Windows isn’t compressing data on any hard drive that we are playing music from or recording audio to. Make sure you repeat this step for any drives you are using with DJ software as some computers feature more than one.
- Navigate to “My PC”
- Right click on the hard drive that you use to store your audio and choose Properties
- Make sure “Compress this drive to save disk space” is unchecked
- Click Apply, then OK
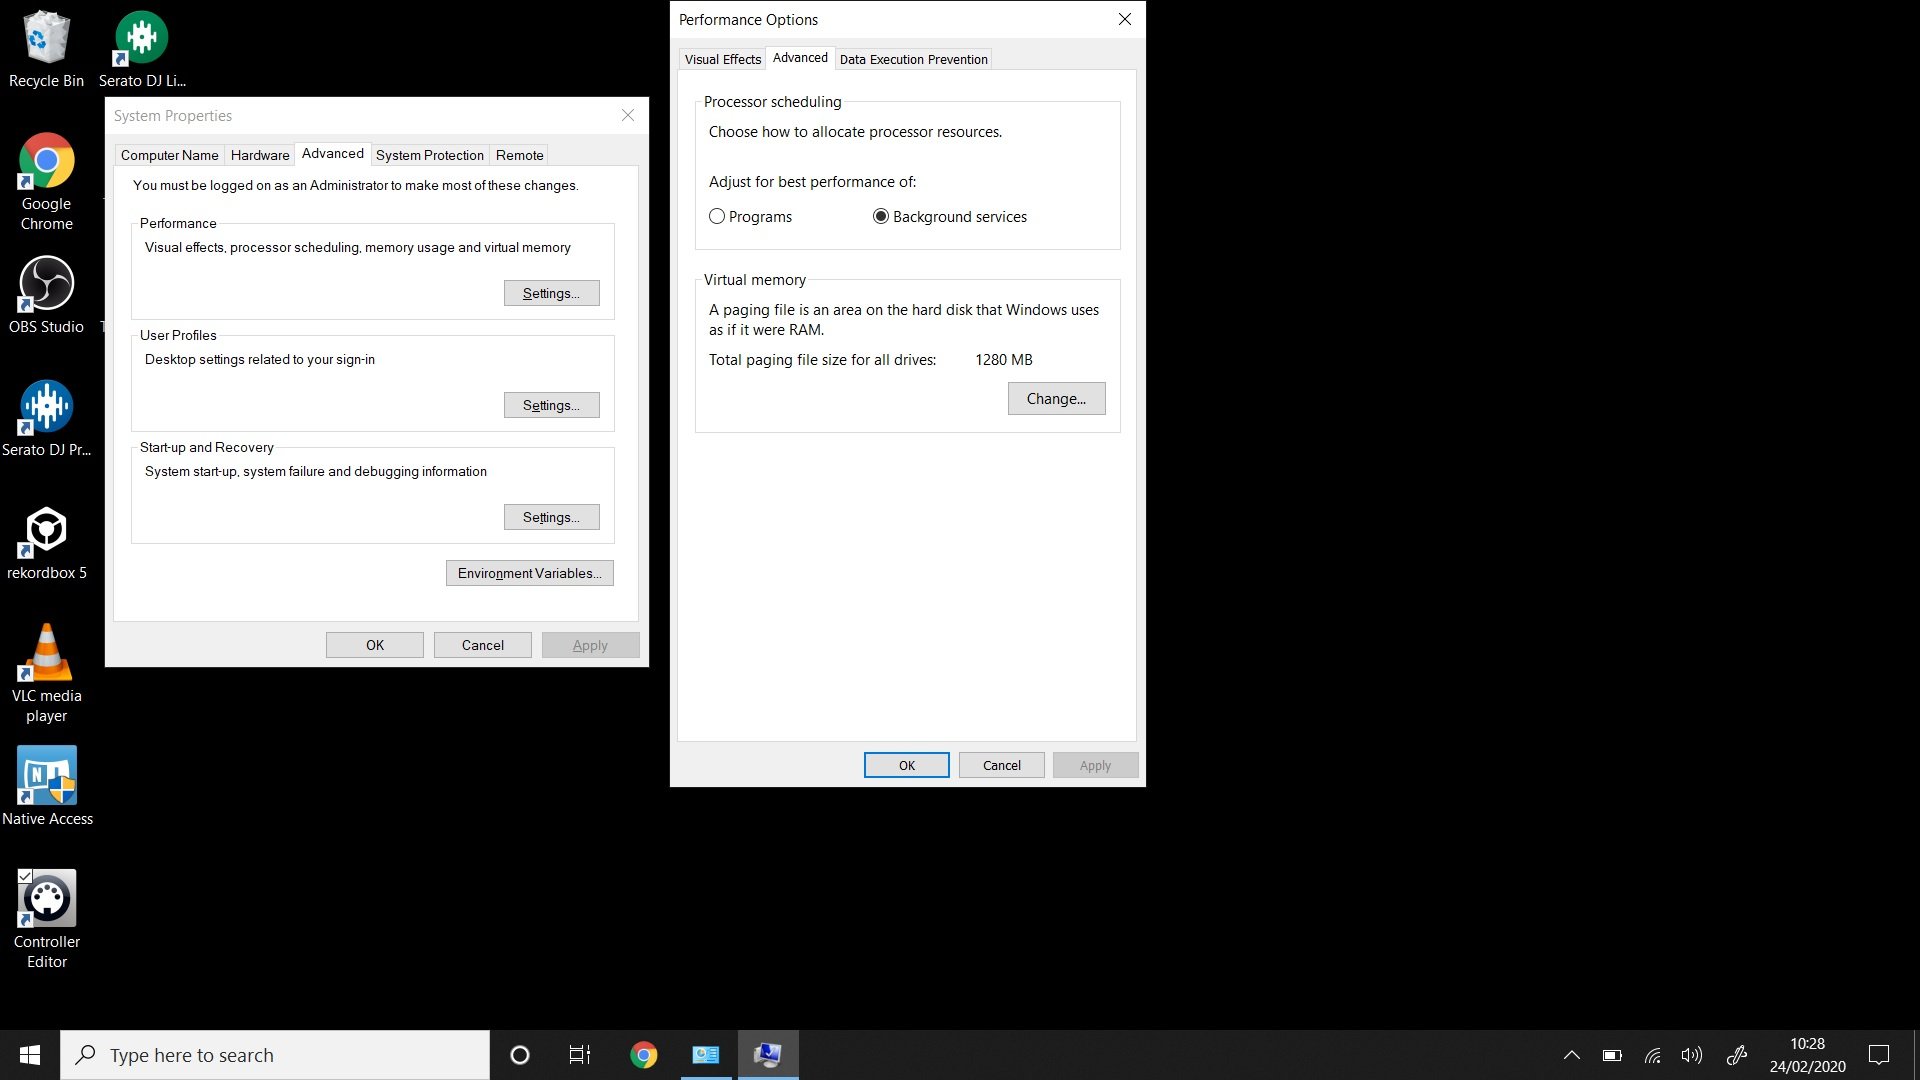
Processor Scheduling
The processor in your computer is much like a human brain, it’s responsible for making all decisions and telling other parts of the computer what to do. Without a processor, the computer would never run. Depending on the task in hand, the processor will decide what to prioritise. The default setting for the processor is to focus on the active programmes running on the PC. However, for audio related tasks we can actually boost the performance of the audio drivers by changing the processor to focus on background tasks. This setting can change the performance of your PC in other programmes, but for DJ and Audio related tasks this is a great change to make. If you do notice a step down in performance with other applications simply change the setting back.
- Open Control Panel
- Click on System
- Select Advanced System Settings
- Click the Advanced Tab
- Under Performance, click the Settings button
- When the Performance Options window pops up, click the Advanced tab
- Under Processor Scheduling, select Background Services
- Click Apply, then OK
- Click OK to close System Properties
- Restart your computer for the changes to take effect
Video Guide
Do you want to learn more DJ skills?
Here are some of our best selling courses!