Learning to produce in Ableton isn’t about knowing all the hundreds of different keyboard shortcuts or super nerdy in-depth features.
It’s all about being comfortable and efficient enough that you can get the ideas down out of your head quickly and simply enough, and actually turn them into real music.
If you’re a DJ, you already understand music. You know how tracks work, how the energy changes, and what makes some tunes work on a dancefloor.
The challenge is learning how to turn those instincts into finished ideas, rather than getting stuck in loops or constantly browsing menus and settings.
That’s what this guide is here to help with. We’ve put together a few of our top tips to help you get the most out of your limited production time and finish more music.
1. Build a Go-To Template
The fastest way to kill an idea is to waste twenty minutes setting up your project. You open Ableton feeling creative, then get bogged down building the same drum rack, adding the same effects, and colour-coding tracks from scratch.
Spend a bit of time creating one project that has your usual setup ready to go:
- Group your drums and instruments
- Load your return effects
- Label everything clearly
- Keep a few of your favourite sounds or synths preloaded
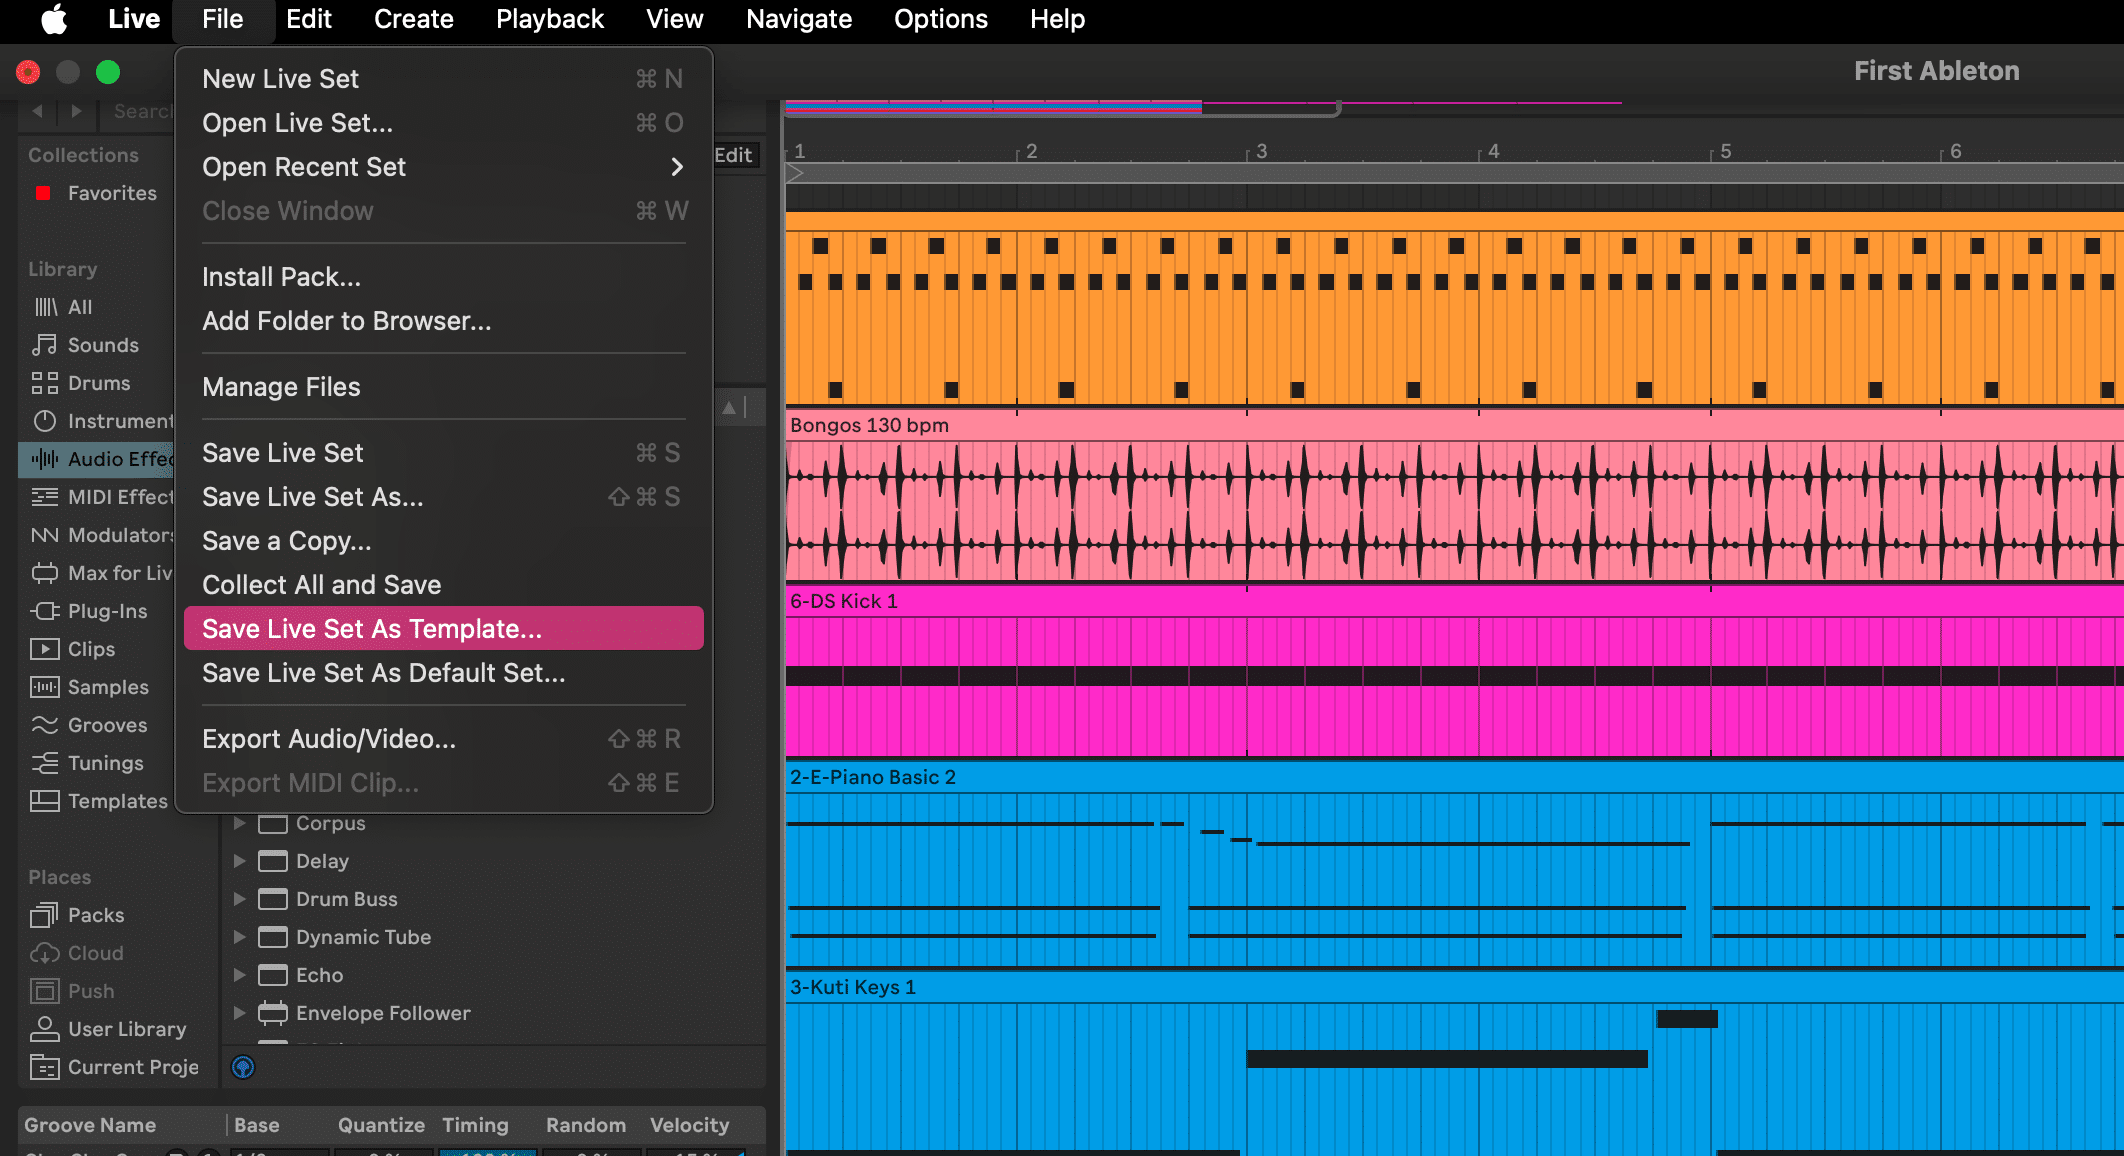
Once you’ve got everything laid out how you like it, go to File > Save Live Set as Template.
That way, when you open Ableton next time, you can start writing within seconds. It’s the same as when you’ve already got your decks set up, ready to go, you’re more likely to practice and get more out of the session than you would if you had to set everything up from scratch.
2. Bounce Early, Finish Faster
Most producers overthink their projects. It’s super easy to sit and tweak a kick drum for hours and feel like you’ve made some progress. But, in truth, you’ll progress a lot faster once you start committing to sounds.
As soon as a part feels right, bounce it to audio. This simple step does two big things. It locks in your decisions so you stop second-guessing yourself, and it opens up new ways to be creative. It can be easier to cut up, rearrange and manipulate audio in ways that you wouldn’t necessarily do with MIDI parts.
You can do this by:
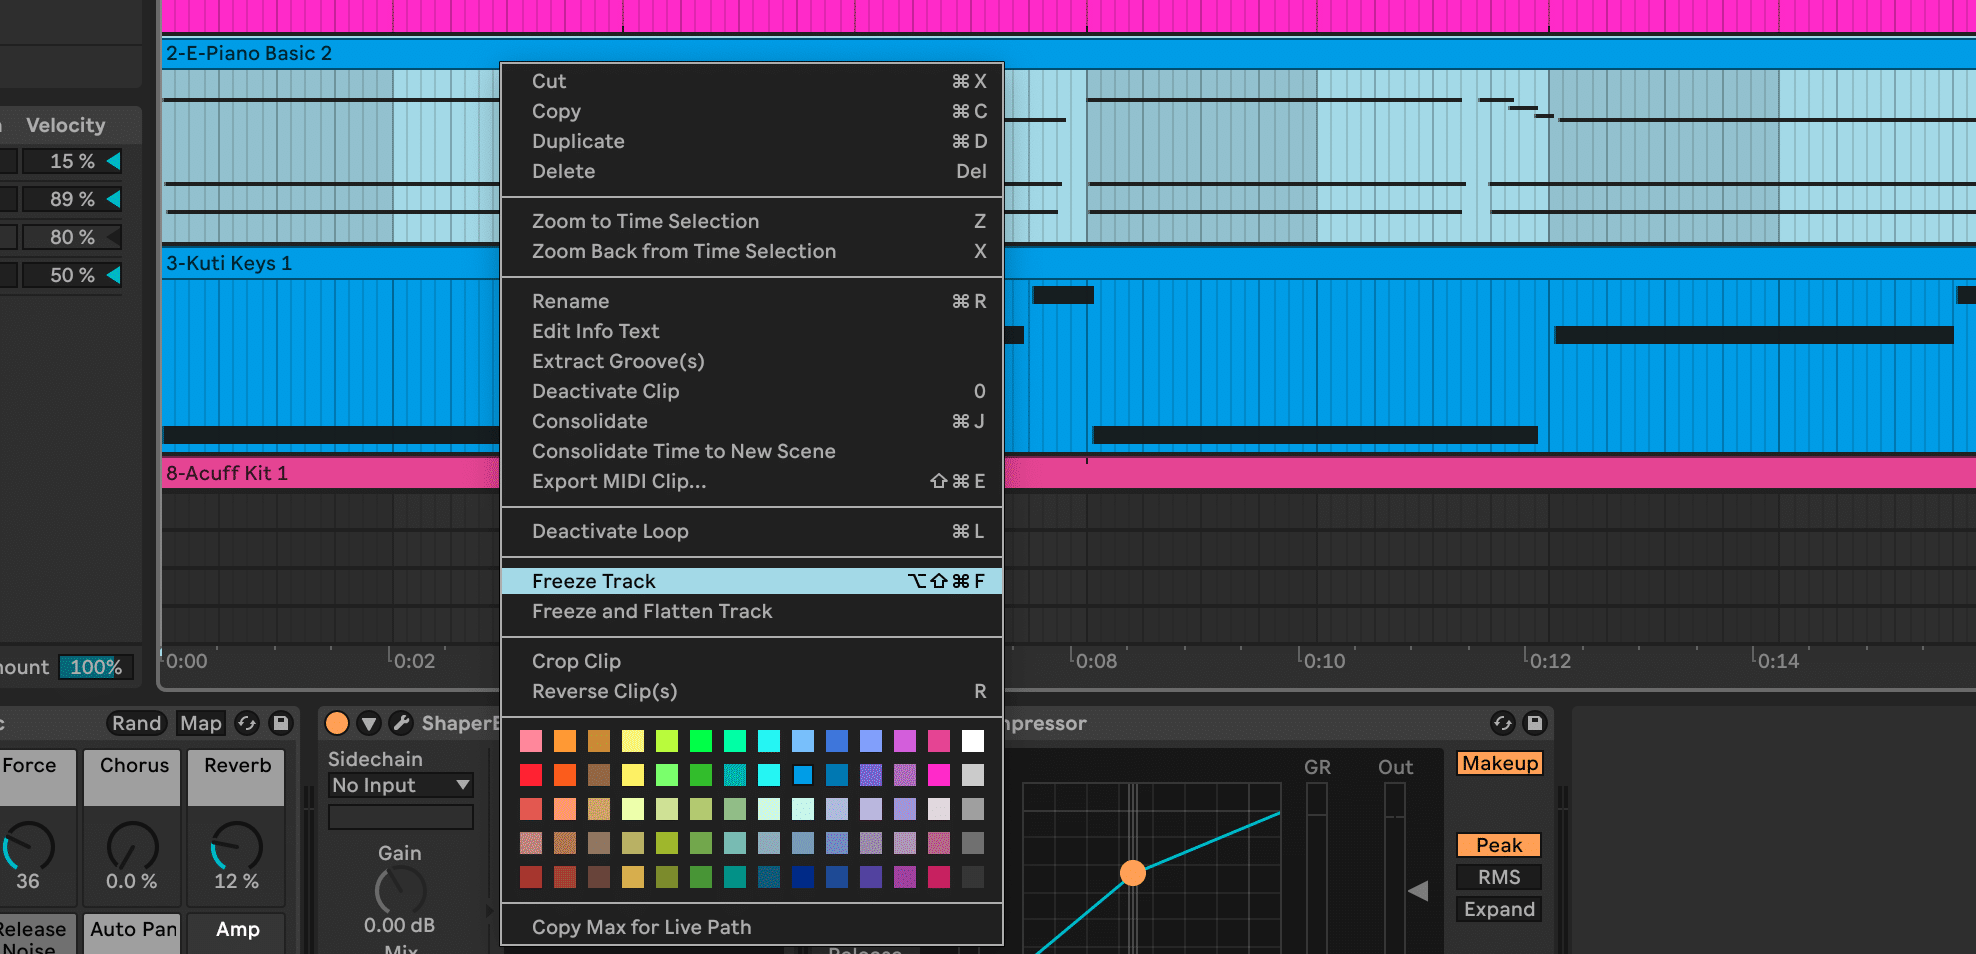
- Freezing the track (right-click and select Freeze Track) to save CPU
- Flattening it to turn it into audio permanently
- Or creating a new audio track, setting its input to Resampling, and hitting record
Think of it like having a hardware synth or drum machine, like all those great producers used back in the day. You might spend some time fiddling around with the settings to find something you like, but then you record that hardware into audio, and it’s set.
By bouncing or freezing things to audio, you’ll also save your CPU, which keeps Ableton running smoothly, and is especially important if you’ve got a lower spec computer.
3. Name and Colour-Code as You Go
This one might sound boring, but it’ll make your life a whole lot easier. Most of us will be familiar with the feeling of going back to an old project and seeing twenty tracks with names like “Audio 3”, without really knowing what’s going on.
While you’re writing, take a few seconds to name each track and give it a colour. Group things logically, with all your drums in one section and melodic parts in another. It makes it so much easier to find what you’re looking for later, and you’ll be able to focus on the music instead of searching for what you want.

If you’re coming from DJing, this will probably feel familiar. The same way a tidy library makes sets flow better, an organised project keeps your head clear in the studio. It’s a small discipline shift that gets you in the productive headspace to get more done.
4. Record Automation
Automation is what gives electronic music its character. Without it, even the best loop can sound mechanical. Those small shifts in parameters are what create movement and build emotion, just like when you move the EQs or effects during a DJ mix.
Rather than drawing automation with a mouse, record it live. In Ableton:
- Click the Automation Arm button near the top right of the screen
- Press Record and start adjusting parameters as the track plays
- Move knobs on a MIDI controller, twist a synth filter, or drag controls with your mouse
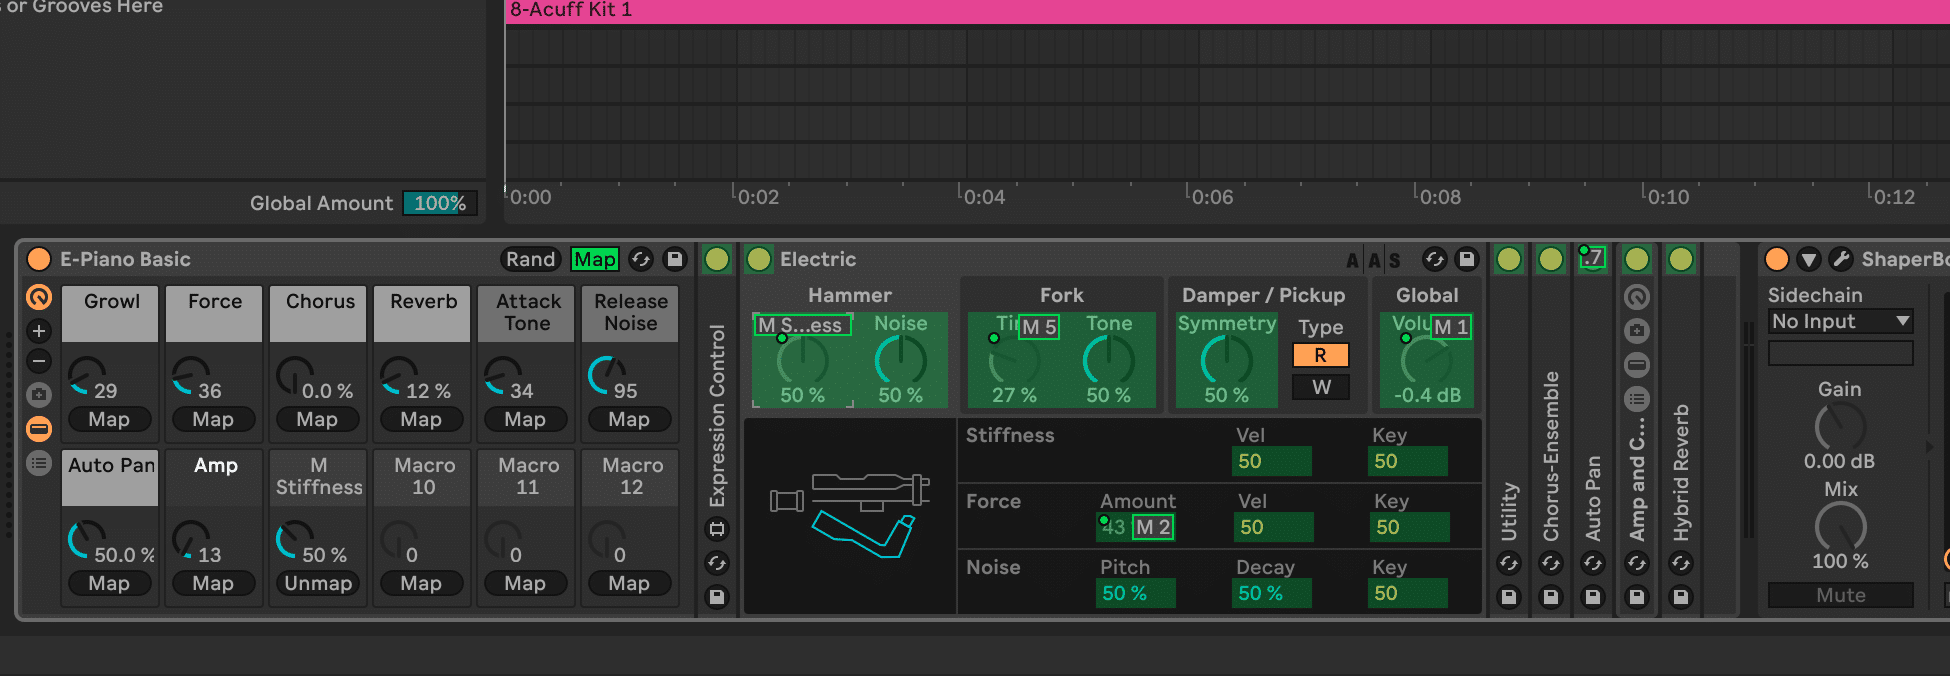
Try setting up macros too. These let you control several effects at once, so one knob can open up your filter while increasing reverb and delay. It’s a quick way to build tension or add depth to transitions, much like the instinctive moves you make when DJing.
Recording automation like this makes your track feel more human. Each small variation in timing or pressure adds personality that’s hard to fake by drawing lines. You’re reacting to the music rather than programming it, and that connection comes through in the sound. It’s the same touch and timing that brings life to a good mix, now captured inside your production.
5. Reference Commercial Tracks for Structure and Mix
When you’re working on your own music, it’s easy to lose track of the bigger picture. Bringing a song you know into your Ableton project gives you a clear reference point for both structure and sound.
Drag a track you’re familiar with into Arrangement View on a new audio channel. Then:
- Right-click above the timeline and choose Add Locator to drop markers for sections like intro, breakdown, drop, and outro
- Flip between the reference and your track to compare how the structure and energy flow
- Check how long each section lasts and how the transitions feel
Once you’ve done that, adjust the volume of your reference to roughly match your project and start listening critically.

When you do, focus on:
- Low end: how the kick and bass sit together
- Midrange: clarity and balance between instruments or vocals
- Highs: brightness without harshness
- Space: how much room and reverb do key elements have
You’re not trying to copy it exactly, but to get a sense of how a professionally mixed tune should sound.
Over time, this practice sharpens your ear. You’ll start to recognise how professional tracks feel and sound, and that awareness naturally carries into your own mixes. It’s the same listening skill you use behind the decks, just applied to your productions.
6. Bounce and Revisit Often
It’s easy to lose perspective when you spend too long inside a project. The more you hear something, the harder it becomes to tell whether it’s actually good or you’re just used to it. Bouncing rough versions helps you step back and listen with fresh ears.
When a track feels like it’s starting to come together, export it. It doesn’t need to be mixed perfectly or even properly finished. Just render a version that captures that moment in time.

Then walk away for a while. Listen to it later on headphones, in your car, or through speakers in a different room. You’ll immediately start hearing what’s working and what isn’t. That distance and a change of space really help give you honest feedback that’s impossible to get while you’re still in the zone in Ableton.
Bouncing also helps you build momentum. Instead of endlessly reworking one idea, you’ll end up with a folder full of playable versions to come back to. Some might grow into finished tracks. Others might just give you a great loop or texture to sample into something new.
The point is that you’re always moving forward and finishing stages of the process.
DJs like us especially know how valuable this sort of perspective can be. You don’t really know how a tune feels until you hear it in the mix. Treat your own tracks the same way. The more often you bounce, listen back, and revisit, the faster your ear will develop and the more confident you’ll get at turning ideas into music that actually works beyond your studio.
Ready to Take the Next Step?
Producing shouldn’t feel like a technical exercise or a chore. Simply nailing down a few workflow tips can really make music-making feel like a much more creative and free exercise, and get rid of loads of the barriers that stop us finishing tracks.
And once you’ve got a rhythm for working quickly, that’s when you’ll really level up your output. If you’re ready to take that next step, build your own DJ edits, remixes and original tracks, our DJ to Producer Course breaks it down in detail. You can watch a free lesson taken straight from the course and download a Toolroom sample pack to start experimenting for yourself