
A mashup is when you blend two or more songs to make something new, often by taking the vocal from one track and putting it over the instrumental of another. Most DJs do this sort of thing live at some point, mixing an acapella on one deck over a beat on the other.
Doing it on the decks can work, but it’s not always perfect. Making mashups in Ableton lets you get everything just so and perfect all those little details and timings, so it’s ready to drop into your sets.
Mashups sit somewhere between an edit and a remix. An edit rearranges a single track to make it easier to mix. A remix rebuilds a song with new production. A mashup keeps the original material but combines songs in a way that sounds fresh. They’re simple to make, sound great in a set, and are a good first step into production.
Choosing the Right Songs
The foundation of any mashup is picking the perfect tracks to make it work. Even with clever production, if the tracks don’t naturally fit, it will always sound forced. Two main factors matter here: key and tempo.
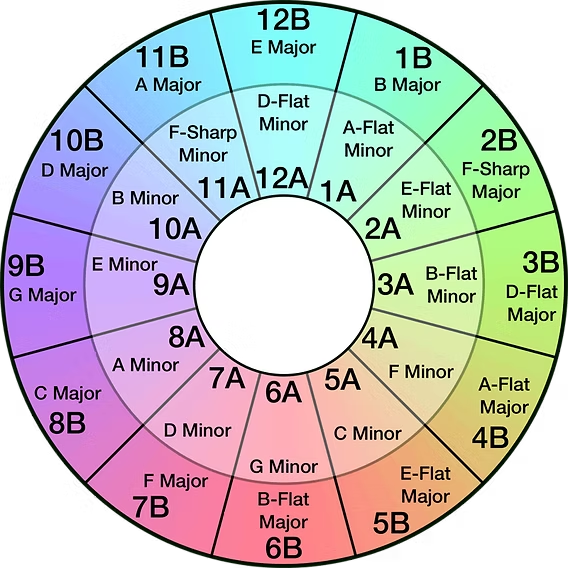
- Key: Songs in the same key will blend smoothly, but you can also mix between related keys on the Camelot wheel. Tools like Mixed in Key or Rekordbox can quickly show you this. You can always pitch shift one to match, but be cautious about overdoing this more than a couple of semitones.
- Tempo: Try to pick tracks within five to ten BPM of each other. That way, you’re not stretching them too far from how they were meant to sound, which can cause audible artefacts.
Getting Vocals and Instrumentals
To create a clean mashup, you need the right building blocks. The easiest route is finding official acapellas or instrumentals, as these are studio-quality and ready to use. Labels sometimes release them, especially for DJs to use, and you can often find them on the same download stores as the official releases.
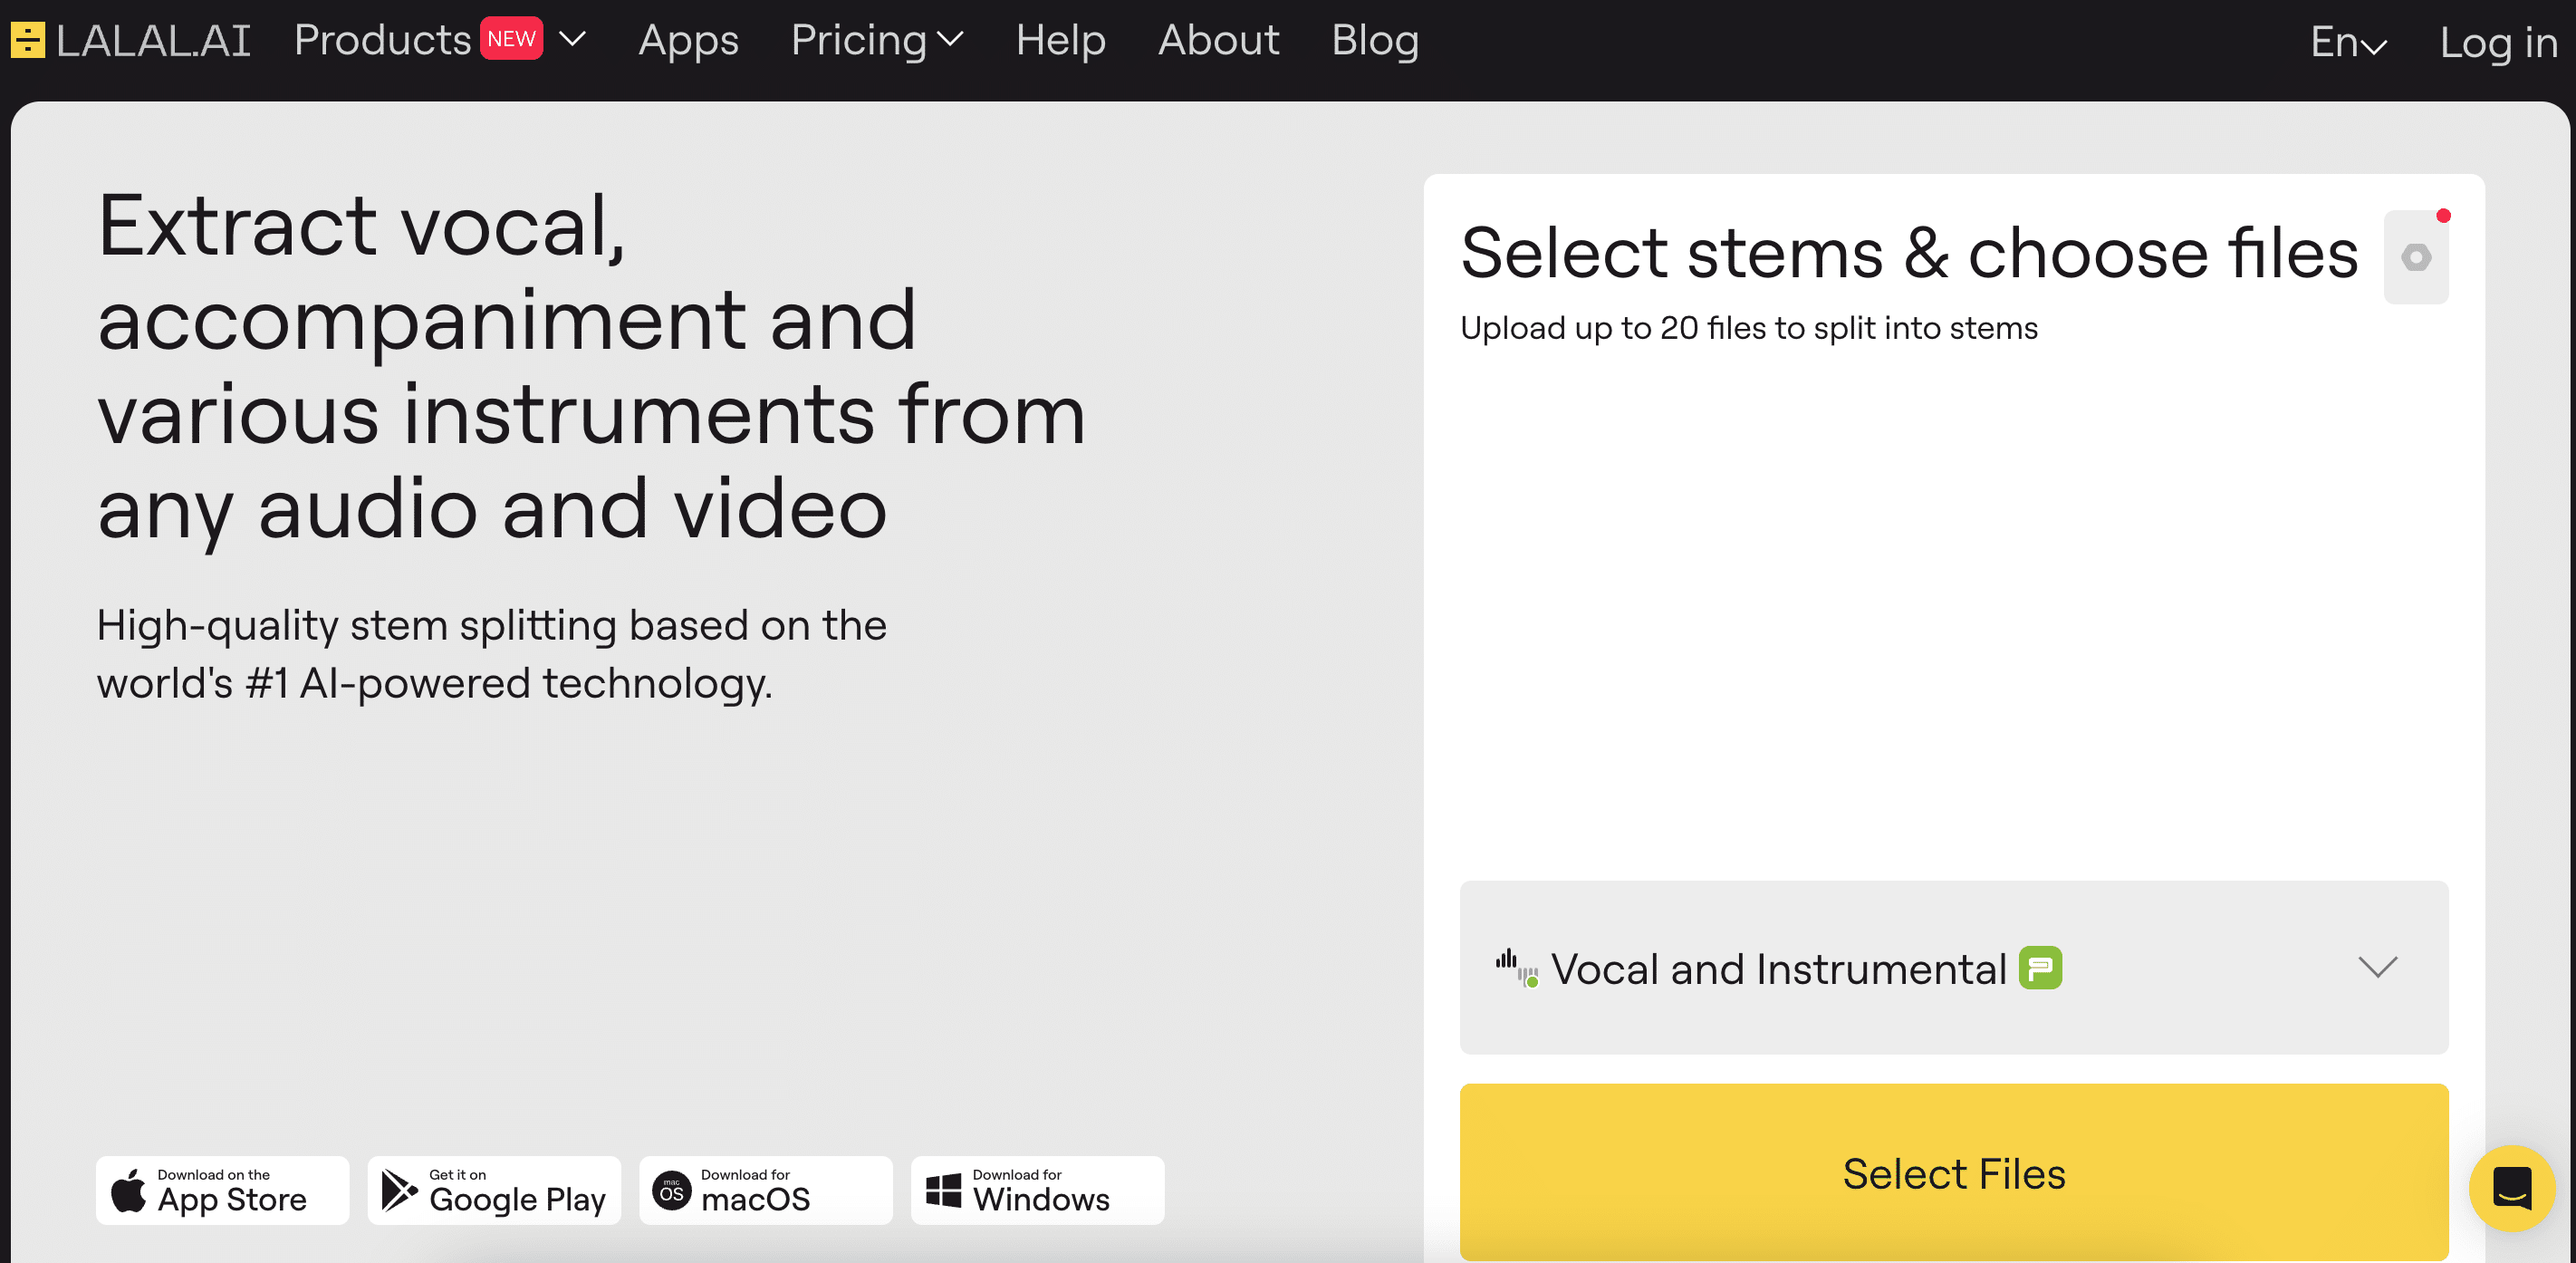
If you can’t find them, you can separate the stems yourself. Ableton Live 12.3 (now available in public beta) includes a Stem Separation tool that can isolate vocals, drums, bass and melody super easily. There are also plenty of other online tools available, such as LALAL.AI, which will do a similar job inside your browser. These tools have become impressively accurate, and can give you clean acapellas even when an official version doesn’t exist.
Importing and Warping in Ableton
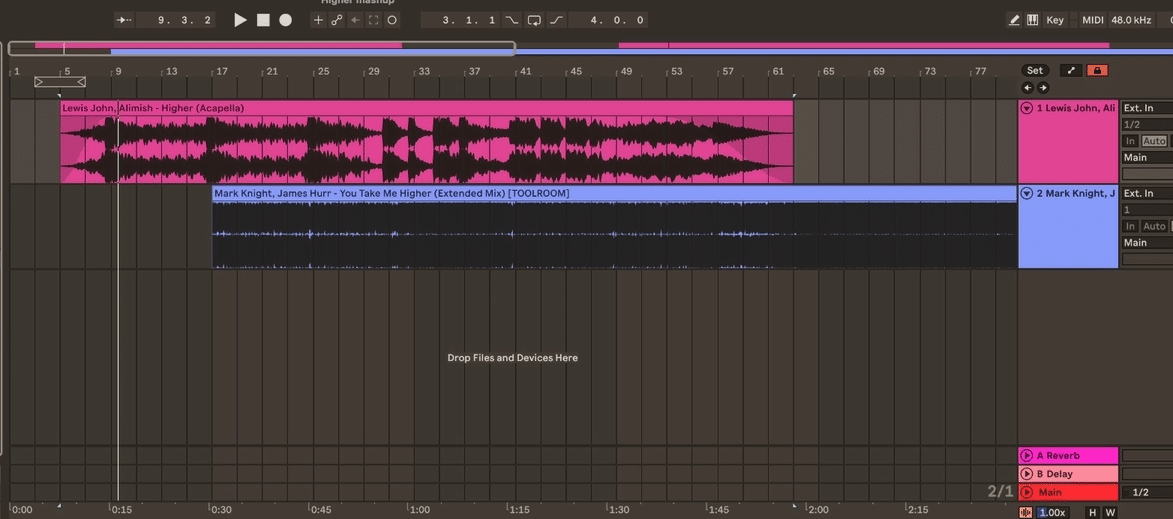
Once you’ve got your tracks, drag them into Ableton Live. Use Arrangement View so you can see both songs running along the same timeline. Place the instrumental on one audio track and the acapella on another, then rename them to keep things organised.
Warping is what keeps your mashup in time. Ableton usually analyses and warps tracks automatically, but it’s worth checking everything before you start:
- Double-click the clip to open it in Clip View.
- Turn on Warp.
- Check the BPM that Ableton has detected matches the track’s real tempo. If it’s wrong, type in the correct BPM.
- Find the first downbeat and drag its warp marker so it sits exactly on the grid.
- Scroll through the rest of the track to make sure the timing stays tight. Add an extra marker or two if you notice anything drifting.
Layering the Vocal
This is where the mashup starts to take shape. Once both tracks are warped and in key, drag the acapella into Arrangement View and drop it above the instrumental.
Start by finding a section that feels right for the vocal to sit in. Often, it’s good to try and experiment with placing your vocal over different parts of the instrumental track to see where it works best. You want something that gives you enough space for things to fit in without too much clashing. This may well line up with your chorus vocal going over the main chorus/drop of your instrumental, but don’t feel as though you have to do that.
Zoom in on the waveforms and make sure the vocal lines up cleanly with the beat. You want every phrase to land naturally with the groove. This may need you to go deeper back into the warp and line the beats up more individually if it starts veering off.
When the timing feels tight, start shaping the arrangement. You don’t always need the full vocal line and sometimes things like looping a short section or just dropping in a couple of lines can be more impactful. Move different clips around and listen for what works where.
Ableton makes this part quick. Use Split (Cmd/Ctrl + E) to cut the vocal into smaller phrases, Duplicate (Cmd/Ctrl + D) to loop bits, and use the faders on the edges of the clips to add short crossfades so things blend more smoothly.
Polishing the Mashup
When you’ve got the structure working as you’d like, now it’s time to get it a bit more polished and professional-sounding.
Start off with the EQ. It’s generally a good idea to roll off some of the low end of the vocal track. This clears space for the low-end elements of the original track and stops things from getting too muddy. You may also want to carve out a bit of space in the original track to help the acapella fit in. Try taking out a bit of mids from the original and listen out for where there’s a clash. Don’t overdo this, though, and many tracks might not even need it.

A little bit of reverb and/or delay can help give the vocal a sense of ‘space’ and make it feel more like a part of the track, rather than something that’s just sitting on top. Keep it light to avoid washing out the sound and losing the details.
Finally, automate the volume so the balance stays consistent. In Arrangement View, press A to show automation lanes. You might need to raise the volume of the acapella in quieter sections and bring it down a bit when things are too busy. Just listen out for what sounds right.
How to go from DJ to Producer
If this has made you want to go further with your own music, now’s the time to start. Our new course is built to help you move from DJ to producer with step-by-step lessons that show how to create DJ edits, mashups, remixes and your own original tracks in Ableton Live.
You can watch a free lesson taken straight from the course, and grab a free Toolroom sample pack below.
Do you have a course or tutorials on how I can make mashups in Rekordbox with my DDJ-FLX4?
In the FLX4 Pro course, we cover using stems to do mashups etc