The one thing that makes you stand out as a DJ more than anything is the music you play. And the biggest way to really set yourself apart is to create your own unique edits of tracks.
A DJ edit is a rearranged and reworked version of a track that’s designed to be more DJ-friendly. Unlike a remix, edits don’t change the core vibe of the song, or add too much new stuff. Instead, it’s really all about rearranging the structure to work better and beefing up the sound to work better on the dancefloor.
Edits are also a great first step into music production because they introduce all the key concepts behind music production in a way that’s much more accessible and simple than just making your own songs from scratch.
In this guide, we’ll walk you through step-by-step how to make simple DJ edits in Ableton Live so you can transform any tune into a dancefloor hit.
Step 1: Import Your Track into Ableton
Once you’ve decided on your track, it’s time to get it into your project. First off, find out the original key and BPM of your track and set your project to match it. You can usually find this info with a quick Google, digital record stores or, failing that, you can try an online BPM tool.
When you’re making an edit, the quality of the track you use is still vitally important, just as it would be for any DJ tune. YouTube rips and low-quality music are still going to sound bad, no matter what you do to them later.
To get your track set up in Ableton:
- Open Ableton Live and switch to Arrangement View (Tab key).
- Drag and drop your chosen track into an empty audio track.
- Find the first beat of your track and zoom right into the start of the note (there will usually be a bit of empty space at the start of the audio file).
- Line up the start of your audio track with bar 1 of your project (1.1.1).

Step 2: Warp the Track (Tempo Adjustment)
A lot of older tracks, like the classic disco and soul records that you might want to edit, aren’t made to a grid in the same way that modern electronic music is. That means that the tempo will vary subtly throughout the track as the drummer slightly speeds up and slows down.
This is, of course, part of what gives these old records their charm, but it can be a real pain when you’re trying to mix them as the beats are constantly moving in and out of time as you’re lining them up with another track.
To fix this, we need to use Ableton’s Warp Function. This allows you to grab a bit of the audio clip and snap it to the grid, and everything else will warp to match it. Here’s how to do it:
- Double-click the audio clip to open the waveform.
- Enable Warp in the Clip View.
- Right-click the first downbeat and select Set 1.1.1 Here → Warp From Here (Straight).
- Adjust warp markers if the track drifts out of sync.
- Now everything’s warped to the grid, you can adjust the tempo of the project to speed up or slow down the track.

The main thing to be aware of here is that it’s really easy and tempting to overdo this and just grab every beat of the bar and snap it to the grid. But by doing this, we’re losing a lot of the original groove that made these tracks so great in the first place.
You’re much better off just grabbing the start beat of every 2-4 bars and snapping that to the grid. See how that sounds compared to the metronome, and if some parts still sound off you can go in more detail.
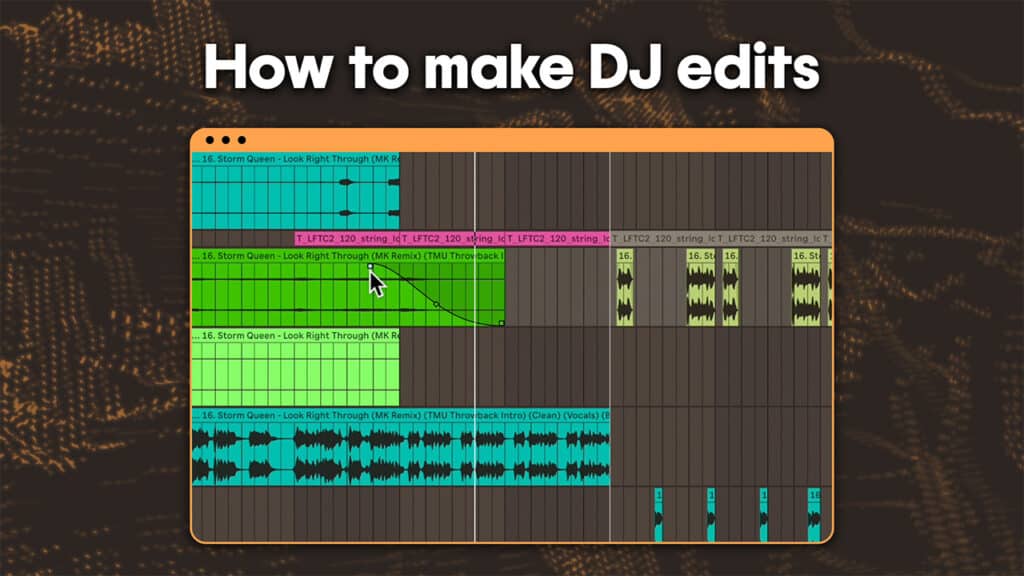
Step 3. Cut and Rearrange Sections
With everything nicely lined up on the grid, we can chop it all up. This is where we can start to get creative with our track and turn it into something a bit more unique and DJ-friendly.
Think about why your track doesn’t currently quite work as you’d like it to in a DJ sense. Imagine how it would work if you dropped it in a set in its current form and what might be lacking. Maybe the intro or outro isn’t long enough to properly mix. Maybe you want to extend the breakdown section a bit, or you think the guitar solo’s not going to translate well to a dancefloor.
Here’s how you can rearrange the structure to make it your own.
- Use the Split command (Cmd+E / Ctrl+E) to slice the track at key points (e.g., before/after breakdowns).
- Delete or drag sections around to create a new structure.
- Loop instrumental sections to create a new intro or outro.
- If needed, add a crossfade to smooth transitions.

Some of these transitions between newly made sections may sound a little janky right now, but we’ll get on to some ways to smooth that over as well as make them sound a bit more dance-friendly.
Step 4: Add Extra Elements
Drums
A lot of what makes proper dance music and DJ edits stand out from more regular pop music and old stuff like disco is the way the drums hit. This is super easy to fix, however, as we can simply layer some new drums right on top of the old ones to really beef them up.
Start off with the kick. This is what really gives dance drums their impact, and getting it right is crucial.
- Add in a new track in for your kick drum
- Use MIDI to draw in a pattern for how you want it to play.
- Copy this across all the sections you want the kick in.
Once you’ve got this hitting right, you can move on to other drum elements in a similar way. Try adding in a new snare or clap on the offbeats to bring out a more housey flavour, or you could add in some shaker or percussion loops for a bit more groove.
How much and what you add at this stage is purely up to you and the sort of sound you’re after. There are lots of different sounds and instruments already inside Ableton, or you can explore a library like Splice to find even more.
Risers
You might also want to add in some risers to help build tension, and there are plenty built in Ableton’s sound library to choose from. Similarly, adding things like crashes, impacts, and downlifters can be great at the start of sections for a bit more hit and to help smooth things over.
New instruments
Adding in extra instruments like a new bassline can be tricky when you’re just doing an edit and you’re working with the original track rather than stems, where things start to tip over into remix territory. If you’re just layering new stuff on top of the existing track, it will most likely sound very messy.
That said, there may still be times when there’s space in your track to add new elements. For example, you could add a pad or drone into a breakdown that might be a bit sparse, or a short chord stab into an existing groove. Just remember that here less is more.
Effects
Effects are a great way to bring your track to life and help give it a bit more energy. To start off with, think about the sort of things you might do if you were DJing this track, and you can start off by replicating some of what you’d do on the mixer right here in Ableton.
For example, you might want to add some filter rises or modulation, such as a flanger, in the build-up sections. Or you might want to add reverb during sections to give some space and to help smooth over the transitions between sections.
Step 6: Export Your DJ Edit
Once you’re happy with your arrangement, it’s time to get it out of Ableton and into an actual audio file you can use for DJing or upload to somewhere like SoundCloud.
Here’s how to do it:
- Select the track region in Arrangement View.
- Go to File → Export Audio/Video.
- Export as WAV or AIFF at 44.1kHz, 24-bit.
- From here, you can work with it in DJ software, like you would any other track.

How to go from DJ to Producer
If this has got you inspired to start making your own music, you might be wondering about where to go from here. We’ve just put out a new course that’s designed to take you from DJ to producer with clear guided tutorials that will break down how to make DJ edits, remixes and original tracks in Ableton Live.
You can check out a free lesson taken straight from this course, as well as a free Toolroom sample pack below:
I really appreciate you all sharing these steps as this was fun for me to read! If I may ask, would it be possible to translate this process from Ableton to Logic Pro? That is the main DAW that I work with and I’m in a financial position right now to not need to pay for two DAWs.
Yeah all of this should work in Logic just fine (Logic’s my main DAW of choice too). The main difference is how the warping works where you’re using Flex Time instead.