
Five top tips to help you get the most from your controller!
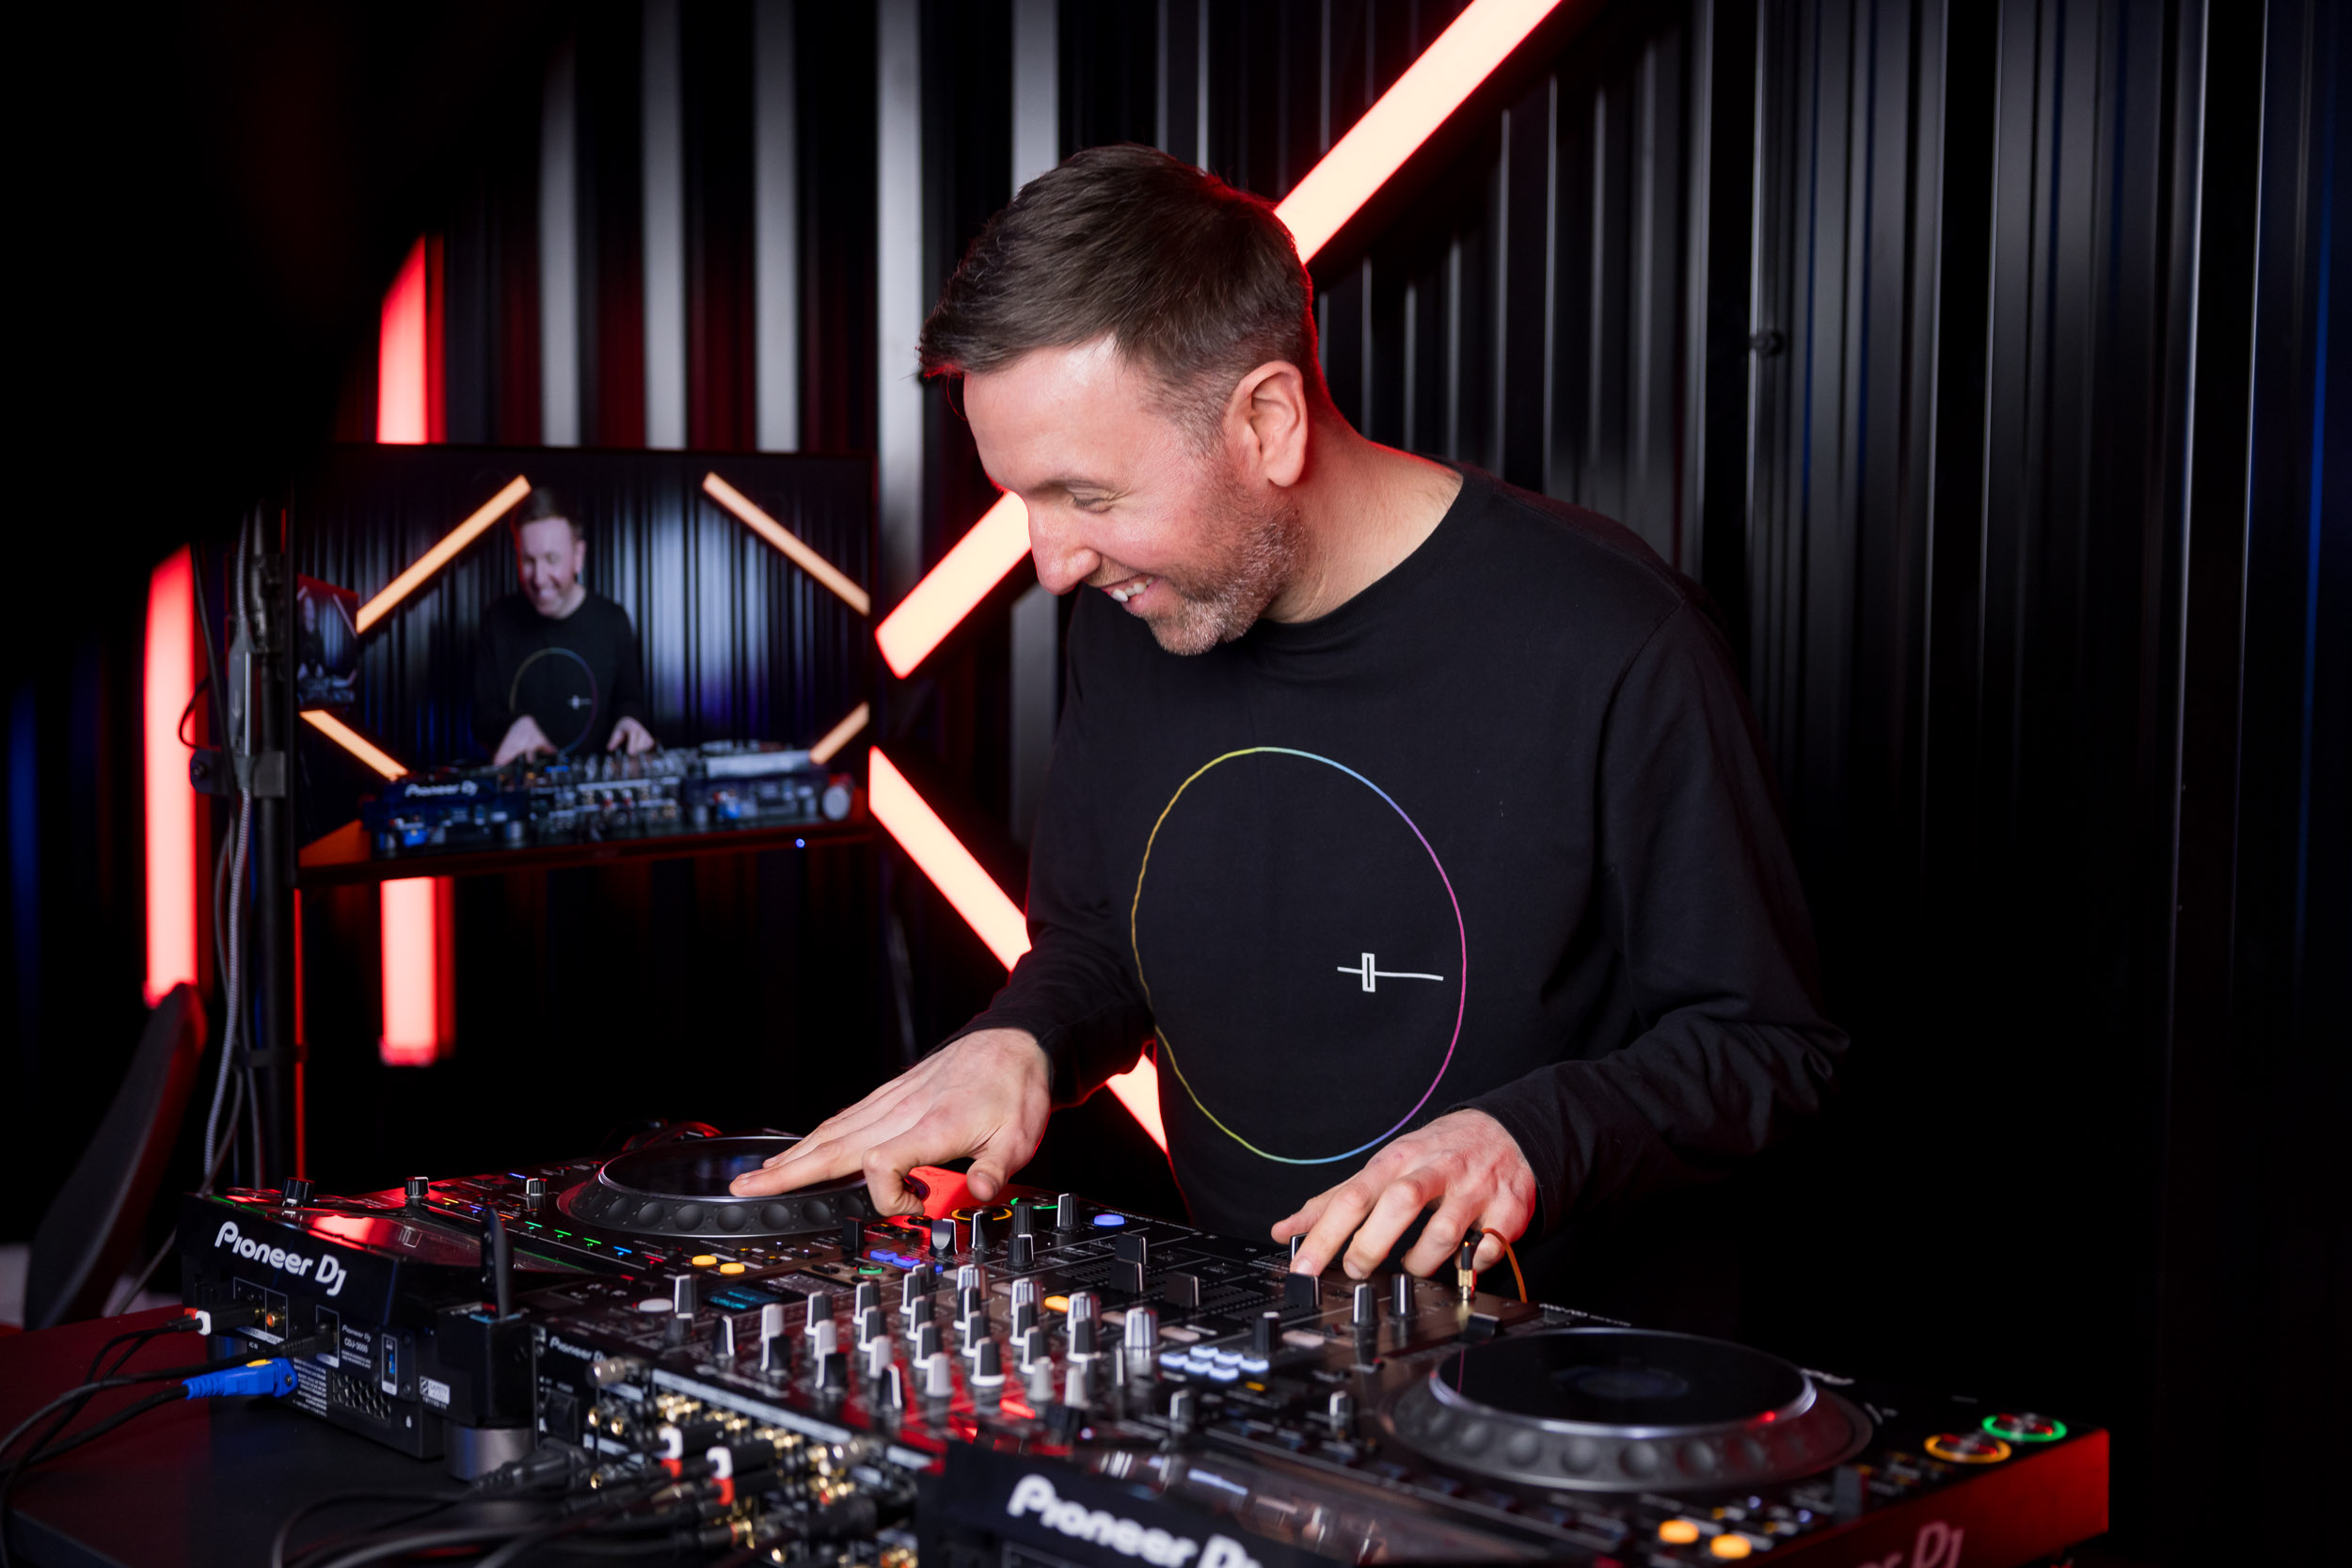
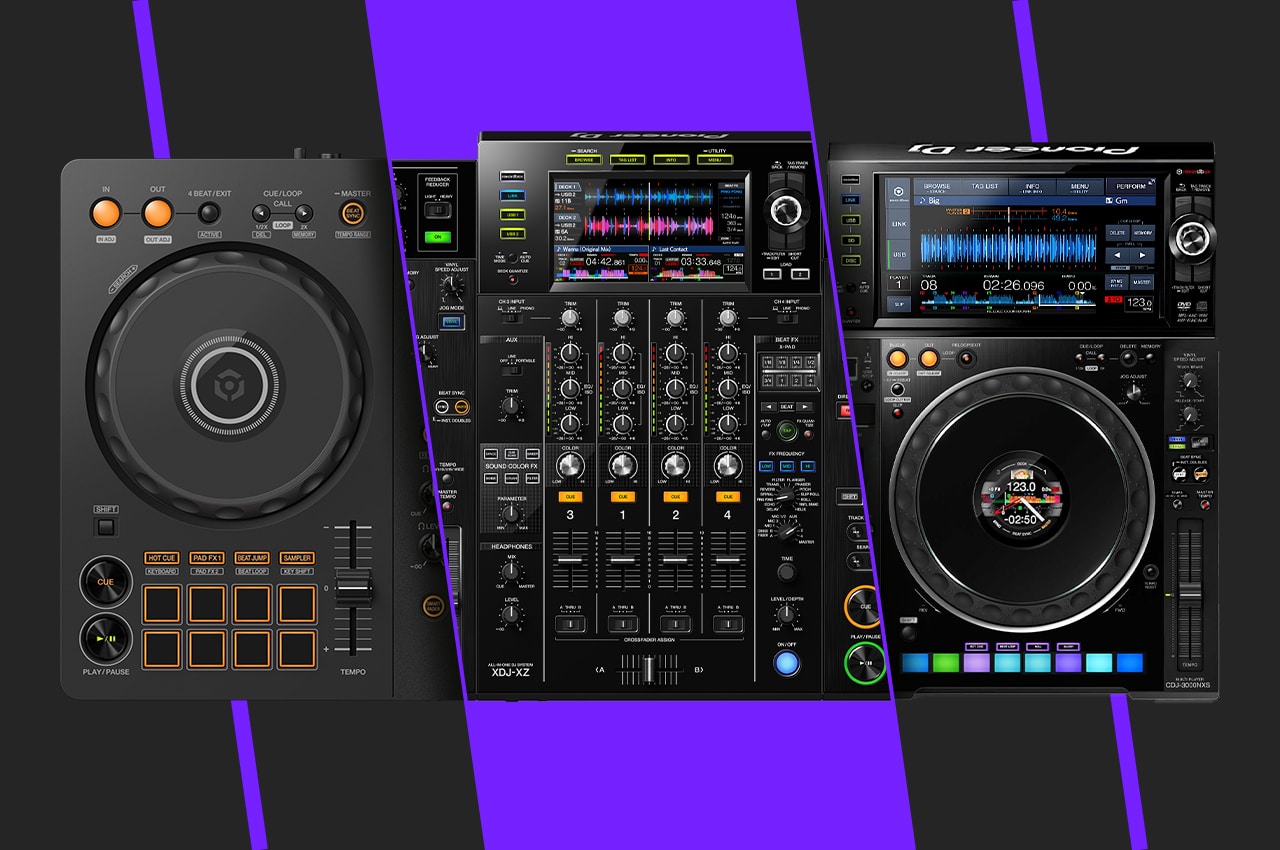
This week on tips and tricks, Jamie Hartley takes you through some of the more unknown features of the Pioneer DDJ 1000 controller. These tricks will help you become more creative in your DJ sets and help you take full control over your Rekordbox set up!
Tip 1 – Pad Editor
What is the Pad Editor…
The Pioneer DDJ 1000 features 8 fantastic RGB pads. They are at the heart of any creative routine with their various effects and controls but did you know you can customise the way they are set up. With pad editor you can create your own custom layout of various functions across two pages of pads. With all of Rekordbox’s performance features available, you can create a layout that helps you combine features for that perfect performance. Choose from hot cues, beat jump, key shift, sampler, pad effects, loops, sequencing and even lighting controls! To get started ensure you have the latest version of Rekordbox installed (5.4.1 at the time of writing) and the latest firmware on the DDJ 1000 (1.05 at time of writing).
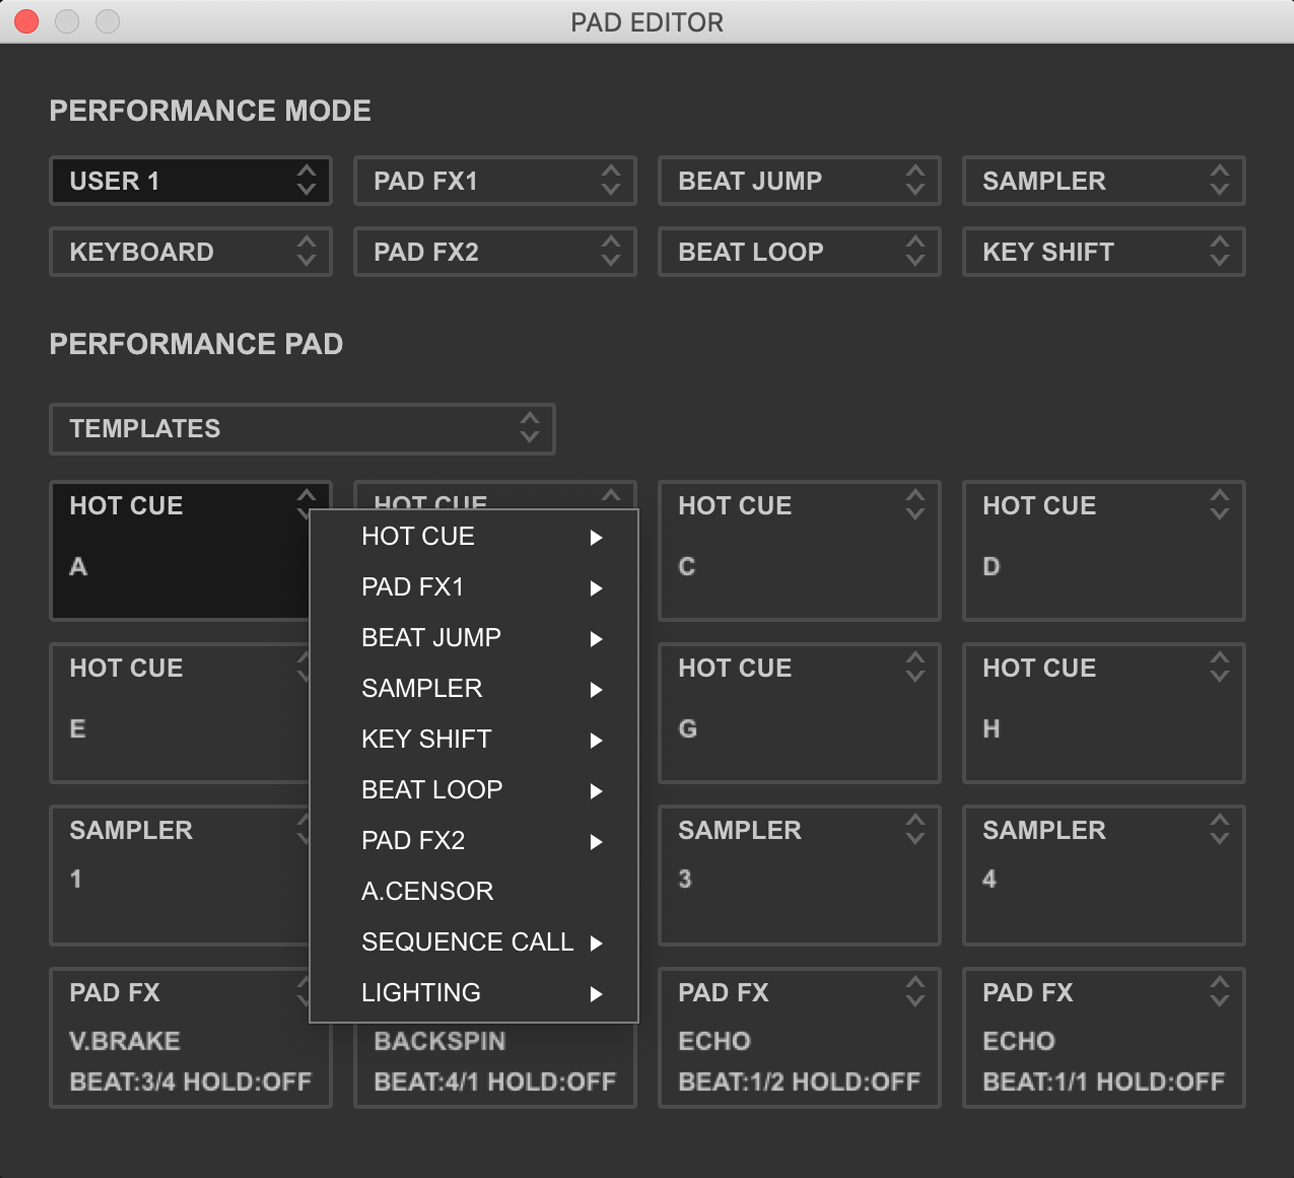
Here you can see the various functions available to map into your custom pad layout within the utility!
How to use the pad editor…
After plugging in the DDJ 1000, slightly off centre at the top of Rekordbox you should see the PAD button. Once you’ve clicked this, the pad utility is displayed. Here you can scroll through the various pad layouts that already exists on your device. To create a custom layout, first select which mode you would like to customise, you can chose from any of the 8 presets but in our demonstration we will modify the hot cues function as it’s the first at hand. To modify simply click down on the selected performance mode and change it from the original (hot cue) setting to one of the USER modes.
Once this has been performed you will see that the pads below are now customisable. By clicking on any of the 16 pads (two banks of 8) you can select from your desired performance features. In our demonstration video below, Jamie selects a key shift functionality that allows him to perform a great routine without the added hassle of swapping between key shift and hot cue modes. Remember you can customise more than one layout, which really allows you to turn your DDJ 1000 into an individual device with this feature. Let us know in the comments section below what combinations you are creating to help your performances stand out from the crowd!
Tip 2 – Midi Mapping
What is midi mapping…
Midi mapping is something you may have heard of before as we have covered it in previous videos. To recap though, midi mapping is what tells the software to perform a task when a certain button or knob is used on the hardware. Now as standard Pioneer have pre mapped all the functions of the controller and labeled them accordingly. But what if you are missing a function you would like on the controller? Or maybe theres a button on the controller you don’t use very often and would prefer it to be replaced? Well with custom midi mapping we can remap those unwanted buttons to perform actions we would prefer. Just like pad editor, this is a fantastic way to make the controller more individual and creative for your needs.
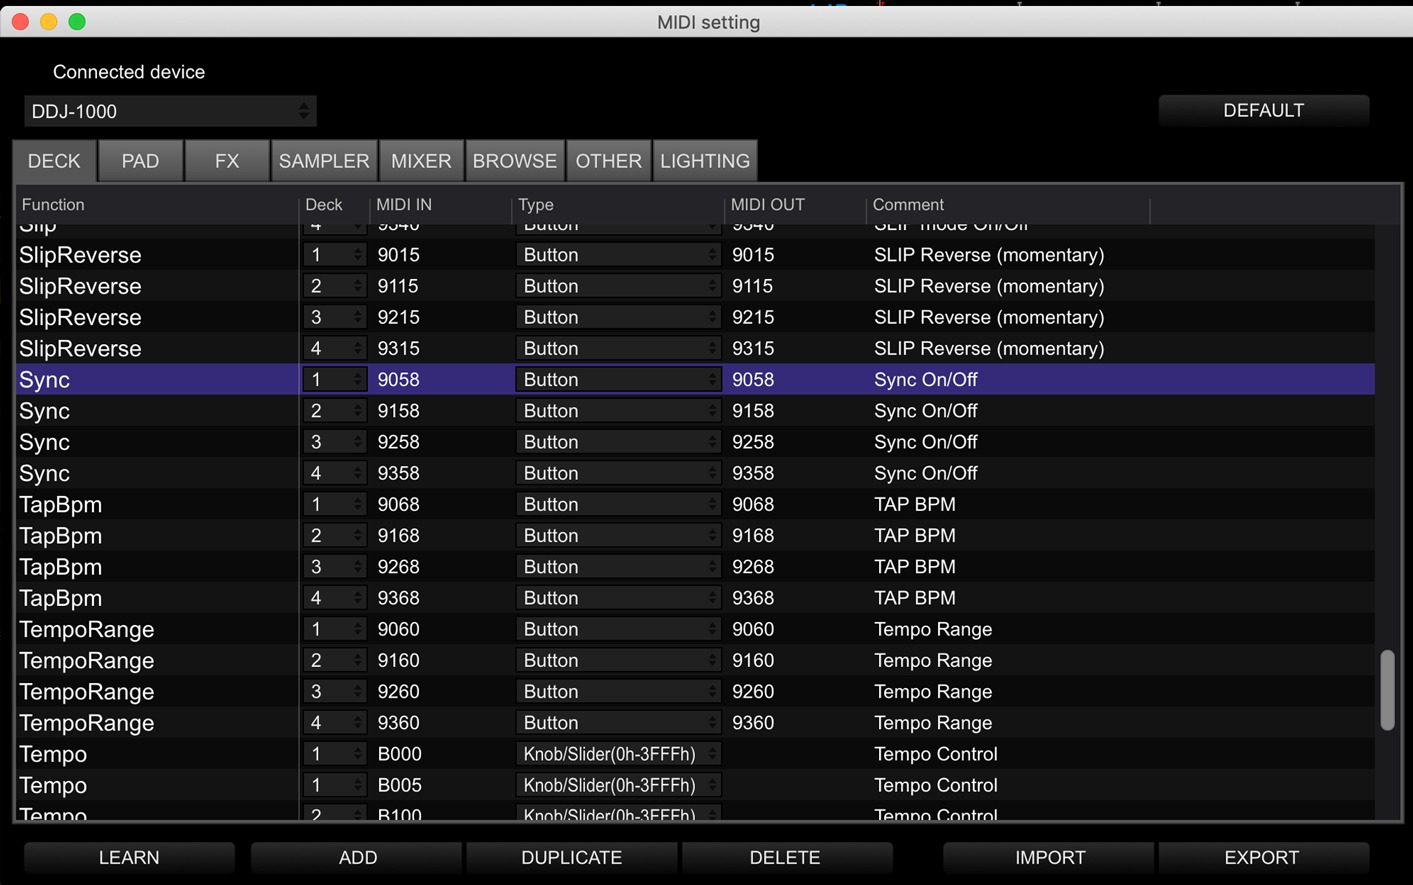
In this screenshot you can see we have found the original mapped button that we are about to delete.
How to midi map the DDJ 1000…
To remap the controller, first click the MIDI button within the Rekordbox software. This is conveniently next to the PAD utility that we just covered. Once within the midi utility you can see the controller has been broken into useful tabs to make navigating easier. In our demonstration video below we remap the SYNC button so this is under the deck tab. Although there is only 2 physical buttons on the controller note there are 4 buttons showing. This is because the controller can access deck 3 & 4, so be cautious not to delete those functions unless you really want to. If you do make a mistake or want to return to standard mapping at any point just hit the default button in the top right hand corner.
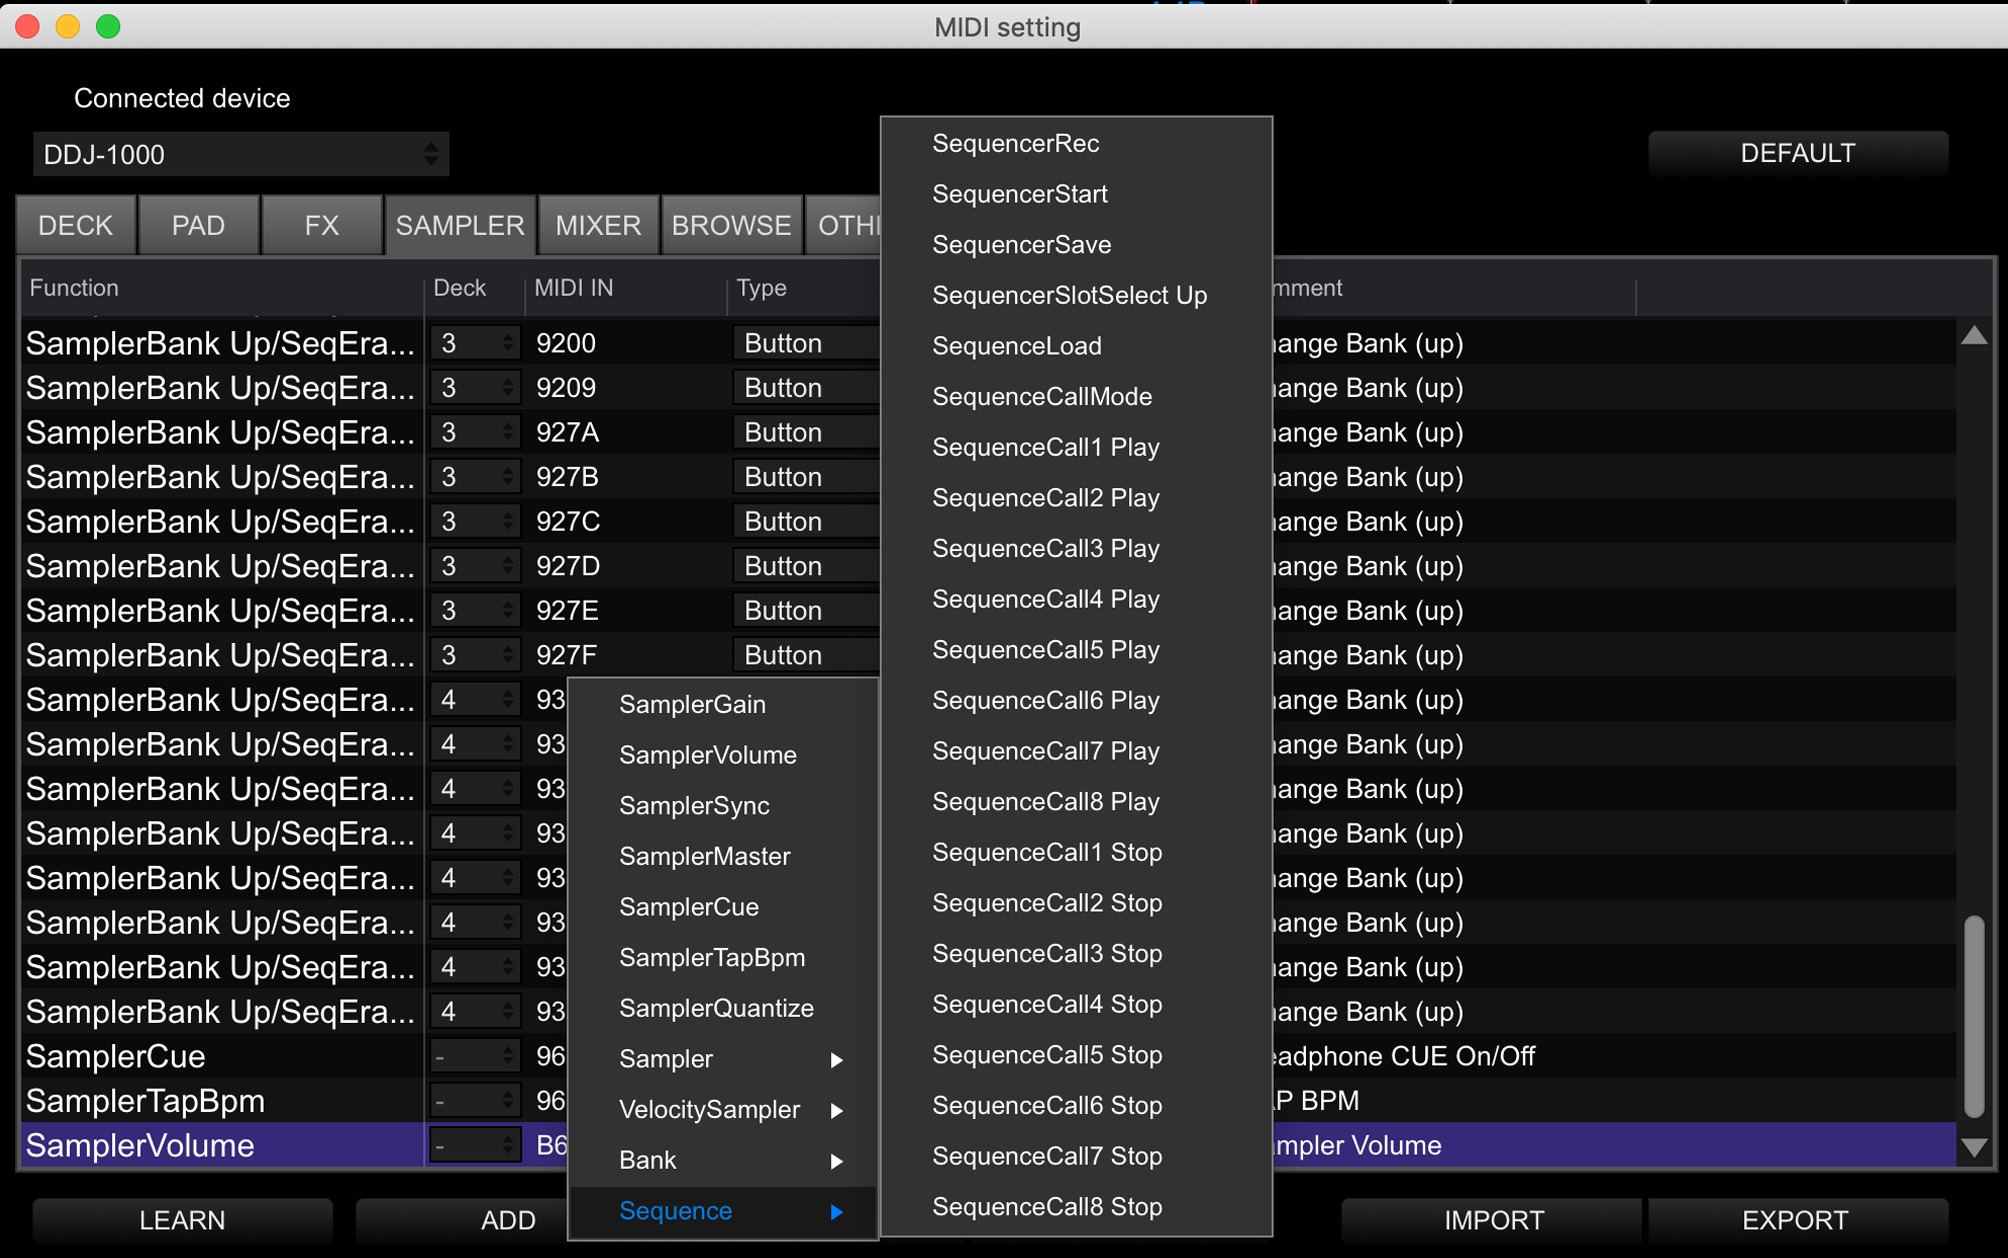
In this screenshot we are adding the new function before mapping the button to that action.
Once deleted you need to find the setting you would like to map. Jamie heads over to the sampler tab in our demonstration and presses add to create a new function. Once you have selected the action you would like the button to perform you need to press learn whilst the action is highlighted. Now by simply pressing the desired button, the action is mapped. If you haven’t deleted the buttons previous action or press another button by accident a warning should show explaining that button has another mapping. Remember to press learn again once done to turn it off and avoid overwriting the button you just mapped.
You can double check you have mapped the correct button manually however by checking the MIDI IN number matches the one of the action you deleted previously. For example in our demonstration we deleted beat sync deck one with the midi number 9058 and re added sampler record with midi number 9058.
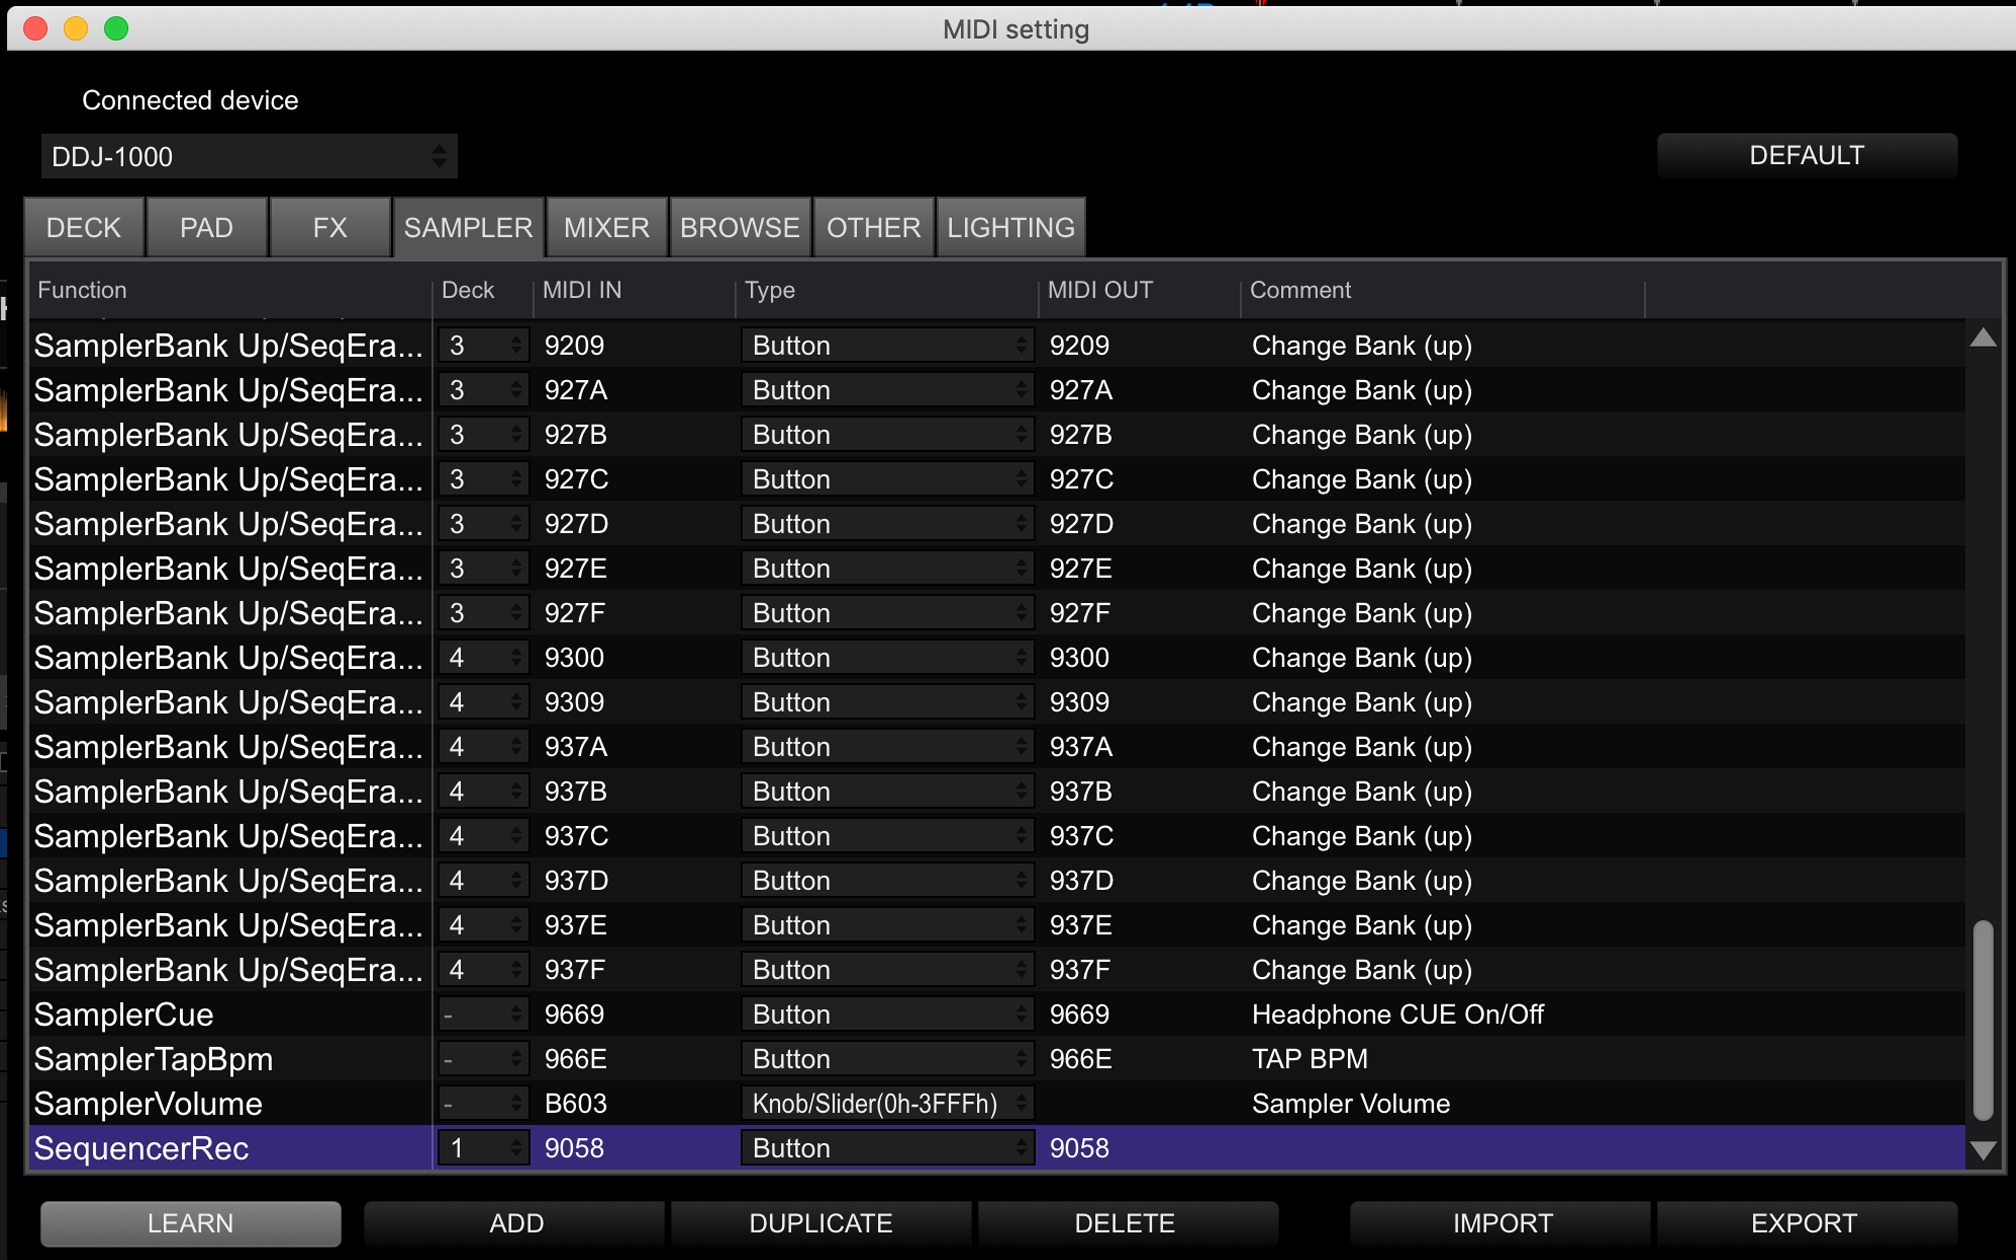
The action is now complete, note how the midi number of the button matches the one we previously deleted.
Tip 3 – FX Parameter
What is the FX Parameter…
One of the DDJ 1000’s best selling points is the mixer section and how much it resembles on of Pioneers industry standard DJM units. The DDJ 1000 borrows heavily from its stand alone cousins and features similar effects unit, eq’s and colour effects. Packaging all this into a smaller, more portable body however has meant a few hardware controls have been lost. The colour effects parameter knob being one of the more noticeable. The parameter knob controls the intensity or harshness of the colour effects, giving you the ability to change the impact they have over the channel they are applied to. The higher range stand alone Pioneer mixers all feature this control knob just below the colour effect buttons. With the DDJ 1000 most user may think this function is missing but we’re here to show you how you can use the software to replace this missing hardware control.
Adjusting the FX Parameter on the DDJ 1000…
In Rekordbox press the FX button at the top left hand side of the screen. Usually this will display your three inbuilt effects decks and not the colour effects unit. So to display this head into Preferences and then go to the view tab. Scroll down to the layout section of the view tab and then in Effect Panel select the BEAT FX + SOUND COLOUR FX tab.
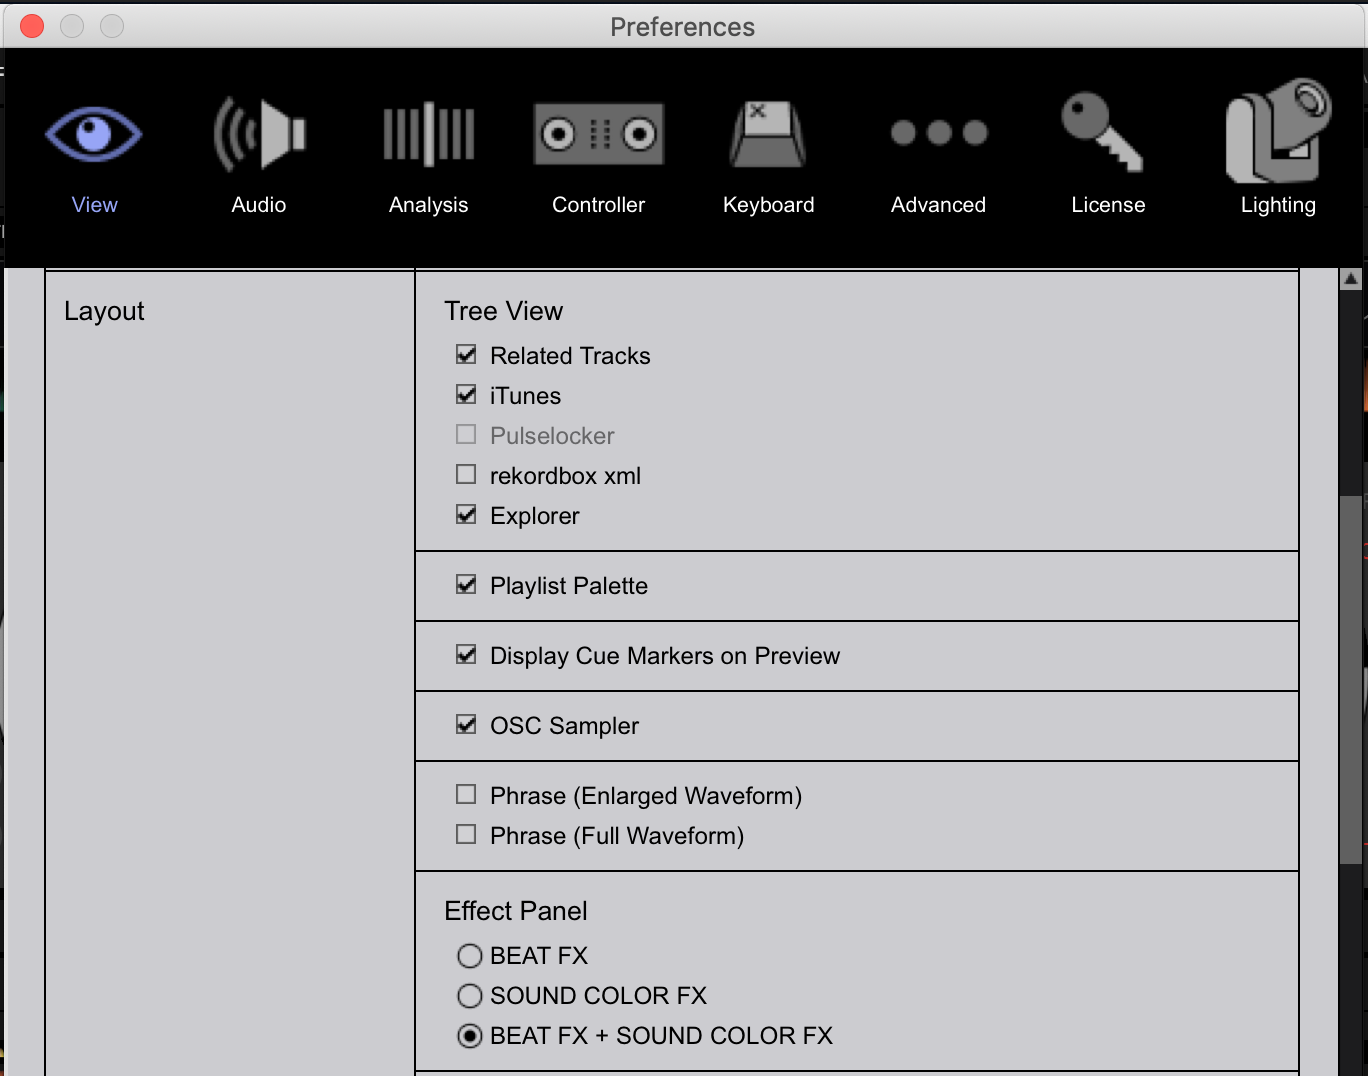
You can show the Colour FX effects from the view settings.
Once enabled you can find the colour effects settings within the FX panel on Rekordbox sitting just underneath the usual banks on software effects. From here you can see the selected colour effect and to the right is the parameter knob, simply click and drag it to the intensity you require. Whats really nice about using the software to control the effects parameter is that you can set each colour effect it’s own individual intensity unlike the hardware controlled units where all 4 share the same parameter knob.

Using the colour effects panel we have lowered the filter’s parameter.
Release Effects on the DDJ 1000…
Another hidden gem in the DDJ 1000 is the ability to control release effects. Release FX are found on the right of the effects panel on Rekordbox and you have three to choose from. Echo out, Vinyl brake and Backspin. Release effects are a method of turning off the currently active effects with a momentary effect of your choice. The length of the effect can be selected just underneath and when in use these can add a dynamic twist on your use of effects. We find the use of release echo particularly effective on long build ups to emphasise a drop. To activate the release effects on the DDJ1000 simply hold shift when turning off your active effects.

You can select between three different release effects.
Tip 4 – Jog Wheel Preferences
What are the DDJ 1000 displays…
One of the main selling points of the DDJ 1000 are the two high resolution displays situated within the mechanical jog wheels. These displays are fantastic and display a wealth of information about the current playing deck. But what about the information that matters most to you as a DJ? Well we can customise whats displayed on the screens to make sure you aren’t distracted by information you don’t need and focus in on the details that matter to you.
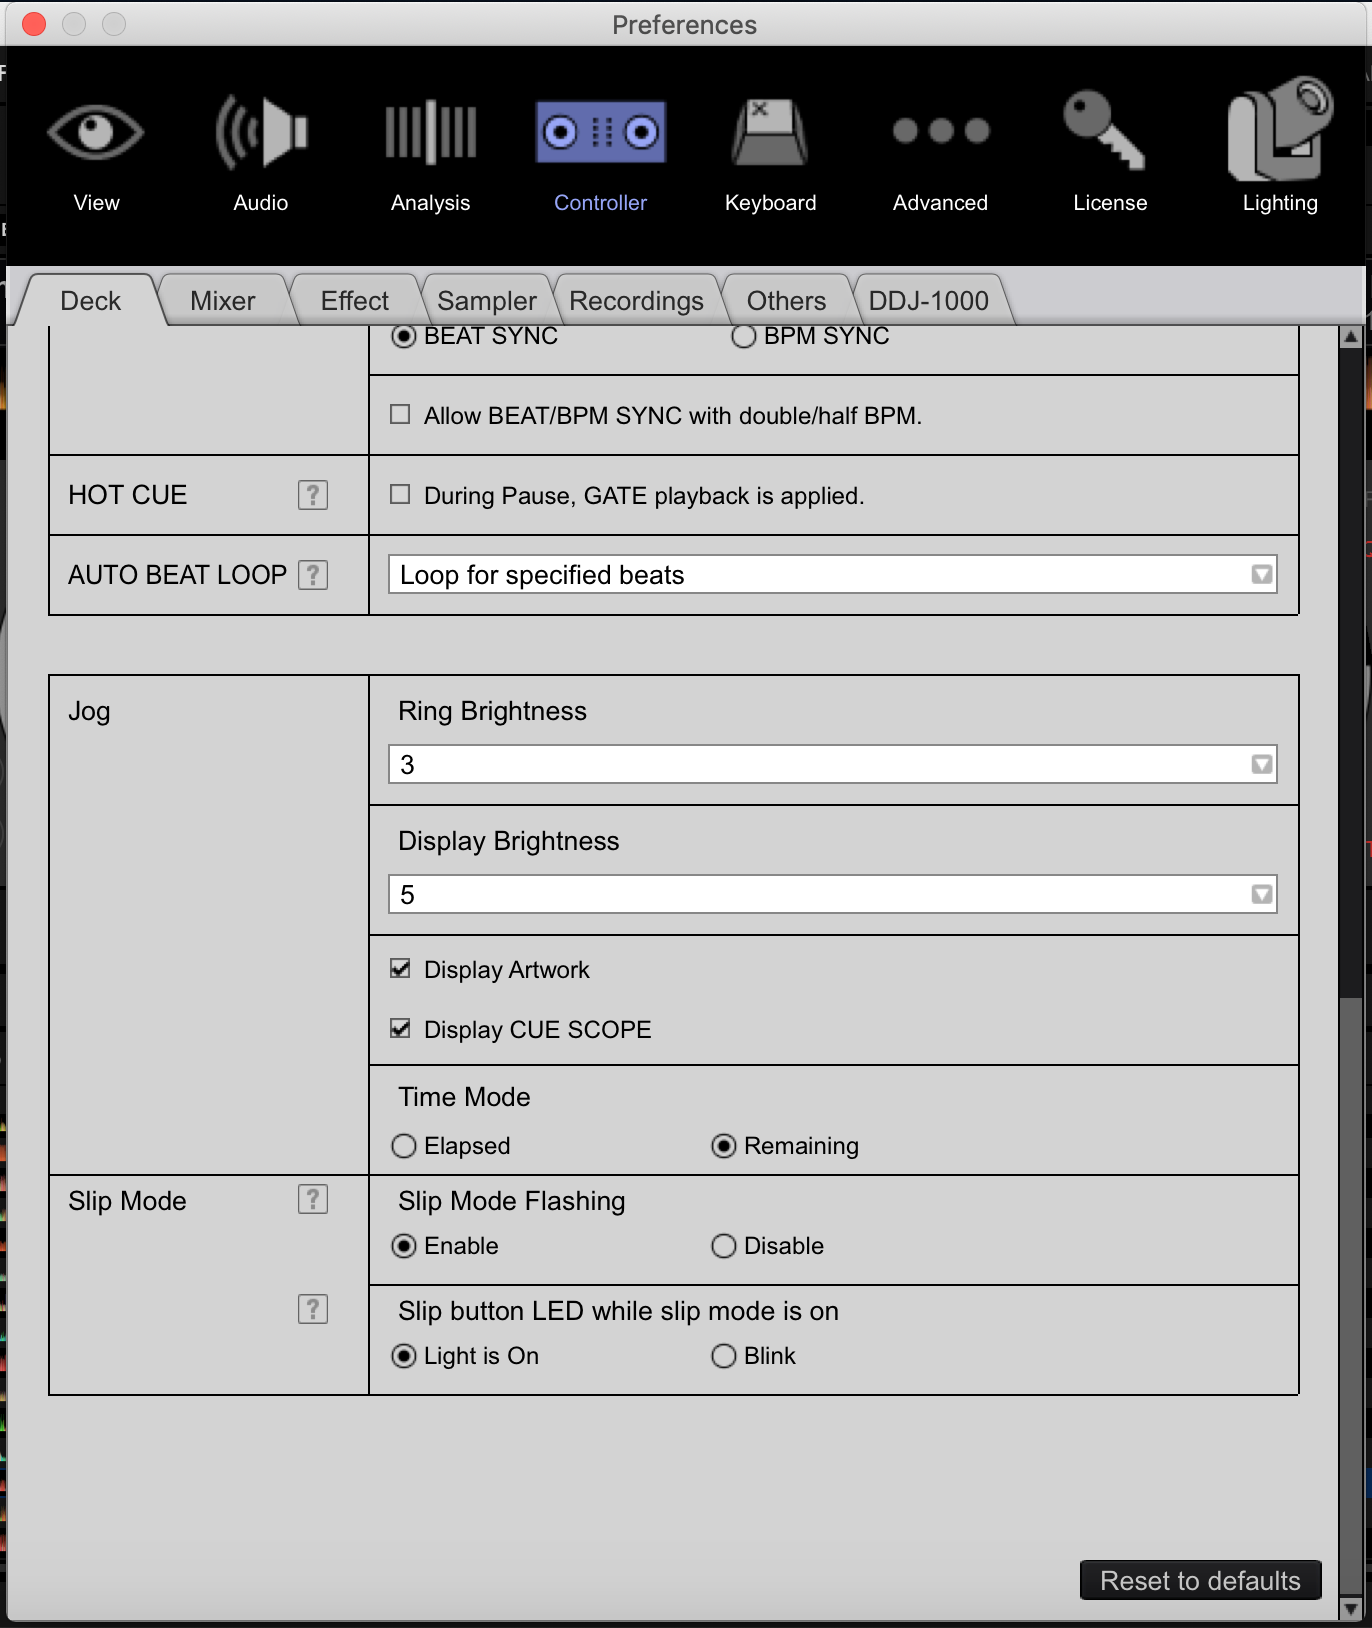
From the controller settings you can change the displays within the jog wheels.
To change this information head to preferences and select the large controller button. Scrolling down the Deck tab you will find the jog section, it is these settings that will effect the information displayed on screen.
Jog Brightness – adjust the brightness of the white LED’s on the outer edge of the jog wheel
Display Brightness – adjust the brightness of the inner jog displays
Display Artwork – Hiding the artwork raises the BPM information making the screen easier to read
Display Cue Scope – Shows a timeline of 16 bars ahead and 4 behind the play head with hot cue and loop points upon the timeline. This feature is great to help you mixing phrases.
Time Mode – Show either how far into a track you are or how long is left
Tip 5 – Crossfader Curve
What is the Crossfader Curve…
Every DJ uses the crossfader differently, scratch DJ’s rely upon it to perform cuts and scratches whilst some techno DJ’s may never use it at all and decide to turn it off. The DDJ 1000 features a fantastic magvel crossfader but lacks direct hardware control to change how the crossfader operates. Luckily within the Rekordbox settings we have some great settings we can use to change this. Please note this is more of a Rekordbox tip than a DDJ1000, and any Rekordbox ready controller can take advantage of these great settings.
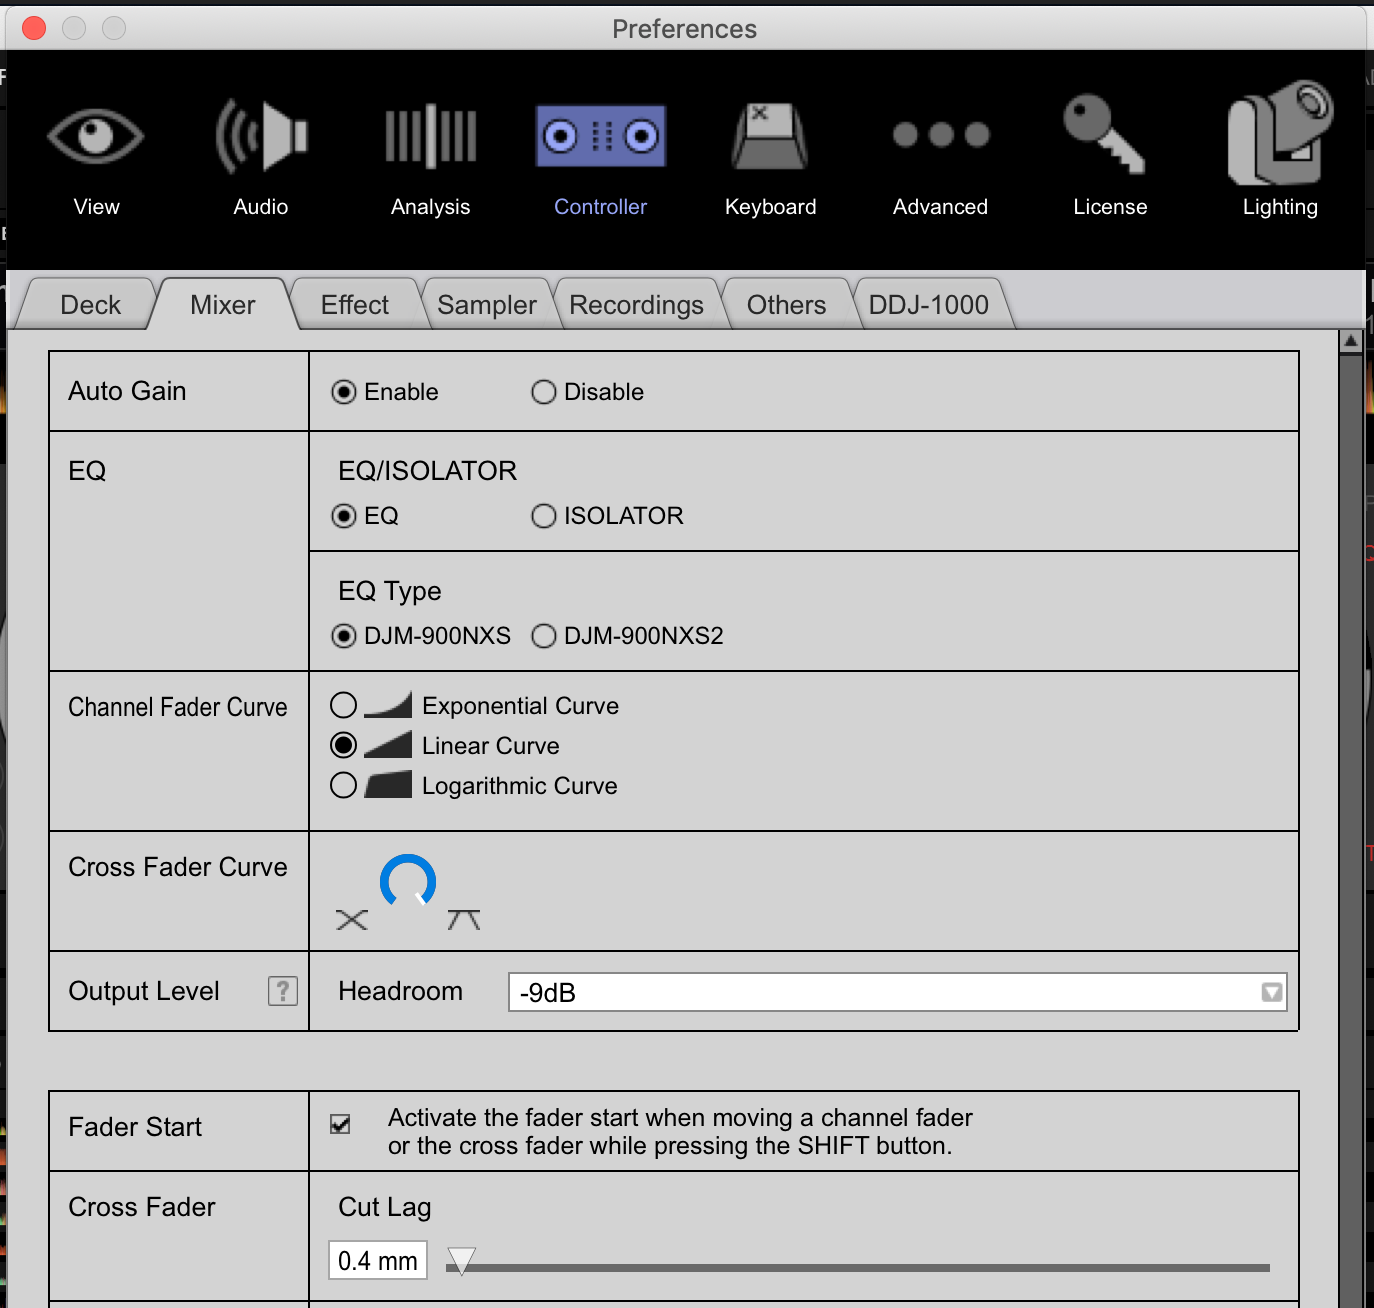
Rekordbox features not only crossfader curve adjustment but cut in distance too!
Adjusting the crossfader on the DDJ 1000…
The first adjustment we can make is the curve, scratch DJ’s will be looking to set the curve all the way over towards the right (the picnic bench style icon) for the sharpest of cuts, where as DJ’s wanting to use the crossfader for longer blends may favour a more subtle cross over style. The infinite adjustment between the two styles is fantastic and allows DJ’s to really dial in to their preference rather than being stuck with 3 preset positions like found on other DJ hardware.
Further more Rekordbox allows DJ’s to control the cut in distance on their unit. This is the amount of travel the crossfader needs to make before leaking or allowing sound to pass. Scratch DJ’s especially will be looking to tune this for the tightest of all cuts, the 0.3mm lowest setting actually requiring the crossfader to have pressure applied to cut the sound!
Video Tutorial
Do you want to learn some of these DJ skills?
Most relevant courses for this equipment:
hello there!! can i use recordbox efects , like robot effect for example, with ddj 1000?? and how!!because ddj 1000 dont have effect button select. thank you!!
You can, either by activating the RB effects with your mouse or by midi mapping the controller.
thank you very much!
My DDJ1000 is having trouble recognizing the MIDI OUT, Nothing works, the buttons don’t correspond to the proper call, I’ve reset the MIDI settings and it still doesn’t work, I’ve updated the controller’s drivers and firmware, can someone help me?
Hi,
Sorry I’m a little confused by what you mean! The MIDI OUT should automatically be set? I’ll attach an updated video below on the process, I hope this helps!
https://www.youtube.com/watch?v=TEQ7NhgTuV0
Let me know if you’re still stuck!
Thanks,
Holland
How do you guys add the crossfader logo to the screens on the jogwheels?
This is just pulled through form album artwork. The logo will be added as an album artwork to the crossfader music pack songs we use.